Situatie
Adding an image to a Word document is as simple as dragging and dropping—or clicking Insert > Picture—and then moving it to the right place. But what if you want to put your image in a specific place in the document and have the text flow around it in different ways? Well, here how that works.
Solutie
Pasi de urmat
What Does the Default Text Wrapping Look Like?
When you insert an object like a picture or shape into a Word document, Word treats that insertion differently depending on what you insert. For reference, we’re talking here about the illustration objects Word lets you insert—pictures, shapes, icons, SmartArt, and so on. We’re not talking about all the other things on the Insert tab of the Ribbon, like tables, headers, embedded spreadsheets, and the like.
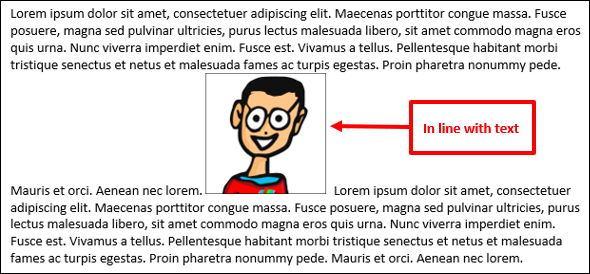
When you insert most of those illustration types—pictures, icons, SmartArt, charts, and screenshots—that object is placed in line with your text by default. For all practical purposes, Word treats that object like just another character of text. If you add more words to the document, the object moves around just like the rest of the text. You can select the object and drag it to another place in your document, but by default, it will always move around with the rest of the text.
There are two illustration types—3D models and shapes—that don’t work that way. When you insert those illustration types, they are placed in front of text by default, actually obscuring the text behind them. You can move them around however you like without affecting your text.
How to Change the Text Wrapping?
No matter what type of illustration you’re working with, you’re not stuck with the default wrapping.
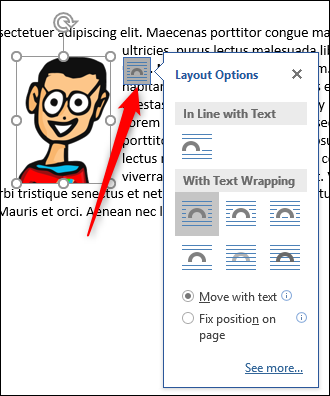
When you select an illustration object (or right after you first insert it), you’ll see a little button floating out to its right. Click that to pop up a quick Layout Options menu with a few text wrapping choices (which we’ll discuss in the next section). Just click an option to change the wrapping style.
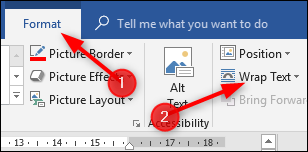
That’s okay for quick changes, but you can get a complete set of wrapping options by selecting the object, switching over to the “Layout” tab on the Ribbon, and then clicking the “Wrap Text” button.
The same “Wrap Text” button is also available on the “Format” tab.
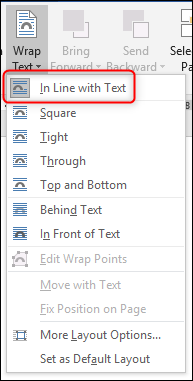
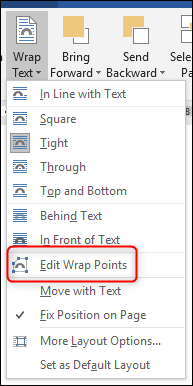
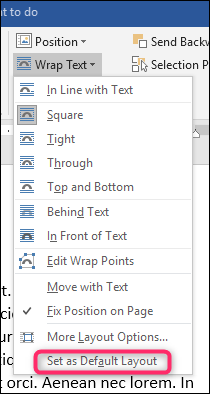
Both open the same menu, which contains all the same basic text wrapping options that the smaller fly-out menu does, but also provides access to more layout options for fine tuning your text wrapping (which we’ll also discuss a bit later) and for setting a default layout based on however you have the selected image set up.
What are the Text Wrapping Options?
So, now that you’ve seen how to access the text wrapping options let’s talk about how they work. You can group these options into three main types:
- Square, Tight, and Through: These three options are all variations on the same thing. Text wraps around all four sides of your object.
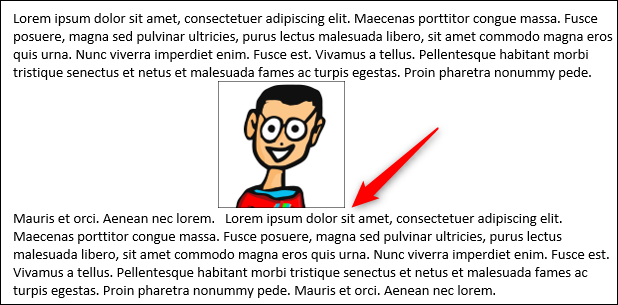
- Top and Bottom: This option keeps the text above and below the object, but not to its sides
- Behind Text and In Front Of Text: These two options don’t affect the text at all. The image either appears behind text or in front of it.
Let’s take a closer look at these.
Square, Tight and Through
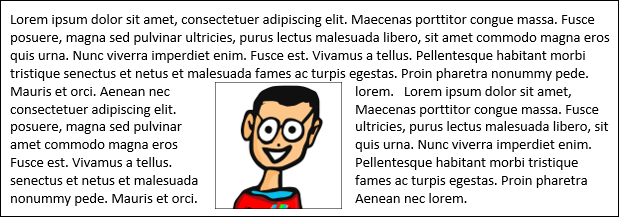
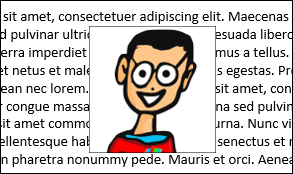
These options all wrap the text around the four sides of your object. They are all slightly different, although it won’t be obvious if you’re using a square image like we are here.
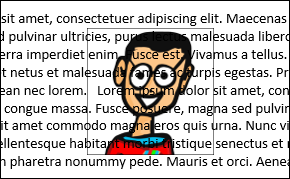
The “Square” setting wraps the text around the square (or rectangular) boundary of the object (even if the object itself isn’t square, it does have a square boundary), leaving a consistent gap between the text and the image.
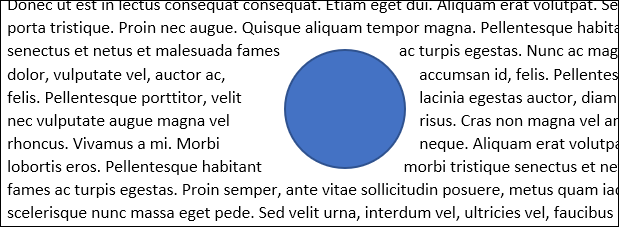
The “Tight” setting tries to wrap the text as closely as possible around the object itself, using the contours of the image rather than the boundary if the object isn’t square. It’s easier to show this with a shape than our square geek picture.
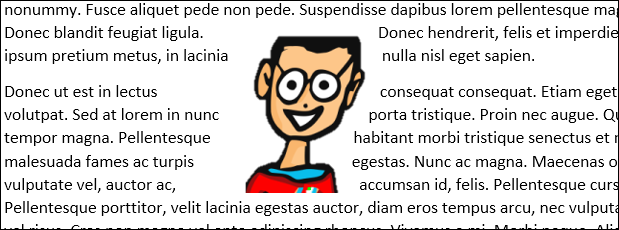
The “Through” setting allows the text to flow into the white space of the object if you’ve got a transparent background. Here, you can see that the text wraps much more tightly and follows the contours of our square object because it’s allowed to wrap through our transparent background.
In practice, the Tight and Through settings work similarly. If we were to apply either of those settings to the objects in the two preceding images, you’d get pretty much the same result. So, you’ll have to play with the options a bit to see what works for you.
Top and Bottom
This setting keeps the text above and below the object so that the object never interrupts text within a line. You can drag the object around however you like, always knowing that it will remain on its own line.
Behind Text and In Front of Text
These two options don’t change the flow of the text around the image, but instead, put the image on a different layer than the text. The “Behind text” setting moves the image behind the text, which is useful for a custom background or a watermark. The “In front of text” setting lets the image show on top of the text, which you can use for overlays.
Editing Your Wrap Points
Once you’ve chosen your wrapping option, you can customize how the text flows around the object by using the “Edit Wrap Points” option on that full “Wrap Text” dropdown menu.
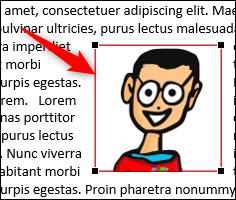
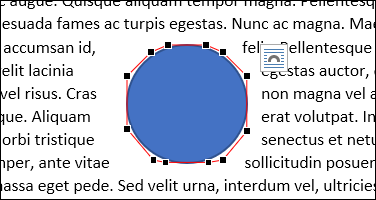
This command adds a new red border to your object that you can move around to control how the text flows around it.
Grab one of the black corner handles on the image and move it to where you want the new boundary to be, and the text will immediately flow around the new boundary.
This lets you create some cool effects if your object has a transparent background and you’ve chosen the “Through” wrapping because you can move the black corner handles inside the object, which allows the text to flow through the transparent parts of your image.
Also, the number of wrap points changes depending on the object’s shape. In that square image we used above, we only got four wrap points. This circle shape, on the other hand, gives us quite a few more to play with.
Fine Tune Your Wrapping
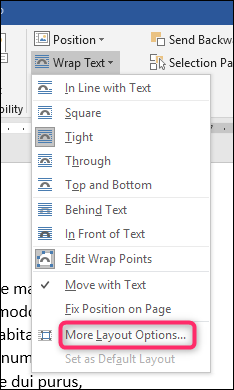
Once you’ve chosen your wrapping, you can fine-tune even further by clicking selecting the “More layout options” options on the “Wrap Text” dropdown menu.
On the “Text Wrapping” tab of the Layout window that opens, you can use the “Wrap text” and “Distance from text” sections to get your wrapping the way you want it.
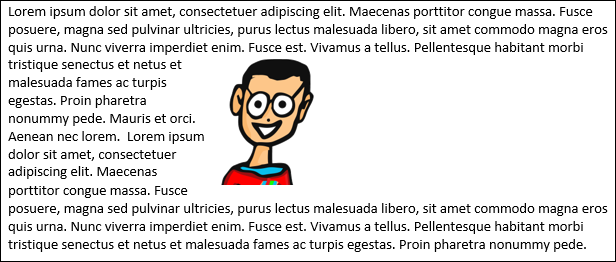
The “Wrap text” options let you choose which sides to wrap the text around. The default is to wrap both sides, but you can also choose a single side, which will leave the other side blank. Here’s an example with “Left only” selected.
The “Distance from text” options let you choose the amount of white space between the text and image. Use this if you want a bigger (or smaller) border area around your image.
Keeping Your Object in Place
When you place an object into a paragraph of text, Word automatically anchors the object and paragraph together. You can always see which paragraph your object is associated with by selecting the object and looking for the little anchor symbol.
(If you can’t see the anchor, then go to File > Options > Display and make sure “Object anchors” is switched on.)
While the object is anchored to a paragraph, Word will move the object along with the paragraph. This means that if you add a new block of text above your paragraph, the whole paragraph—including the object—moves down the page. If you select a whole paragraph by triple-clicking it, the object is also selected.
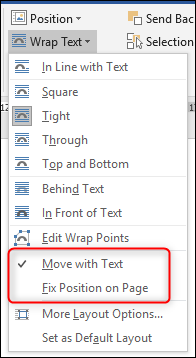
You can change this behavior in the “Wrap Text” dropdown by changing from the “Move With Text” setting to the “Fix Position On Page” setting.
This keeps the object in the same place on the page. The anchor will move with the paragraph that the object is associated with, but the object itself will stay in the same place on the page no matter what other text or images you add.
Changing Your Default Wrapping
Once you’ve adjusted your wrapping the way you want it for an object, you can also make those wrapping settings the default for when you insert future objects. Just select the object with the settings you want to use as the default, and then click the “Set As Default Layout” command on the “Wrap Text” dropdown menu.
From that point on, any object you insert will use the same settings.







Leave A Comment?