Situatie
While both OST and PST files perform specific functions, sometimes users face a deadlock when it comes to OST files. They cannot access their mailbox information in the case of non-availability of Exchange Server. And Exchange can face downtime, crash, or other technical issues at any instance. In such an event, converting the OST to PST remains the only viable option. But the process to convert OST to PST manually is a challenging task that involves multiple steps. So how can the users achieve OST to PST conversion, easily?
Offline Storage Table or OST plays an important role in saving Microsoft Exchange mailbox data in an offline folder. It helps the users to work in offline mode when there is no Internet connection, limited connectivity, or Exchange unavailability.
It simply represents a local cache of Microsoft Exchange account and syncs all the changes automatically to the Exchange server, as soon as you are connected to the Internet. Personal Storage Table or PST stores all the email data like emails, notes, contacts, tasks, calendar, etc. of the users in a local system. It is used for the actual storage and not cache storage. It keeps the emails in the same hierarchy as the main Inbox and is quite flexible.
When both OST and PST files have their distinct roles and functionalities, why do users feel the need to convert OST to PST manually? Let us find out.
Now that we know the need for OST to PST conversion, let us see how to convert OST to PST.
Solutie
Pasi de urmat
1. Import And Export Mailbox As PST File
Note: For this method to work, you must be connected to the Exchange server and have Outlook installed on your computer or laptop.
- First, you need to open Microsoft Outlook and click the “File Menu” present at the top left corner of Outlook.

- Now select “Open and Export” option from the list.
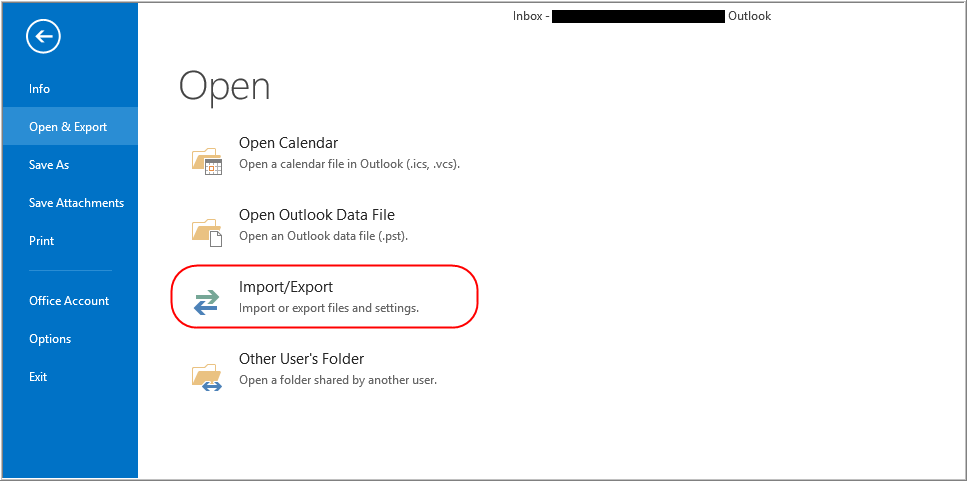
- There you will see 4 options. You need to click the “Import/Export” option.
- A new dialogue box will open up asking you to “Choose an action to perform”. Click on “Export to a file” and then click on the “Next” button to continue.

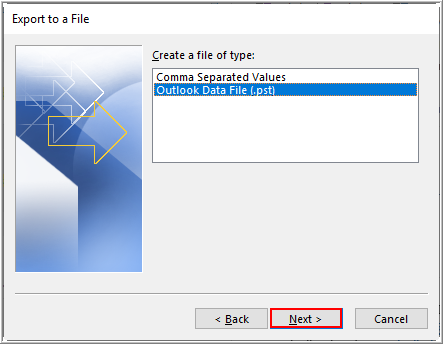
- On the next screen, you will be asked to select the file type to import. Choose “Outlook Data file (.pst)” and click on “Next” button to continue.
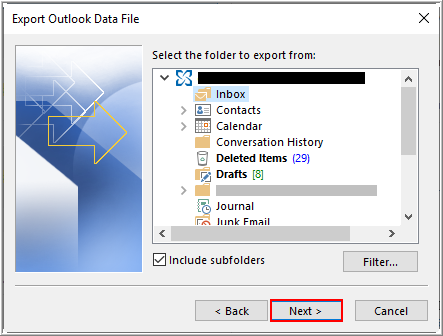
- Now choose the folder to export from. Here you need to select the files to be exported and click on the “Next” button to continue.
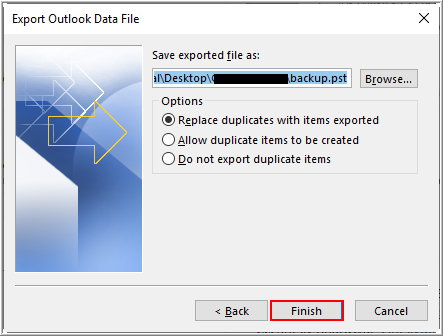
- Choose the option from the list “Allow duplicates to be created” and then click on the “Finish” button.
- Once done, a new pop-up will come up asking you to provide an optional password. You can move ahead without providing it and click on the “OK” button and your OST file will be automatically saved in PST format at the selected location.
2.Use “Archive” For The Conversion
Note: In this method, you need to enable the Archive Settings so that OST files get saved as a separate PST file in the system. It also keeps the mailbox size at an optimal level by saving the older emails in the archive folder.
Follow the below-mentioned steps to create an archive mailbox:
- First, you need to open Microsoft Outlook and click on “File Menu” present at the top left corner of Outlook.
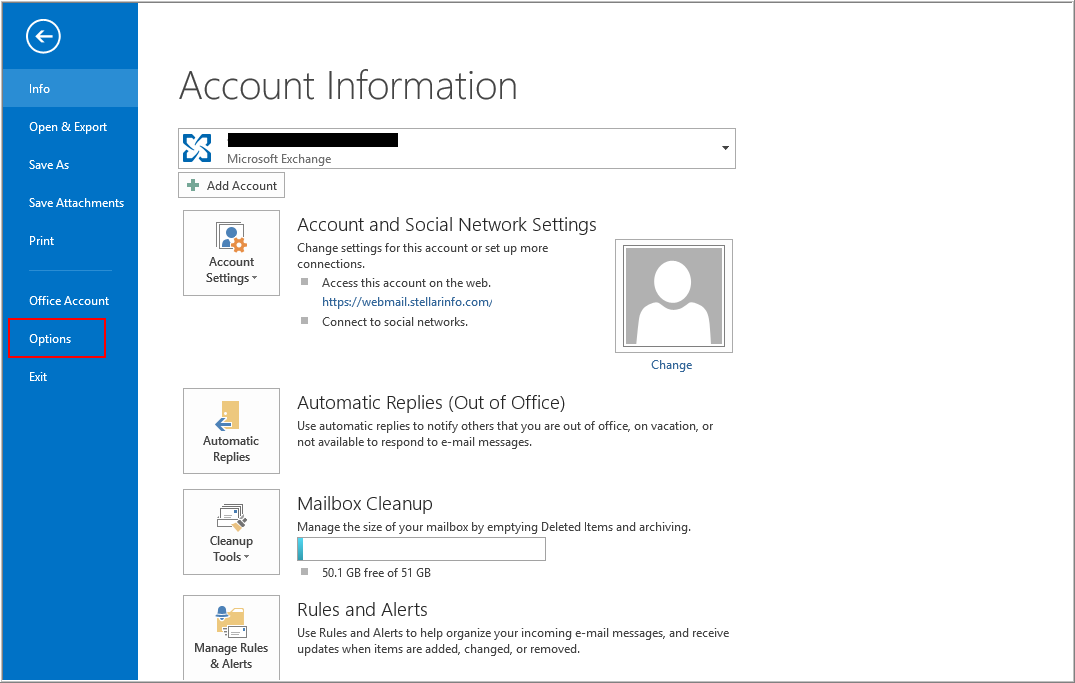 Click “Options” and then navigate to “Advanced”.
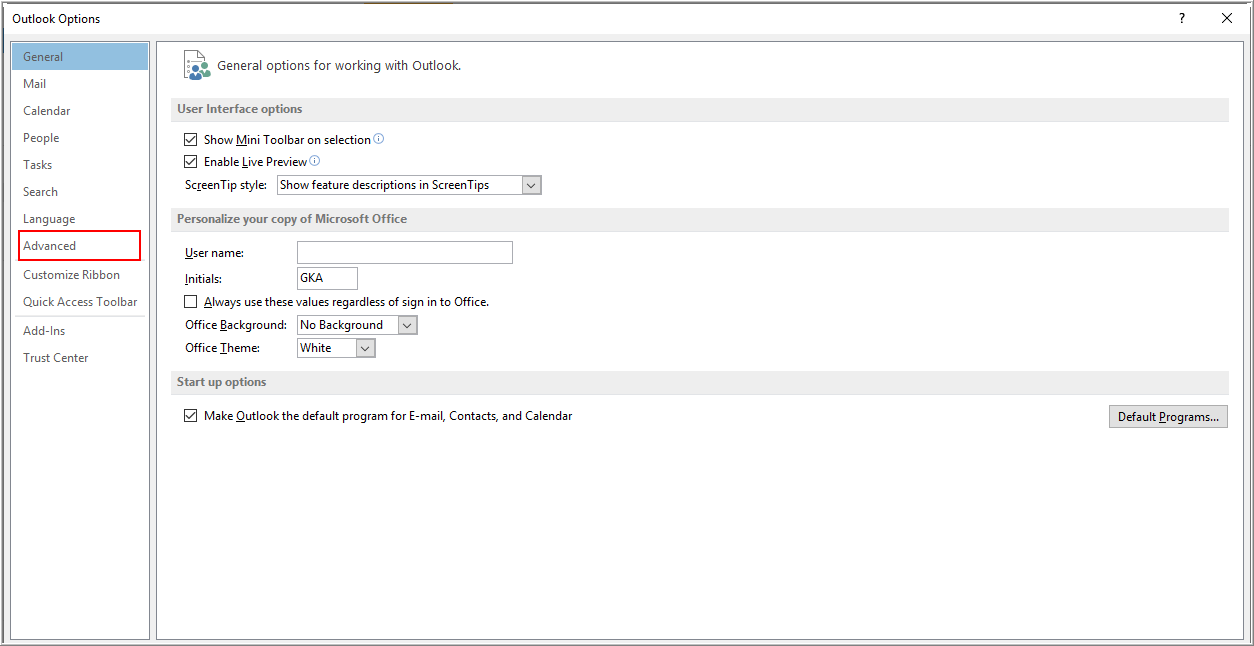
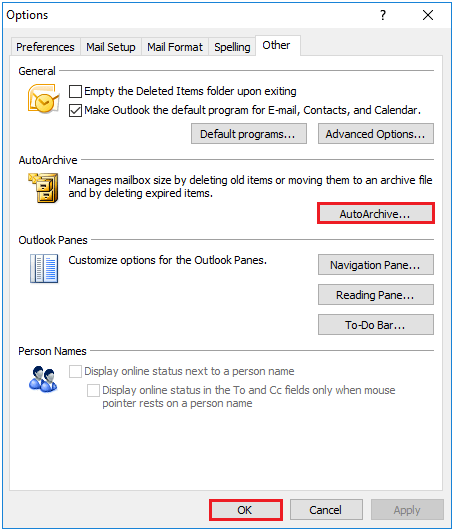
- Click “Auto Archive Settings” button present on the screen.
- Now provide the number of days for which to run the Auto Archive.
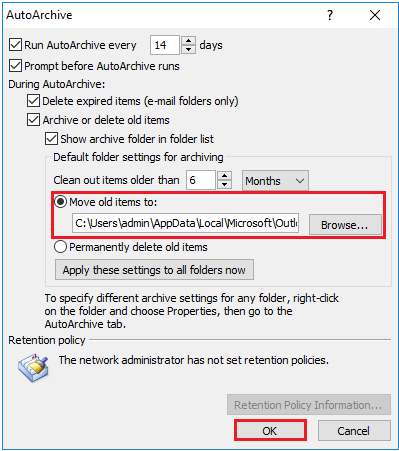
- Then provide the desired location by using the “Browse” button to save the archive file. Then click on the “OK” button to continue.
- The process will start and the mailbox items will be saved to the PST file automatically.
Drag And Drop To A New PST File
-
- First, you need to open Microsoft Outlook and create a new PST file for your Outlook profile.
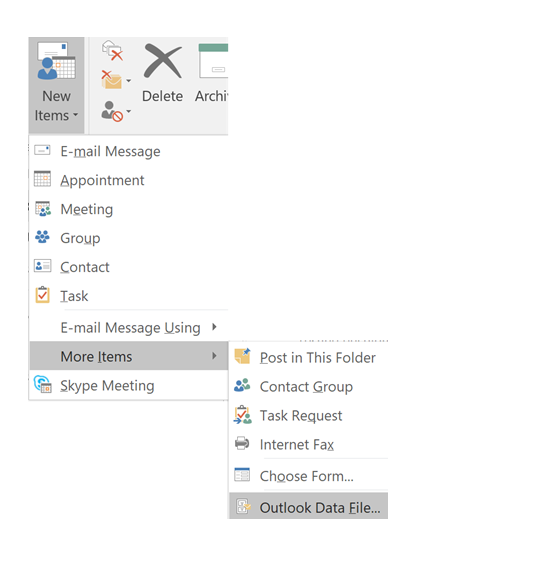
- To do so, click “New Items” from the Toolbar. Go to “More Items” -> “Outlook Data file”.
- Enter the file name and you can provide a password as well in the optional password box.
- Click on OK button and PST file is created.
- Now drag all the mailbox folders which you would like to export to the newly created PST file. Please note that you won’t be able to drag the Inbox and Contacts folder to the PST file. For that, you need to copy the folder from OST to PST.

Leave A Comment?