Soluții

Windows 10 – How to Access and Utilize Mobility Center Settings

If you want to customize the main settings of your Windows 10 laptop, directly launch Windows Mobility Center on your screen. Windows Mobility Center is one of the main constituents of Microsoft Windows which has been found with the introduction of Windows Vista. Before heading more, make a note that Windows Mobility Center will not be accessible in the computers which are not portable. The users who have Windows 10 installed on their laptops, Ultrabook or tablet will be able to take benefit of Windows Mobile Center and utilize it.

Now coming back to its description, it allows the users to control or change the settings of the important components of their system. It has a user-friendly interface with a sequence of some tiles on its window, each representing a portion of information. The items listed by the tiles totally depend on the manufacturers of the device. So do not get tensed. The general and most used are present in all the systems.

In this tutorial of Windows Mobility Center in Windows 10, we will cover its entire details, starting from its accessibility to use its tiles and a lot more. Have patience till the end of this post because you are really going to get some interesting knowledge. Let the learning begin!

The first process is via Cortana Search merely underneath the Start Menu. Hit the Cortana icon, type Mobility Center in the search area at the lowermost part.

You will notice it in the result. Click on it to open.

Control Panel

Another way to get into Windows Mobility Center is from the Control Panel. First, open the Control Panel. Among the various categories, look for Hardware and Sound.

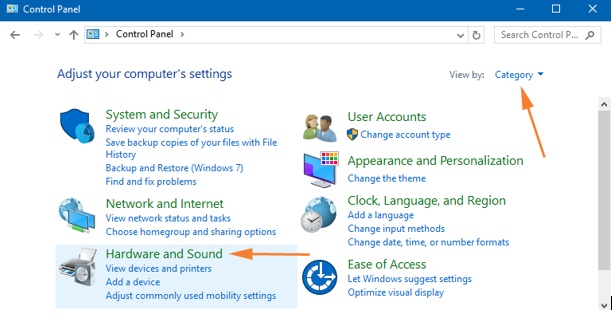
Under Hardware and Sound window, click the Windows Mobility Center option.

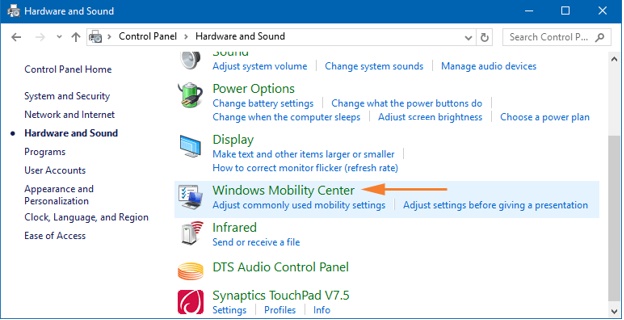
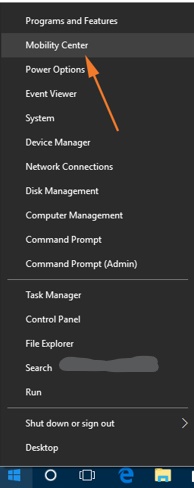
Right click on the Start icon on the Taskbar. You will notice a list of options. It is called Power User Menu. You can even use the keyboard shortcuts of Windows and X keys to launch this Power User Menu on the screen. Look carefully, the Mobility Center is the second option on the arrived list. Click and open it.

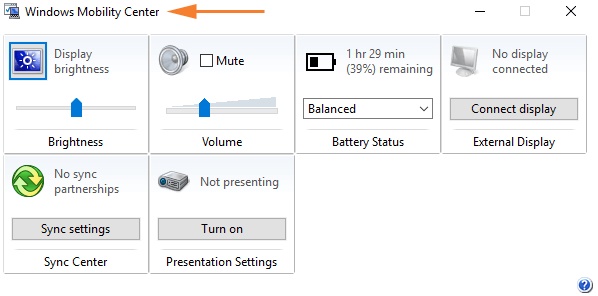
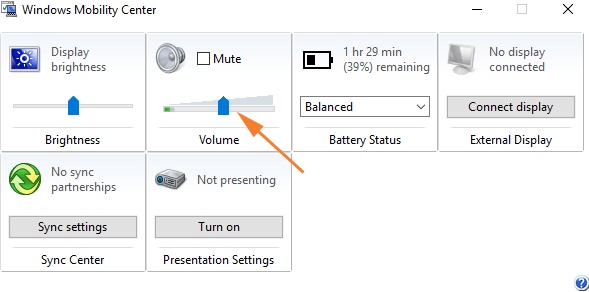
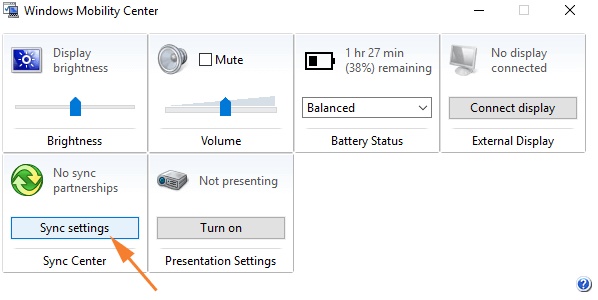
When you open Windows Mobility Center on your Windows 10, it will look something like this, each tile representing each component of your system (See the screenshot below). Rather than navigating the complicated ways to open the components for simple settings, you will get all at one place, which saves your time and energy. Below is the list of tiles that are present in the laptop using Windows 10

  • Brightness
  • Volume
  • Battery Status
  • External Display
  • Sync Center
  • Presentation Settings

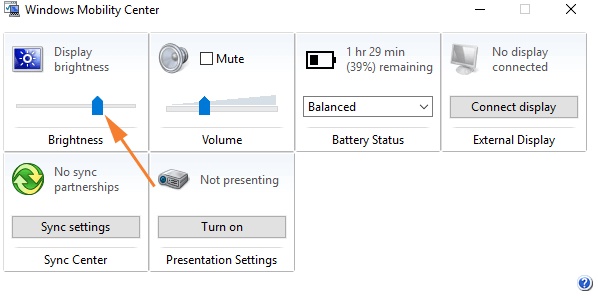
The first tile of the Windows Mobility Center is the Brightness. The name and look of the tile itself explain you everything. Use the slider to adjust the display brightness of your Windows 10 laptop screen. Of course, reduce the brightness, the better will be the life of the battery. You might have used this setting in a separate way, but here as mentioned before, all at one place.

The method of using the Volume tile is same as the Brightness tile. If you wish to put the sound into a silent mode, check the Mute box. Drag the slider to left or right to increase or decrease the volume. Adjust it to the level you want.

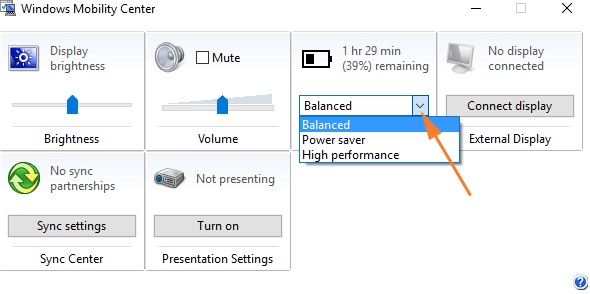
The Battery Status tile exhibits you the percentage of remaining power. It also permits you to select the preferred power plans from the drop-down menu. When you click on the drop-down menu you will notice three power plans are listed. The Balanced power plan is selected by default. Its’ performance is automatic and creates a balance between the performance and its usage. The Power saver option lets the resources provide their maximum performance. You can keep on changing the options and experience yourself which power plan suits best for your laptop.

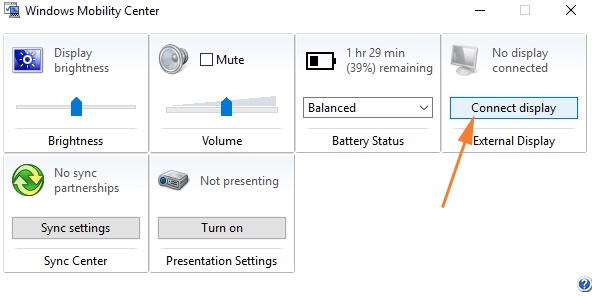
The option of connecting to the external display will not be obtainable if you are not using a laptop or tablet. This tile will enable your laptop connected to the external display. You will see an option Connect Display in the External Display tile. A click on the Connect Display option will prompt up a charms list on the right edge of your screen exhibiting you different projecting options to choose from. You can view this list through Control Panel also or by simply pressing Windows and P keys on your keyboard.

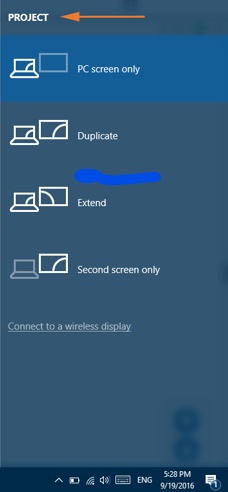
Below are the four projecting options and their workings –

  • PC Screen Only – The external display will be turned off when this option is being selected because it chooses only the computer screen, the one on which you are working.
  • Duplicate – When you opt this option, you will see the exact thing on the connected monitor that you are able to see on your PC screen.
  • Extend – It is the extension of your PC’s display screen on the connected external screen.
  • Second Screen Only – It will switch off the display of your laptop’s screen by making the connected screen as the main screen.

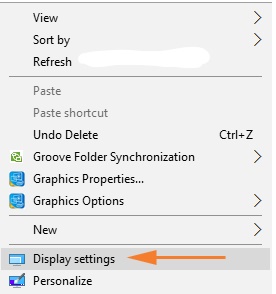
After the completion of your preferred external display, you might require to executing certain modifications of your screen resolution. This facility is not built in Windows Mobility Center. To carry out the modifications, go to your Desktop, right-click on an empty area and select Display settings. Then carry out the needed modifications. In case you think you went wrong with the modifications; the 15 seconds timer of Windows will display the real settings when the new one fails to perform.

When you click on the Sync Setting option of Sync Center you will get into the Sync Center window. Dropping down the details of Sync Center here will be a massive thing. We request you to go the below link and get the information related to it.

Last but not the least tile of Windows Mobility Center is of Presentation settings. This option is the simplest of all the settings of the presentation. If you are working first time on this setting from this component, click Turn On button of Presentation Settings tile of Windows Mobility Center.

This action will then lead to the pop-up of new Presentation Settings window which will inquire you about performing a presentation. (In case this new window does not pop up automatically, click on the icon of the Presentation Settings and you will get its new settings window on your screen).

[mai mult...]

Cum inserați o semnătură în Microsoft Word

O linie de semnătură vă oferă dumneavoastră, sau altcuiva, un loc în care puteți semna un document tipărit. Dacă intenționați să tipăriți documentul Word, adăugarea unei linii de semnătură este probabil cea mai simplă modalitate de a adăuga o semnătură.

Pentru a adăuga o linie de semnătură la documentul Word, faceți click pe Insert > Signature Line (Inserare > Linie de semnătură). Această pictogramă este de obicei inclusă în secțiunea “Text” din bara de meniu a panglicii Word.

În caseta “Signature Setup” (Configurarea semnăturii) care apare, completați detaliile semnăturii dumneavoastră. Puteți include numele, titlul și adresa de e-mail a semnatarului. Acesta poate fi dumneavoastră sau altcineva. De asemenea, puteți oferi instrucțiuni pentru semnatar. După ce sunteți gata, faceți click pe “OK” pentru a introduce linia de semnătură.

După ce ați confirmat opțiunile de semnătură, se inserează o linie de semnătură cu o cruce și o linie pentru a indica locul unde trebuie să semnați

Acum puteți plasa acest lucru într-o poziție corespunzătoare în documentul Word. Documentul poate fi semnat în această poziție după imprimare sau, dacă ați salvat documentul Word în formatul de fișier DOCX, puteți insera o semnătură digitală în document în acest moment.

[mai mult...]

How to Spot a Fraudulent Website

The internet is home to roughly 1.7 billion websites. Unfortunately, many of these websites live only to scam you out of your personal data or money. Here are a few signs to look out for to spot a fraudulent website.

Double-Check the URL Name

The first thing you should do before visiting a site is ensure that the domain name is the one you intend to visit. Fraudsters create fake sites masquerading as an official entity, usually in the form of an organization you would likely recognize, such as Amazon, PayPal, or Wal-Mart. Sometimes the difference between the real site’s name and the fraudulent site’s name is almost unnoticeable. For example, the cybercriminal may build a site using rnicrosoft.com (note the “r” and “n” at the beginning of that address, which looks similar to an “m”), but you think you’re visiting microsoft.com.

What Should You Do If You Receive a Phishing Email?

There are two basic ways the cybercriminal, or “threat actor,” gets you to visit the fraudulent site. The first way is by a method known as “phishing.” Phishing is a form of cyberattack that is delivered mainly by email. The threat actor tries to entice you to click a link in the email that will then redirect you to a fraudulent copy of the real website.

Another way the threat actor may get you to visit the fraudulent site is by a method known as “typosquatting.” Typosquatting uses common misspellings of domain names (for example, amazom.com) to trick users into visiting fraudulent websites. You think you entered the domain name correctly, but you’re actually visiting a fraudulent copy of the genuine site. If you’re lucky, your web browser will warn you.

Regardless of how you get to the site, once you log in to this fraudulent website, the threat actor will harvest your login credentials and other personal data, such as your credit card information, and then use those credentials themselves on the actual website or any other website where you’re using the same login credentials.

The first and most basic method of spotting a fraudulent website is to make sure the domain name is the one you truly intend to visit.

Look For the Padlock, Then Look Harder

When you visit a website, look for the padlock to the left of the URL in the address bar. This padlock indicates that the site is secured with a TLS/SSL certificate, which encrypts data sent between the user and the website.

If the website hasn’t been issued a TLS/SSL certificate, an exclamation mark ( ! ) will appear to the left of the domain name in the address bar. If a site isn’t TLS/SSL certified, any data you send is at risk of being intercepted. The downside to this is that not all SSL certificates are authentic. These sites are usually caught pretty quickly, but it’s still best to look a little harder at the padlock just to be sure. Unfortunately, you can only dig deeper if you’re browsing the web using a desktop.

  • First, click the padlock and then click “Connection is Secure” from the context menu.
  • If the certificate is valid, then you’ll see the “Certificate is Valid” text on the next menu. Go ahead and click that for more details.
  • A new window displaying the information about the certificate will appear. You can check which site the certificate was issued to, who it was issued by, and its expiration date.

Certificate information.

While this won’t always protect you from fraudsters, the padlock (and the certificate information) is a good indicator that you’re visiting a legitimate site.

Check the Site’s Privacy and Return Policies

Fraudulent websites generally don’t go to the extent that genuine websites go to concerning privacy and return policies, if at all. For example, Amazon has a pretty thorough return policy and privacy policy that details everything the customer needs to know about each respective policy.

If a site has a poorly written return or privacy policy, that should raise some red flags. If a site doesn’t have these policies stated on their website at all, avoid them at all costs, as the site is likely a scam site.

Check For Poor Spelling, Grammar, and UI

A spelling or grammar mistake is likely to happen now and again, even on the most authoritative of websites. However, most websites have teams of professionals creating these websites. If a website looks like it was created in a day by one person, is riddled with spelling and grammar errors, and has a questionable user interface (UI), there’s a chance that you’re visiting a dangerous website.

Use a Site Scanner

If you’d like to add another layer of protection between you and fraudulent websites (and also give you a heads up if you may be visiting one), then use a site scanner such as McAfee SiteAdvisor.

These tools crawl the web and test sites for spam and malware. If you visit a dangerous (or potentially dangerous) site that the program determines may contain dangerous content that could harm your PC, you’ll be notified and asked to confirm you still want to proceed to the site when you try to visit.

A Website Status notification.

While site scanners are helpful in spotting a potentially fraudulent website, not all fraudulent websites will be flagged. While you use them as an extra layer of protection, still be conscious of the sites you visit.

What to Do If You’ve Been Scammed

If you’re a victim of an online scam, there are a few measures you can take to protect yourself (and potentially protect others). What you need to do next depends on what type of information you believe the scammer may have on you.

If you purchased something using your credit or debit card from the fraudulent site, the first thing you should do is call your bank immediately and report to them what happened. They’ll freeze your accounts and cards so that the threat actor can no longer purchase anything with your details. If you believe the threat actor may also have your personal information, such as your Social Security Number, date of birth, address, and so on, you’ll want to freeze your credit so that the fraudster can’t take out any loans or open any accounts in your name.

Once that’s taken care of, file a report with your local police, notify the Internet Crime Complaint Center (IC3), and report the site to Google.

[mai mult...]