How To Organize Your Messy Windows Desktop
The desktop is a convenient place to store files and program shortcuts, but it can get messy fast. Here’s how to tidy your desktop up so you can quickly find everything you’re looking for—and make sure it stays nice and organized.
Hide All Your Desktop Icons
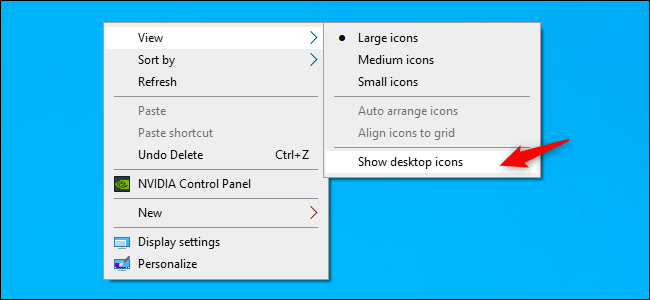
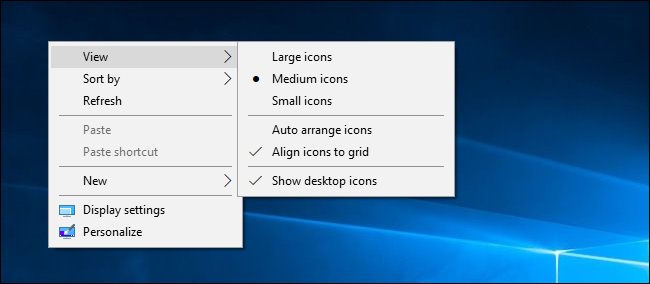
If you don’t use your desktop much, but programs keep dropping shortcuts on it, here’s a quick solution: Hide everything to get a perfectly clean desktop. To toggle desktop icons on or off, right-click your desktop and select View > Show Desktop Icons. Your desktop will appear empty.
To see your desktop icons again, click the “Show Desktop Icons” option again. Or, you can open a File Explorer or Windows Explorer window and click the “Desktop” folder to view the contents of your desktop in a standard file browser window. That’s the nuclear option, of course. If you like storing files and program shortcuts on your desktop, you won’t want to hide them all.
Quickly Sort Your Desktop Icons
For a quick organization, you can right-click your desktop and select an option in the “Sort By” menu. For example, select “Name” to sort files alphabetically or “Date Modified” to sort them chronologically. This makes it easier to find what you’re looking for if your desktop is very messy.

You can also use the options under the “View” menu to choose the size of your desktop icons and decide whether they’re aligned to a grid. If you uncheck “Auto Arrange Icons,” you can drag and drop icons anywhere you want. If this option is enabled, icons will always be grouped, one after the other.
These options can be helpful, but they’re no substitute for truly taming the clutter.
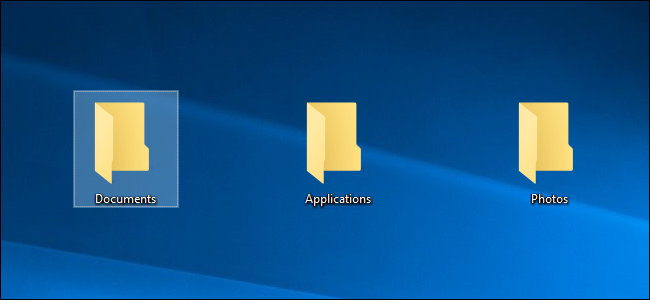
Organize Your Files and Shortcuts Into Folders
Consider using folders to keep your desktop organized. To create a folder, right-click the desktop, select New > Folder, and give the folder a name. Drag and drop items from your desktop into the folder. You can double-click a folder on your desktop to open it, so it takes a few more clicks to open your files—but they’re still easy to find.
For example, you could have separate folders for your photos and documents, or keep files related to a single project in their own folder. And yes, you can drag and drop program shortcuts into folders, too. If you’d like to clean up your desktop quickly, you can select everything on your desktop and then drag and drop them into a folder. You can then move items back onto your desktop as you need them.
Use the Desktop as a Temporary Working Area
The desktop works well as a workspace, giving you a convenient place to store files with which you’re working currently. For example, you might store spreadsheets you’re working on, documents you’ve scanned, photos you’ve just taken, or things you’ve just downloaded on your desktop.
To keep the desktop useful for this task and prevent it from getting too cluttered, try only storing files on your desktop for as long as you need them. When you’re finished with a project or task, move the associated files to another folder like your main Documents or Photos folder—or even dump them in a folder on your desktop. In other words, treat the desktop like you should treat a physical desktop or counter—place things on it while you’re using it, and clear them away afterward rather than letting them pile up.

Put Shortcuts in Your Start Menu and Taskbar
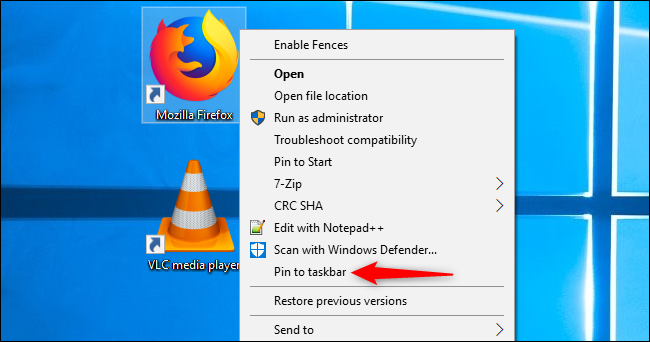
Programs often add shortcuts to your desktop when you install them, which makes your desktop get more and more cluttered over time. Try placing program shortcuts elsewhere, such as on your taskbar or in your Start menu. To pin a program shortcut to your taskbar, right-click it and select “Pin to Taskbar.” It will always appear as an icon on your taskbar, and you can drag the icon to the left or right to position it.
To get more space for icons on your taskbar, you can remove some things to free up space. For example, to hide the Cortana search box on Windows 10, right-click your taskbar and select Cortana > Hidden. You can also click Cortana > Show Cortana Icon, which will make Cortana be a standard taskbar icon instead of a large search box.
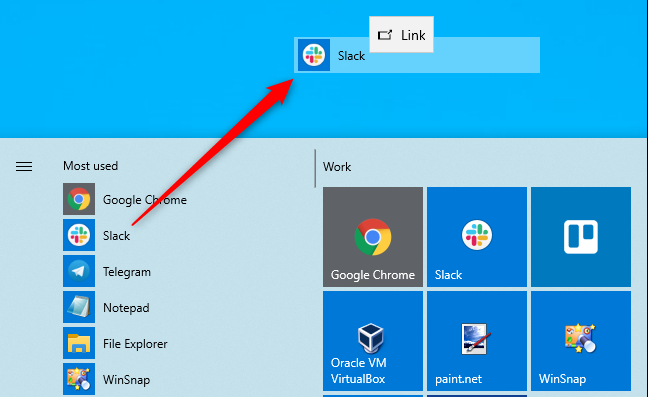
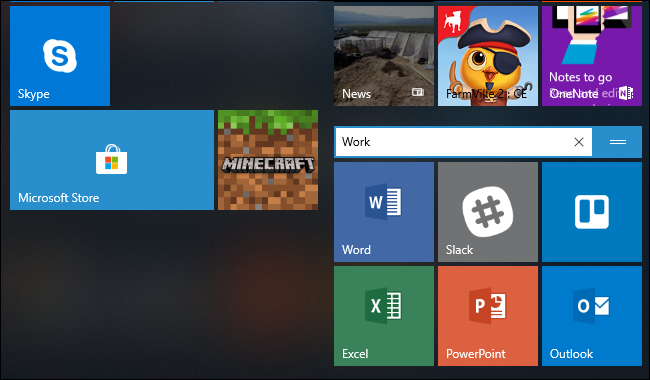
You can also place shortcuts in your Start menu. To do so, right-click a shortcut and select “Pin to Start.” On Windows 10, it will appear as a tile at the right side of your Start menu. On Windows 7, it will appear as a shortcut at the left side of your start menu. You can also pin apps right from the Start menu—either right-click a shortcut in the all apps list in the Start menu and select “Pin to Start,” or drag the icon to the pinned apps area.
On Windows 10, you can drag and drop pinned application shortcuts in your Start menu to organize them into groups, and click the header at the top of the group to give it a name. For example, you could create a “Work” group with shortcuts to applications you use for work or a “Games” group that contains shortcuts for your games.
Also, if you’re using Windows 10, you can unpin all those pinned apps Microsoft put there to make the Start menu your own. Feel free to unpin any shortcuts you don’t use.
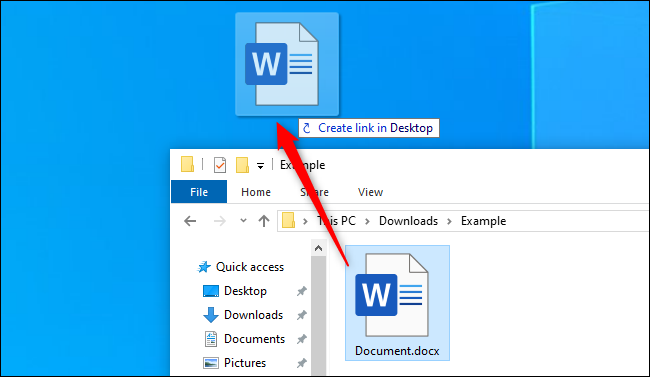
After you’ve moved all the shortcuts you want to your taskbar and Start menu, you can delete them from your desktop like you’d delete any file—or move them to a folder. If you accidentally delete a shortcut and want it back on your desktop, open your Start menu and find the shortcut in the list of all your installed applications. Drag and drop the shortcut to your desktop.
[mai mult...]