How to Enable Dark Mode in Microsoft Edge
Edge will keep using its light app mode until you select dark mode. this tutorial will illustrate how to do so.
[mai mult...]Soluții pentru problemele tale IT

Edge will keep using its light app mode until you select dark mode. this tutorial will illustrate how to do so.
[mai mult...]Did you just turn ON your computer and this Windows Firewall dialogue shows up requiring Firewall permission for winrmsrv.exe? Yes, it is most definitely a virus / trojan / malware. Because the original Microsoft Windows winrmsrv file does not need any Network access.
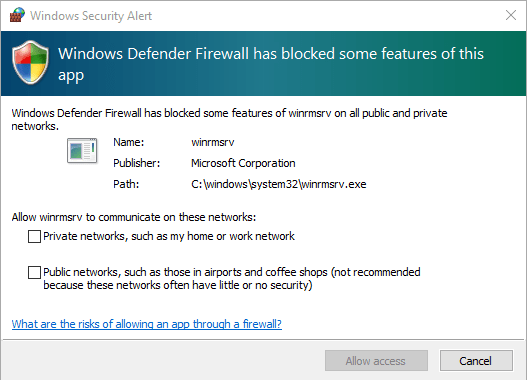
If you’re still doubtful and want to make sure that the winrmsrv.exe file located in the C:\Windows\System32\winrmsrv.exe really is a virus or trojan them here’s what you need to do.
Go to your Web browser and open www.virustotal.com. Now click on the File option and select Choose File. Browse to the location of the winrmsrv.exe file (C:\Windows\System32\winrmsrv.exe) and upload the file to Virustotal.
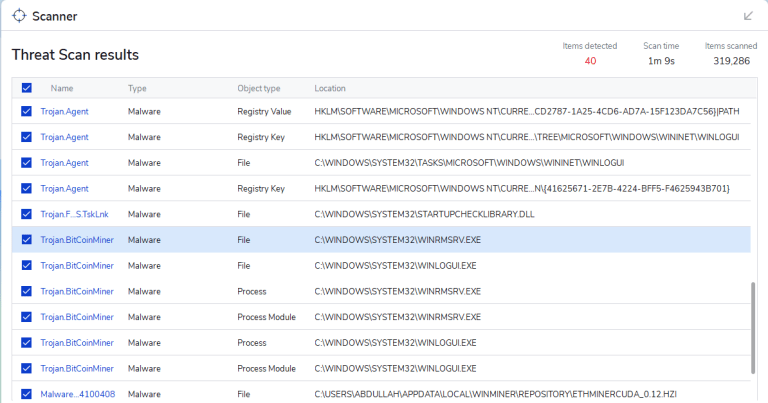
VirusTotal scans the file with a number of popular Anti-virus and Anti-malware engines and gives you the result immediately. If you see that there are multiple anti-viruses reporting the file as a Trojan or malware then it is definitely a malware. Now that you are certain that this file is a Trojan / Malware, the next step is to remove it.
We have tried removing it by installing a number of popular Anti-viruses (both Free and Paid) and the most effective and quickest way was to remove it with MalwareBytes. Simply download the Free version of Malwarebytes from HERE. You don’t need the premium version to remove the virus from your PC. The free version will be sufficient.
Once it’s downloaded, go ahead and install it on your PC. After installing it, start a complete Scan of your PC. After a few minutes, you will get the result of the Scan. You should be able to find the entry of the winrmsrv virus among the list of infected files.
Now click on Quarantine to get rid of all the viruses and malwares found on your system. After that it should be as good as new.
Winrmsrv can be a very dangerous file for your PC. Most Anti-virus engines classify it as a Trojan and Crypto-miner. The attacker can gain full control of your PC. It can also be used to mine crypto-currency from your PC. In this case your PC will give very degraded performance and you will notice huge lags while browsing or gaming etc.
[mai mult...]Dacă utilizați extensii cu Mozilla Firefox și doriți să adăugați sau să eliminați pictogramele extensiilor din bara de instrumente, este la fel de ușor ca glisați și fixați utilizând funcția de personalizare Firefox a Mozilla. Sau puteți elimina rapid o pictogramă cu un click dreapta.
[mai mult...]Scrii pe laptop și dintr-o dată, unele dintre taste încep să se înregistreze ca numere și simboluri în loc de litere. Ce se întâmplă?
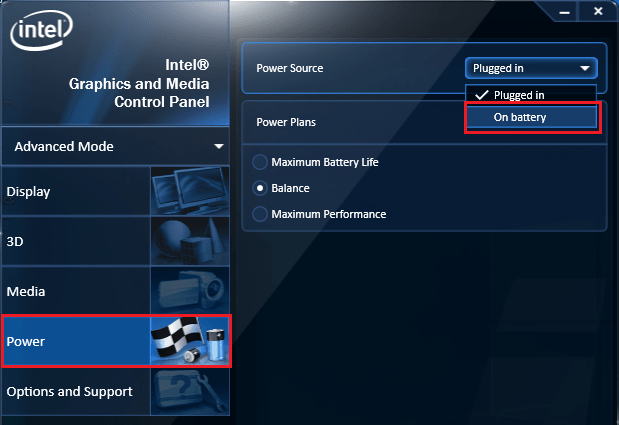
[mai mult...]Have you encountered such a problem when your Laptop screen suddenly starts to distort and get messy while on battery (un-plugged)? Well, you’re not the first one because many users have complained about this issue from time to time. You will be surprised to know that there’s actually a very easy fix for it. All you need to do is configure a specific setting in your Intel Graphics control panel.
There are two settings that are actually responsible for this issue:
To put it simply, you need to disable the Power saving options in the Intel Graphics properties. Below I will show you how to do exactly that.
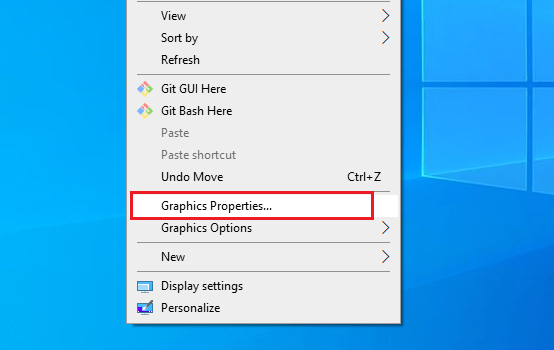
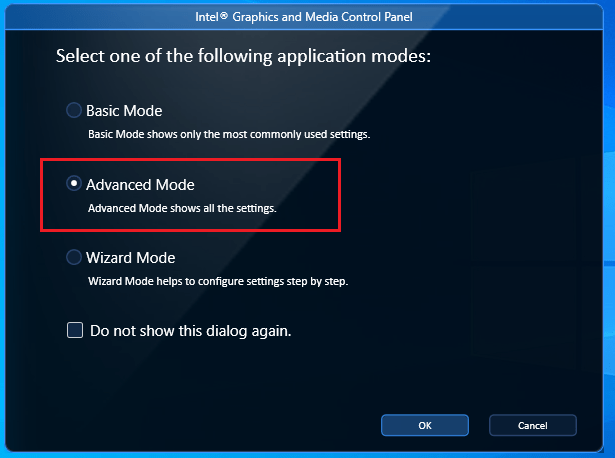
Here are simple steps with screenshots that will get rid of the messy / distorted Laptop screen issue:

Sometimes, due to any reason you may want to disable or block your internal Laptop keyboard. In this guide I am going to show you how to do that in Windows OS without installing any third-party software or application. There could be a number of reasons why you would want to disable the Internal Keyboard. Here are some of the most common scenarios that users usually face:
Sometimes, you don’t want to visit the local repair store because it’s just not worth it. The repair process can be cumbersome and fixing the laptop might charge you a lot of money. In some scenarios, it is just easier to plugin an external USB Keyboard and use it instead. We are going to explore a way to turn off the keyboard without installing any software on your PC. Windows offers built-in utilities and tools to achieve that within a matter of minutes.
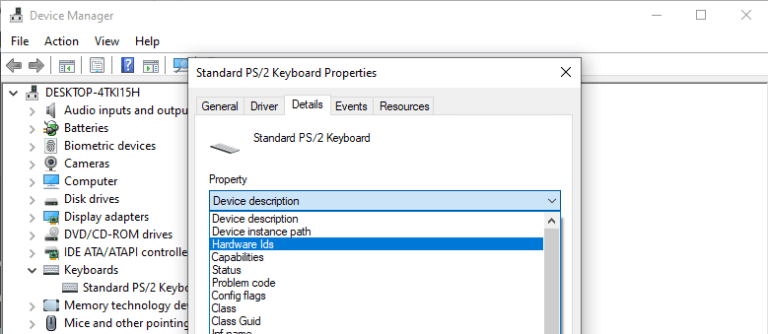
Steps to Disable Keyboard
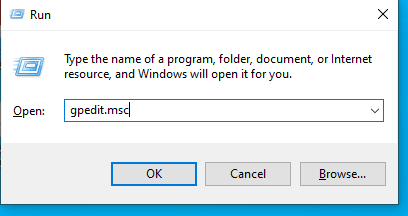
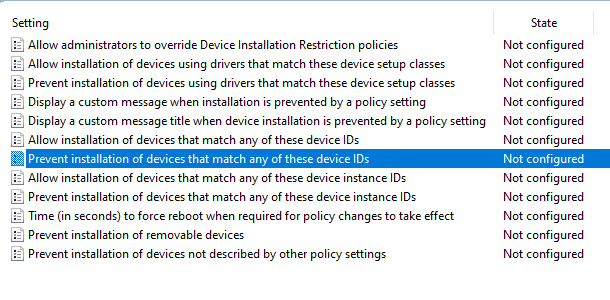
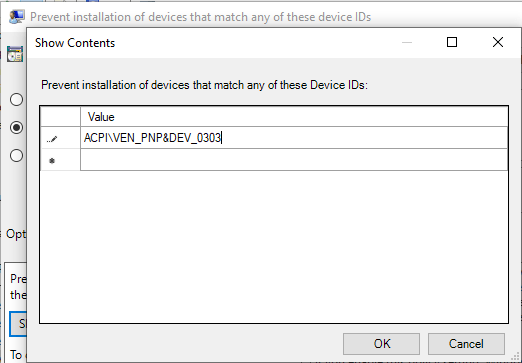
The procedure is very simple. You can easily disable or block any device including Keyboard, Mouse, Touchpad, USB storage or any other device with the Local Group Policy editor. Group Policy editor is a built-in Windows utility that allows you to control every aspect of your Windows PC. If you know how to properly use this tool, it will give you super power over your PC.
Follow the steps below to turn off your Laptop keyboard by changing the Group Policies:

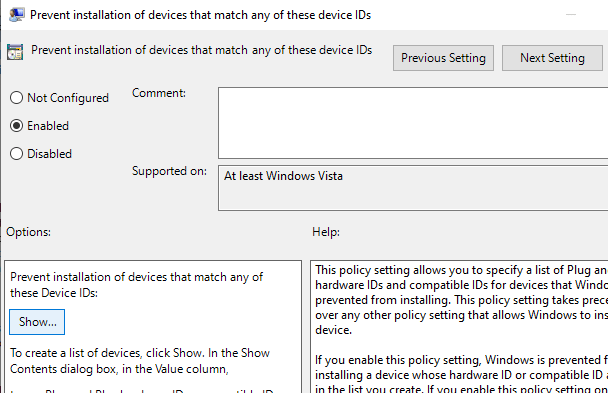


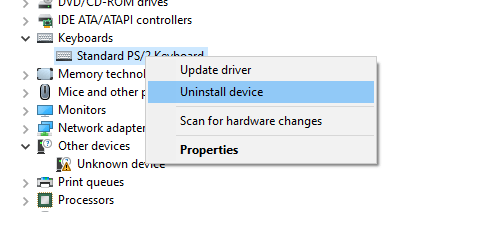
If ever in the future you need to revert the configuration, it can be done very easily. Go to the policy setting and instead of the Enabled option, select Not Configured. Then restart the PC. This will revert the policy setting and now you will be able to use your keyboard just like before.That’s all you need to do. Once you have completed all these steps, it is time to test the new policy setting. To test it, simply restart your PC and try using the keyboard keys. If everything went right, the keyboard will not work. Now you can plugin an external keyboard and use it instead.