

Soluții
How to dismiss “Local Security Authority Protection Is Off” in Windows 11
Do you keep receiving a “Local Security protection is off. Your device may be vulnerable.” notification each time you boot into Windows 11’s desktop area? This troubleshooting guide will explain why that happens and what you can do to dismiss it.
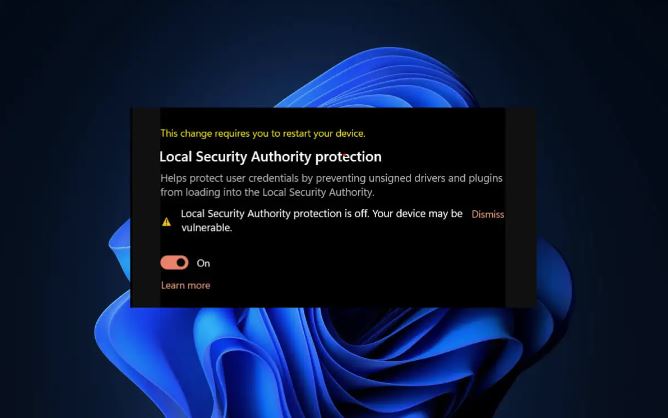
You’ve got three methods to deal with a persistent “Local Security Authority protection is off” security warning in Windows 11. You can:
- Dismiss the error: Despite the warning, the chances are Local Security Authority is running in protected mode on your computer. You can safely dismiss it after verifying the LSA state via the Event Viewer.
- Update Windows. At the time of writing, Microsoft has released an official fix with “Update for Microsoft Defender Antivirus antimalware platform – KB5007651 (Version 1.0.2306.10002).” You can install it if it’s available for you.
- Modify the registry: It’s possible to modify the system registry and manually activate Local Security Authority protection to stop the security warning from appearing.
Unable to Print in Windows
Step 1: Check Printer Connection
- Ensure that your printer is properly connected to your computer and turned on.
- Check the USB or network cable connections.
Step 2: Restart Printer and Computer
- Turn off the printer
- Shut down your computer
- Turn on the printer and restart your computer
- Attempt to print again
Step 3: Set Default Printer
- Open “Settings” and go to “Devices”
- Under “Printers & scanners,” select your printer and click “Manage”
- Make sure the option “Let Windows manage my default printer” is turned on.
Step 4: Check Printer Status
- Open “Settings” and go to “Devices”
- Under “Printers & scanners,” select your printer
- Check if there are any print jobs in the queue. Cancel or restart them.
Step 5: Update or Reinstall Printer Drivers
- Open “Device Manager” (right-click on the Start button)
- Expand “Print queues” or “Printers”
- Right-click on your printer and select “Update driver” or “Uninstall device” followed by reinstalling the drivers.
Step 6: Clear Print Spooler
- Open the Run dialog (Win + R) and type
services.msc - Locate “Print Spooler” in the list
- Right-click on it and select “Stop”
- Navigate to
C:\Windows\System32\spool\PRINTERSand delete all files - Restart the Print Spooler service.
Step 7: Check Printer Compatibility
- Ensure your printer is compatible with your version of Windows
- Visit the printer manufacturer’s website for updated drivers if needed
Step 8: Run Windows Troubleshooter
- Open “Settings” and go to “Update & Security”
- Select “Troubleshoot” and run the “Printer” troubleshooter.
Unable to connect to Wi-Fi on Windows
Problem: Unable to Connect to Wi-Fi on Windows
Step 1: Check Wi-Fi Hardware
- Ensure that your Wi-Fi adapter is enabled. You can do this by right-clicking on the network icon in the taskbar and selecting “Open Network & Internet settings”
- Under “Change adapter options,” right-click on your Wi-Fi connection and make sure it’s enabled.
Step 2: Restart Your Router and Computer
- Unplug the power from your router.
- Wait for 10-15 seconds, then plug it back in.
- Restart your computer.
- Try connecting to Wi-Fi again.
Step 3: Forget and Reconnect to Wi-Fi Network
- Open “Settings” and go to “Network & Internet”
- Under “Wi-Fi,” select your network and click “Forget”
- Reconnect to the Wi-Fi network by entering the password.
Step 4: Check for Airplane Mode
- Ensure that Airplane Mode is turned off. You can find this in the Action Center or under “Network & Internet” settings.
Step 5: Run Network Troubleshooter
- Open “Settings” and go to “Update & Security.”
- Select “Troubleshoot” and run the “Internet Connections” troubleshooter.
Step 6: Update Wi-Fi Drivers
- Right-click on the Start button and select “Device Manager”
- Expand “Network adapters” and right-click on your Wi-Fi adapter.
- Choose “Update driver” and select “Search automatically for updated driver software”
Step 7: Disable and Enable Wi-Fi Adapter
- In Device Manager, right-click on your Wi-Fi adapter and choose “Disable”
- Wait a few seconds, then right-click again and choose “Enable”.
How to fix slow computer performance on Windows
Step 1: Check Disk Space
- Open File Explorer and check the available disk space on your system drive (usually C:).
- If low on space, delete unnecessary files or move them to an external drive.
Step 2: Disable Startup Programs
- Press Ctrl + Shift + Esc to open Task Manager.
- Go to the “Startup” tab.
- Disable unnecessary startup programs to improve boot time.
Step 3: Run Disk Cleanup
- In File Explorer, right-click on the system drive (C:) and select “Properties.”
- Click on the “Disk Cleanup” button.
- Select file types to clean up and click “OK.”
Step 4: Update Windows and Drivers
- Open Settings (Windows key + I) and go to “Update & Security.”
- Check for Windows updates and install them.
- Update graphics and other drivers using Device Manager.
Step 5: Check for Malware
- Run a full system scan using Windows Defender or install a reputable antivirus program.
- Remove any detected malware or viruses.
Step 6: Adjust Visual Effects for Performance
- Right-click on “This PC” and select “Properties.”
- Click on “Advanced system settings.”
- Under the “Advanced” tab, click on “Settings” under the Performance section.
- Choose “Adjust for best performance” or customize visual effects.
Step 7: Uninstall Unnecessary Programs
- Open Control Panel and go to “Programs” > “Programs and Features.”
- Uninstall unused or unnecessary programs.
Multi-function printer- mesaj de blocare a alimentarii cu hartie pentru scanari in urma curatarii
In cadrul utilizarii tavitei/sistemului de auto-preluare a hartiilor pentru scanare se va observa ca uneori hartia ramane blocata. In aceste cazuri MFP-ul prezinta un mesaj de eroare si recomandarea deschiderii unei trape de acces specifica nevoii de indepartare a hartiilor blocate. Dupa efectuarea interventiei si inchiderea trapei mesajul va disparea, dar acest lucru nu se intampla intotdeauna.
[mai mult...]