Cum activezi tema Dark Mode în Windows 11
Doriți să activați tema Dark Mode în Windows 11 pentru a reduce oboseala ochilor sau pentru preferințe estetice.
[mai mult...]Soluții pentru problemele tale IT

Doriți să activați tema Dark Mode în Windows 11 pentru a reduce oboseala ochilor sau pentru preferințe estetice.
[mai mult...]To create custom resolutions for your display
From the NVIDIA Control Panel navigation tree pane, under Display, click Change resolution
Click the image that represents the display you want to affect
Click Customize, then from the Customize dialog box, click Create Custom Resolution
(Quadro and NVS products only) In the Select displays section of the Create Custom Resolution dialog box, select any additional connected displays to which you want to apply the change
Complete the information in the Custom Resolutions dialog box. For more information on custom resolutions, see Create Custom resolution dialog box
Click Test, then if the test passes and you want to save the new mode, click Save.
![]() Note: You can also create a custom resolution for your HDTV by using the Desktop Resize control.
Note: You can also create a custom resolution for your HDTV by using the Desktop Resize control.
Discord taps into Google’s own GIF search engine, Tenor, to offer up an endless collection of GIFs. These can be easily accessed and shared to any text conversation or Channel.
1. Open up a Direct Message thread or Text Channel. You’ll find all your Direct Message threads on the left side of the app’s home screen. Text Channels are visible on the left sidebar within a Server, preceded by the “#” symbol.
2. Click the GIF button in the message box at the bottom. In the Discord mobile (iOS, Android) app, you can tap the emoji icon and switch to the GIF tab.
![]()
3. Select one of the many pre-made categories from the resulting pop-up or simply enter what you’re looking for into the built-in search bar.
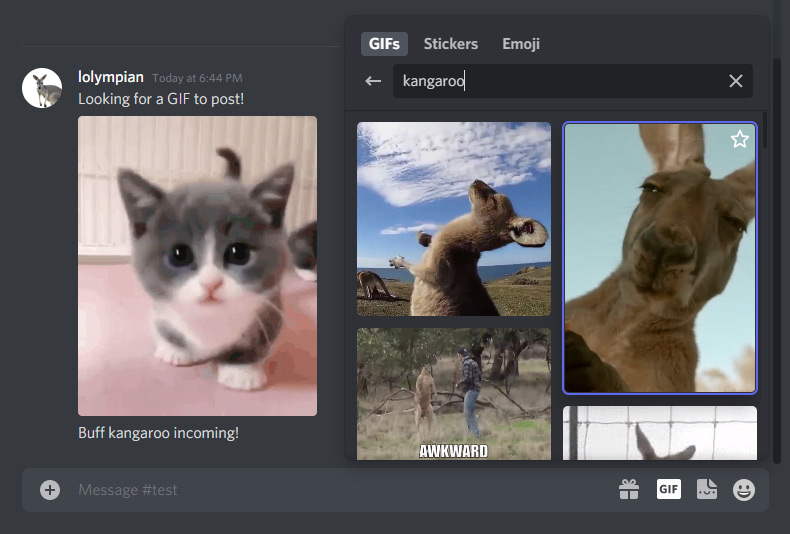
4. Click on any of the listed GIFs to instantly share them to the thread. You can also click the star icon in the top-right corner to add individual GIFs to your Favorites, displayed at the top of the GIF box.
You could, of course, share GIFs from anywhere else on the web as well. If you ever feel the need to do so, simply right-click the image, copy the image address, paste it into the message box, and hit enter.

If you have GIFs downloaded to your computer, you can upload these to a thread by double-clicking the plus (+) button inside the message box or clicking the button once and selecting Upload a File.

You don’t have to make do with the GIFs baked into Discord. A custom GIF is likely to get more traction within conversations. Imagine sharing a looping clip of your very own gameplay, for example, or a screen recording guiding your friends through the solution to a problem they’re facing.
Now, there are more than a few ways you can record your screen and export the clip as a GIF. If you’re looking to go from recording to sharing in the fewest steps.
Here’s how to record your screen to a GIF with Jumpshare.
1. Download the Jumpshare desktop app, install it, and sign up for an account if you don’t already have one.
2. Launch Jumpshare and click the GIF button along the top of the interface or hit the Record GIF shortcut (Alt + Shift + 3 on Windows and Command + Shift + 8 on Mac by default) at any time with Jumpshare running in the background.
[mai mult...]