Calculate square root in Excel with the SQRT function
If you’d like to use a function to calculate the square root, use Excel’s dedicated SQRT function for finding square roots. This function retrieves the same result as the method above.
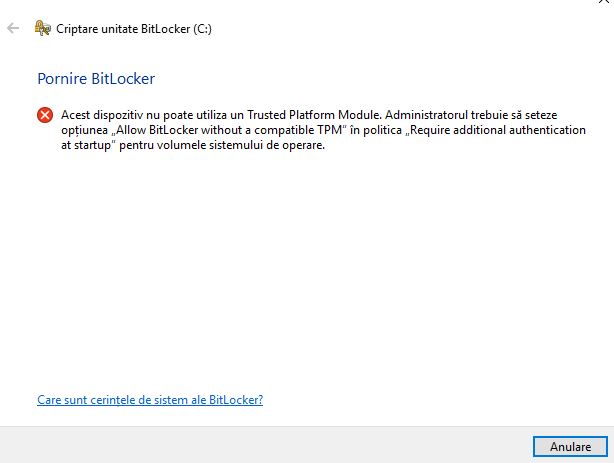
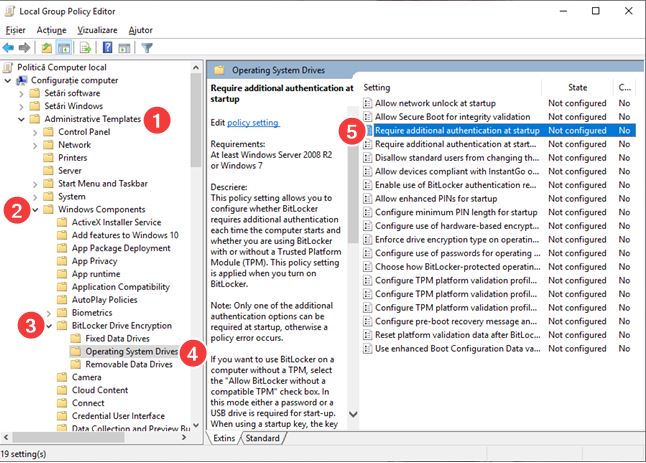
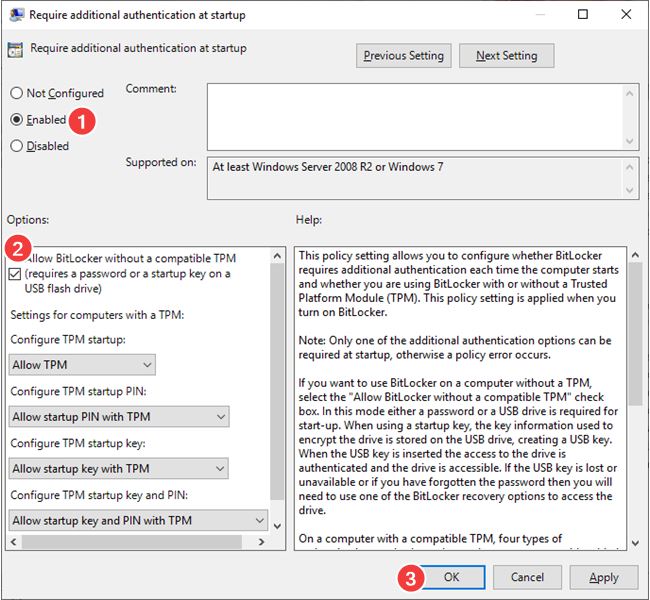
[mai mult...]