Situatie
Solutie
Pasi de urmat
Head to Bidefender Central- In the activation email, click on the big blue ‘Activate in Central’ button. You’ll be taken to the Bitdefender Central account login page.
- If you’ve already created such an account, you can log in using your existing details.
- If not, at the login page, simply click on ‘Create one’ (next to the ‘No account?’ prompt), then fill in the relevant details (name, email and password), tick the box to agree with the legal terms, and then click ‘Create Account’.
2. License Activated
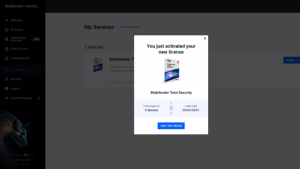
– Once you’ve logged in to your existing – or freshly created – Bitdefender Central account, a message will pop up to confirm that you’ve just activated your new Bitdefender license.
– If it doesn’t, and something has gone wrong with the license activation link, you can manually activate in your Bitdefender Central account: simply head to ‘My Subscriptions’, select ‘Activate with code’, and enter the one-time code supplied in the activation email.
– The number of devices you can protect will be listed here, and to install Bitdefender on your current PC, click on the ‘Use it on a Device’ button.
3. Install options
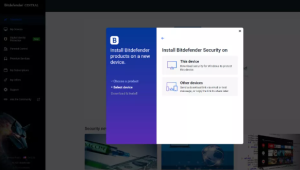
– A dialog box will appear offering you the chance to install Bitdefender on the PC you’re using (alongside another option to install it on other devices – more on that later). Assuming you want the application on the computer you’re using (at least first of all), under ‘Install Bitdefender Security on’, click on ‘This device’.
4. Downloading
– The Bitdefender installer will then download, with a yellow box highlighting this fact. The yellow box with arrow points down to the installer executable (EXE) file, and it will download very quickly.
– Once it’s done, click on the EXE and it’ll open.
– A box will pop up asking for permission to let Bitdefender make changes to your device, so click ‘Yes’.
– A screen will pop up informing you that the app is preparing your system for installation, and then a percentage indicator will track the progress of the Bitdefender download.
5. Full installation if files
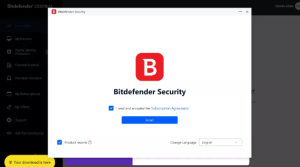
– Once the download has finished, a Bitdefender Security panel will appear and you will need to tick the box to accept the subscription agreement (after you’ve read it).
– Note the ‘Product reports’ box bottom-left which is ticked by default – if you don’t want to send data on threats spotted on your machine back to Bitdefender, make sure this isn’t ticked.
– Click the blue ‘Install’ button and the process begins – you’ll see an installation progress bar letting you know how far through the installer is.
6. Optional device assesment
– You now have the chance to scan the critical areas of your system to check for any security problems or threats right out of the gate.
– Click the ‘Start Device Assessment’ button. Depending on your drive size and the data on it, the scan may take just a few minutes, or somewhat longer.
– If Bitdefender finds any problems, the app will advise you on what to do.
7. Initial setup
– Click the ‘Start Using Bitdefender’ button to do just that, and the program’s main menu will pop up.
– Shortly after you start using the program, Bitdefender will automatically check for updates, and will install any necessary files to keep you fully up-to-date, informing you of this with a pop-up notification.
– On the main menu, you will be given a couple of initial recommendations. The most important one is to turn on ransomware remediation, which offers additional protection from this particularly nasty strain of malware (and can help to stop an attack, and indeed restore any files which might be maliciously encrypted if the ransomware successfully manages to hit a few files before the antivirus kicks in and halts its progress). It’s worthwhile clicking ‘Enable’ to activate this feature.
– Note that there’s also a little tour of the interface you can take (or skip) to familiarize yourself with a few things.
– You’re now good to go with all the basics of Bitdefender downloaded and set up, and the most important elements of protection in place.


Leave A Comment?