Situatie
Since the conception of Linux, so many of flavors in Linux operating systems are developed. Most of them can be downloaded from the internet. The downloaded Linux OS is usually a bootable ISO image. You can write it to either a CD or DVD or USB depending on the size of the ISO image. Nowadays, most of us use USB mass storage devices to write the bootable ISO images in Linux and Unix-like systems. There are many applications available to create bootable USB disks in Linux and each application has its own set of distinctive features. Today, we will discuss about one such tool called USBImager.
USBImager is a simple graphical application used to write the ISO images as well as compressed disk images to USB drives. Compared to its counterparts, USBImager is really really small. The size of this tiny application is around 170~ kb only. It doesn’t have any dependencies either. It makes synchronized writes, meaning, all data is on disk when the progress bar reaches 100%. It can verify writing by comparing the disk to images.
USBImager can read the RAW images, such as .img,.bin,.raw,.iso,.dd, etc., compressed images, such as .gz,.bz2,.xz,.zst etc, and archive files such zip (PKZIP and ZIP64). We can also create the backup of the entire USB drive. It is even possible to create compressed backups in raw and bzip2 formats. USBImager has an option to let the users to choose whether the backup should be compressed or not. USBImager is totally free and the source code is available under MIT license. It works under GNU/Linux, MacOS X and Windows platforms.
Solutie
Pasi de urmat
Install USBImager in Linux
Download the latest USBImager . It is available in zip and .deb format.
If you are on a Debian-based systems, such as Ubuntu, Linux Mint, download the .deb file and install it like below:
$ sudo apt install gdebi$ sudo apt install usbimager_1.0.4-amd64.debIf you are using other Linux distributions, download the zip file, extract it and move it to your $PATH.
$ wget https://gitlab.com/bztsrc/usbimager/raw/binaries/usbimager_1.0.5-x86_64-linux-x11.zip
$ unzip usbimager_1.0.5-x86_64-linux-x11.zipThe above command will extract the contents of this zip file in a directory called bin in the current working directory. Move the usbimager binary to your $PATH, for example /usr/local/bin.
$ sudo mv bin/usbimager /usr/local/bin/For Arch Linux and its variants like Manjaro Linux, USBImager is available in AUR. Install it using any AUR helper programs like Yay as shown below.
$ yay -S usbimagerUSBImager Interface
Launch USBImager from command line by invoking the following command:
$ usbimagerOr, it can be launched from the menu/application launcher.
The default interface of USBImage will look like below.
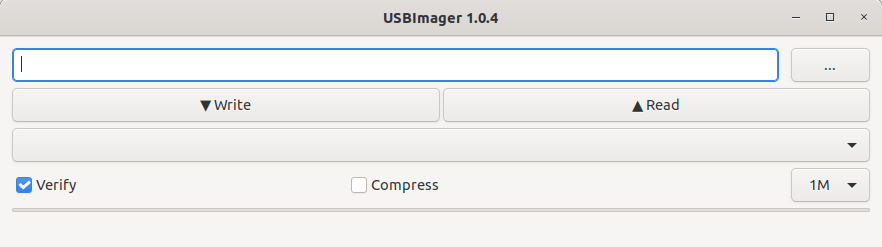
As you can see, USBImager’s interface is very simple. It has four rows and each row has buttons and each button does a distinctive operation.
In the first row, you can choose the image file by clicking on the three dots (…) button. The second row has two buttons namely Write and Read. If you want to write an image to the USB disk, click the “Write” button. To read the disk image or create a backup of the disk, choose “Read”.
The third row allows you to choose the USB device. The fourth and final row has two check box buttons namely Verify and Compress, and a drop down box to select the buffer size to use. By default, the “Verify button is selected. So, each block is read back from the disk and compared to the original image. The default buffer size is 1M. So the image file will be processed in 1M chunks. If the Compress button is checked, the image will be compressed using bzip2 format.
Create bootable USB drive with USBImager in Linux
Plug in in the USB stick and click the the three dots in the first row and choose the ISO file you want to write into the USB device. Then, select the USB device from the device selection drop down box on the third row. If you want to verify the disk with the original image, make sure the “Verify” checkbox is checked in the fourth row. Also you can choose the buffer size to use from the buffer selection drop down box. The image file will be processed in this big chunks. If you don’t know what size to use, just leave the default value which is 1M.
Finally, click “Write” button to start writing the image file to your USB disk.
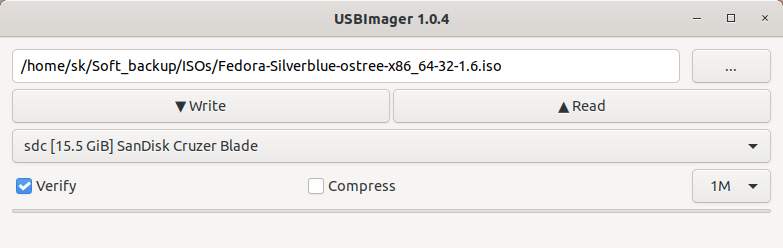
It will take a few minutes depending upon the size of the ISO file. Please note that the time shown in the progress bar is just an estimate. It took me around 4 minutes to write the Fedora 32 ISO (2.7 GB) in a 16 GB USB disk. After the process is completed, you can use the USB stick to boot any system and install the OS.
Create backup image file from the USB device
As stated already, USBImager can also backup the entire USB. Plug in the USB device, choose it from the device selection row and click the “Write” button to create a backup image file from the USB device. If you want to compress the image file, check the “Compress” box.
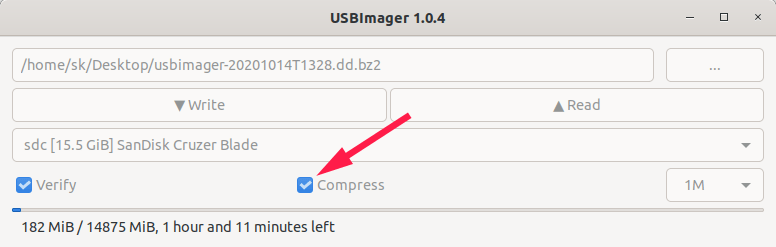
he generated image file is saved in the ~/Desktop location with name “usbimager-(date)T(time).dd”, generated with the current timestamp. If “Compress” option is checked, then the image will be compressed using bzip2 format and a ".bz2" suffix will be added in the file name.
It took me around 8 minutes to create a backup image file without compression and nearly 1 hour and15 minutes to create a compressed backup. As I already said, the remaining time shown in the progress bar is just an estimate. Sometimes it may take longer or shorter than the estimated time to complete depending on the size of the image file and transfer speed of the USB stick.
Conclusion
USBImager is best alternative to electron-based bootable USB creation tools, for example balenaEtcher. It is cross-platform, easy to use, and light-weight application with a minimal GUI. As far as I tested, It works just fine in my Ubuntu 20.04 LTS desktop.
Leave A Comment?