Situatie
Create Clonezilla bootable USB with Tuxboot
You can create a Clonezilla USB with the Tuxboot open-source app with these steps:
- Download tuxboot from SourceForge. (Select the latest stable version available.)
- Double-click the tuxboot-x.x.x.exe file.
- Click the Yes button to bypass the warning.
- Select the “On-Line Distribution” option.
- Use the drop-down menu and select the Clonezilla-live-stable option.
- Select the USB Drive option from the “Type” setting.
- Select the flash drive from the “Drive” setting.
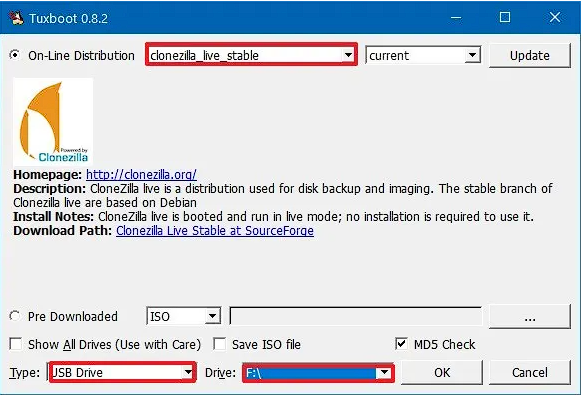
- Click the OK button.
- Once you complete the steps, before starting your device with the tool, you need to ensure that your device can boot from USB.
- Typically, you will need to access your device’s Basic Input/Output System (BIOS) or Unified Extensible Firmware Interface (UEFI) by hitting one of the function keys (F1, F2, F3, F10, or F12), the ESC, or the Delete key during boot.
- Once inside the firmware, look for the Boot section and make sure the boot order is set to the drive that contains the Windows 10 installation files and do not forget to save the configuration.
- The BIOS/UEFI can differ depending on the manufacturer and per computer model. As such, check your manufacturer support website for more specific instructions.