Situatie
If your Windows 10 Task Manager shows 100% disk usage, something is causing your hard drive to over-work. Your computer is now so slow it’s almost impossible to use, and you’re probably wondering what you did wrong. The answer is, nothing! This problem can occur all by itself. But the good news is, it’s usually not a hard problem to fix.
Solutie
Here are a few fixes that have helped other users resolve their Windows 10 100% disk usage problem. You may not need to try them all; just work your way down the list until you find the one that works for you.
1: Disable Windows Search
To determine if Windows Search is causing your 100% disk usage problem, the first thing you should do is temporarily disable Windows Search, and see if your computer speeds up. If it does, you can permanently disable Windows Search.
Temporarily disable Windows Search
Windows Search is what makes searching files on your PC much faster. If you don’t use it at all, or you have another search app, you can disable it completely. Disabling this service will stop the indexing of all files. But you will still have access to search, which will take longer time.
Here’s how to temporarily disable Windows Search and find out if it’s the cause of your 100% disk utilization problem.
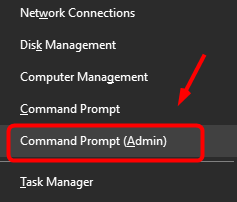
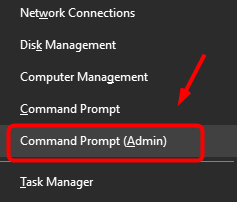
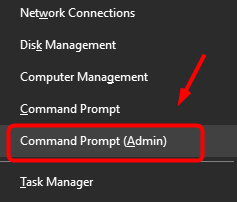
1) On your keyboard, press the Windows logo key ![]() and X at the same time, then select Command Prompt (Admin).
and X at the same time, then select Command Prompt (Admin).
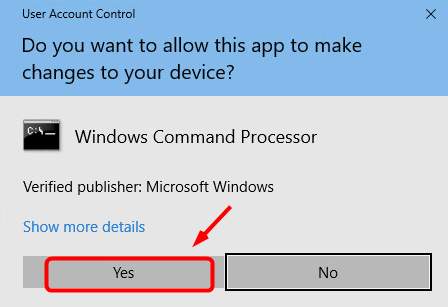
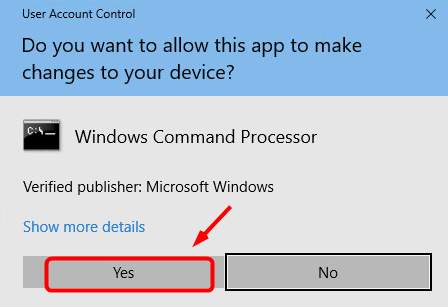
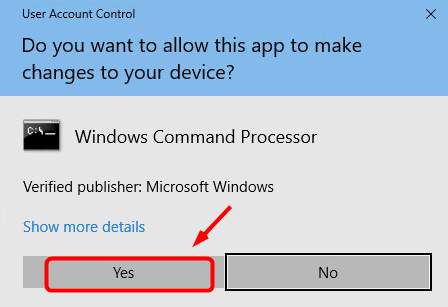
2) Click Yes at the User Account Control window prompt.
3) A mostly black window will then display. This is the command prompt window. In this window, type in the following command:
net.exe stop "Windows search"
4) Hit Enter on your keyboard.
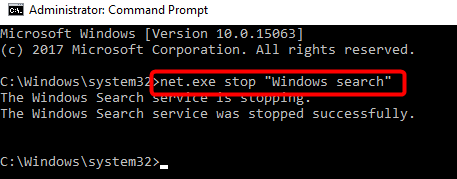
Check to see if your disk usage and the performance of your computer improve. If they do, you should permanently disable Windows Search as described below.
Permanently disable Windows Search
If you discovered that Windows Search is causing your 100% disk usage error in Windows 10, you can permanently disable Windows Search:
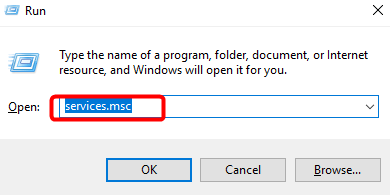
1) Press Windows logo key + R at the same time, and type in services.msc.
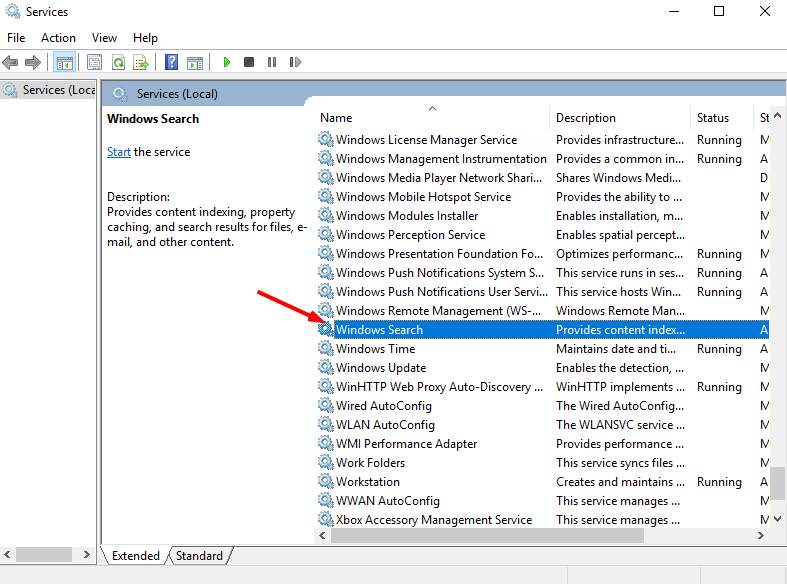
2) Locate Windows Search option, double click it to enter its Properties window.
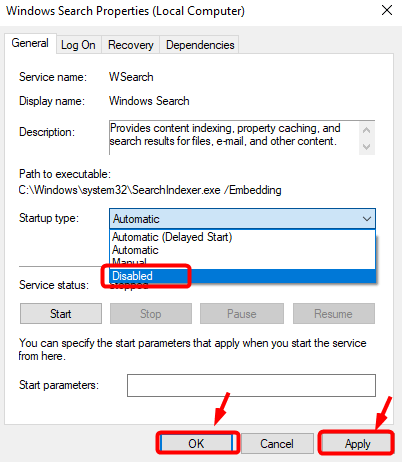
3) Change the Startup type to Disabled. Then click Apply and OK to save your change.
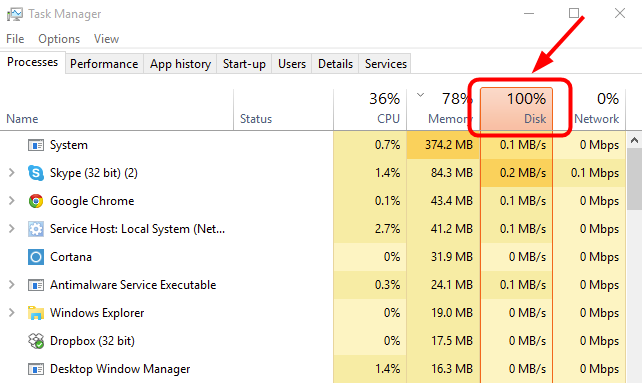
4) Check your computer’s disk usage: Type “task manager” in the Windows search bar and select Task Manager, then in the Processes tab, look at the % at the top of the Disk column.

If the 100% disk usage problem persists, try the next method, below.
Disable SuperFetch
SuperFetch helps to decrease boot time and make must-load programs more efficiently. However, it has been identified as a potential cause of disk performance issues in Windows 8 and later versions of Windows, including Windows 10. Here’s how to stop this service:
1) On your keyboard, press Windows key and X at the same time, then choose Command Prompt (Admin).
2) Click Yes at the User Account Control prompt.
3) The command prompt will once again display. Type in the following command:
net.exe stop superfetch
4) Hit Enter on your keyboard.

5) Wait for a few minutes to see if your computer starts performing better. Or check your computer’s disk usage: Type “task manager” in the Windows search bar and select Task Manager, then in the Processes tab, look at the % at the top of the Disk column.
Perform a disk check
1) On your keyboard, press Windows key and X at the same time, then choose Command Prompt (Admin).
2) Click Yes at the User Account Control prompt.
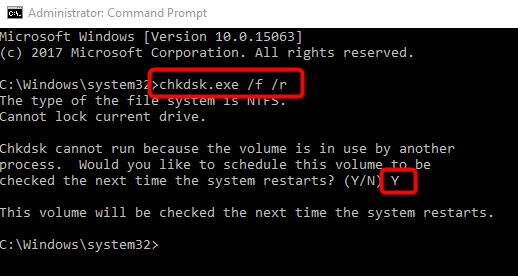
3) The command prompt will once again display. Type in the following command:
chkdsk.exe /f /r
4) Hit Enter on your keyboard, then type Y to confirm that you’d like to perform the disk check the next time you restart your computer. Please make sure you have closed all of your applications first.
5) Check your computer’s disk usage: Type “task manager” in the Windows search bar and select Task Manager, then in the Processes tab, look at the % at the top of the Disk column. If it’s no longer 100%, you’ve fixed the problem!


Leave A Comment?