Situatie
Sometimes, it’s better to assign a PC its own IP address rather than letting your router assign one automatically.
Solutie
What is a Static IP Address?
A static IP address is manually set to a permanent, fixed address rather than being assigned automatically by your router using a procotol known as Dynamic Host Configuration Protocol (DHCP). DHCP is a handy way for devices to connect to your network more easily, because you don’t have to configure IP addressing for each new device yourself.
The downside to automatic addressing is that it’s possible for a device’s IP address to change from time to time, which is why people choose static IPs for certain types of devices. For example: You have a device like a home media server that you want to be able to find using the same IP address or host name each time. You have certain apps that can only connect to network devices using their IP address. In particular, many older networking apps suffer this limitation.
You forward ports through your router to devices on your network. Some routers play nice with port forwarding and dynamic IP addresses; others do not. Whatever your reason, assigning static IP addresses to devices is not difficult, but you do have a choice to make—whether to do it from the router or on the device itself.
Assign Static IP Addresses Via Your Router
While this article covers assigning static IP addresses to PCs within Windows itself, there is another way to go about it. Many routers allow you to assign a pool of IP addresses that are handed out to specific devices (based on the device’s physical, or MAC address). This method offers a couple of significant advantages: IP addresses are still managed by the router, meaning that you won’t have to make (and keep up with) changes on each individual device. It’s easier to assign addresses within the same IP address pool your router uses.
How to Set a Static IP Address in Windows 11
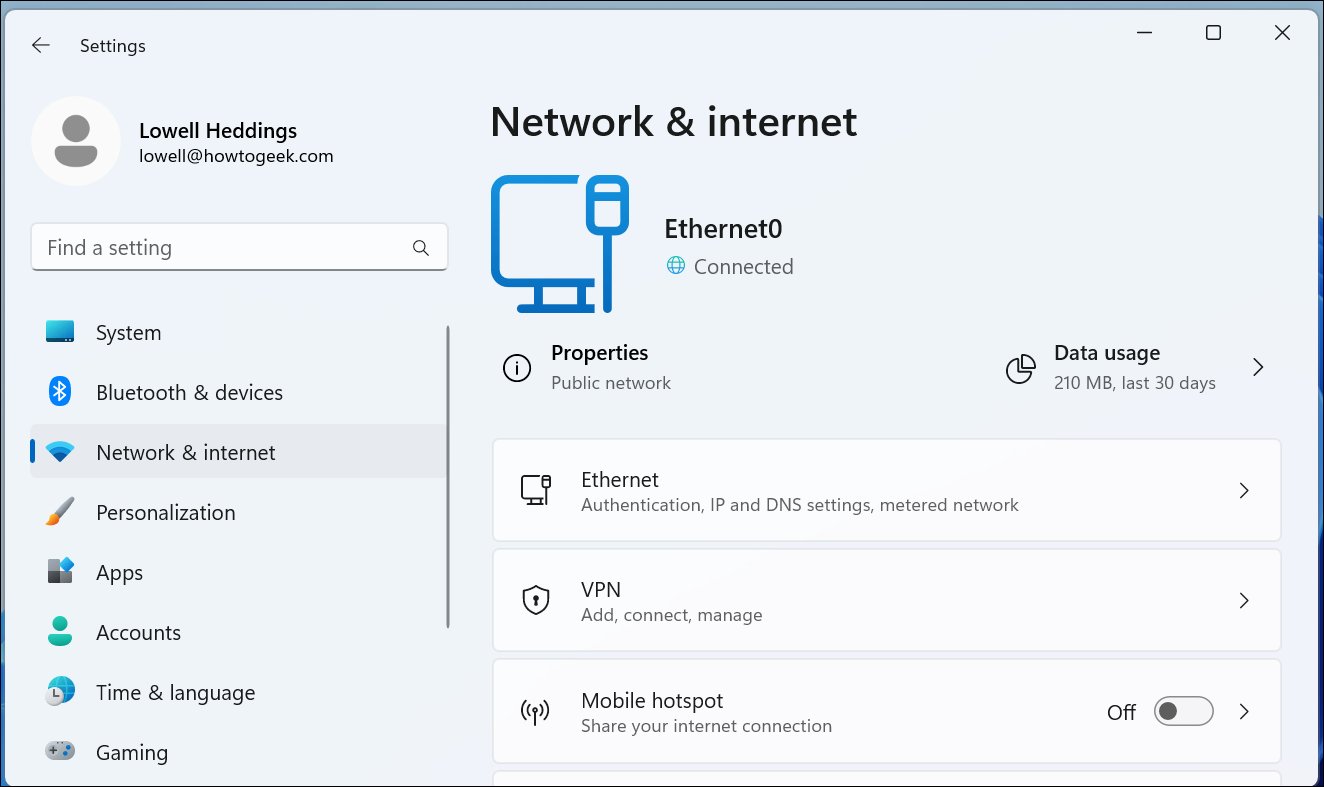
To set a static IP address in Windows 11, you’ll want to open Settings, go to Network & Internet, and then find the Properties for your network. Inside there you’ll be able to click the Edit button for IP Assignment and then fill out the manual network details. First, open up the Settings app and then find Network & Internet on the left-hand side. You’ll be presented with a panel that shows your current network connection. You can click where it says “Properties” right underneath the network, or if you have multiple network connections you can drill down into the specific network to see the IP address details for each one. In this case it’s called “Ethernet”, but you will most likely see “Wi-Fi” as the option to choose.
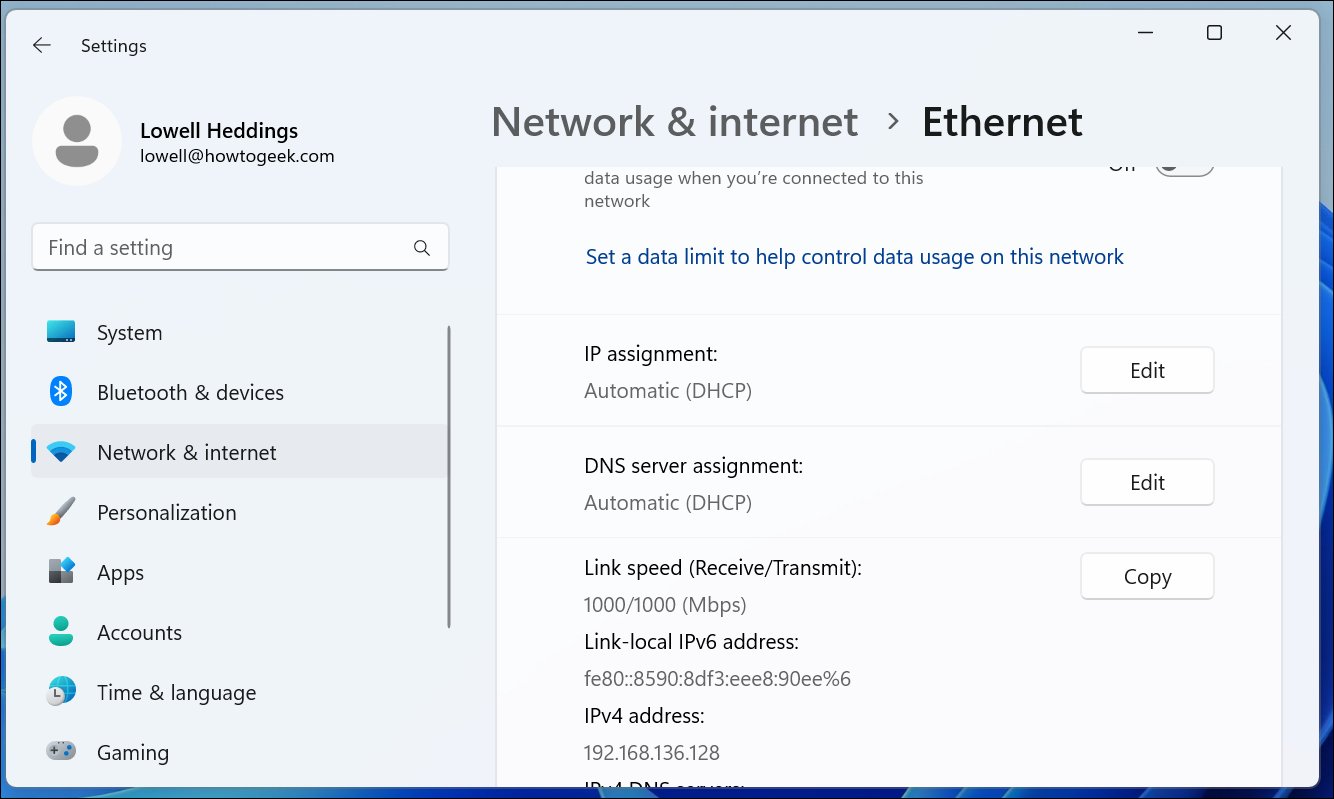
Once you’ve drilled down into the network connection that you want to set a manual IP for, scroll down until you see “IP Assignment” and then click the Edit button to the right.
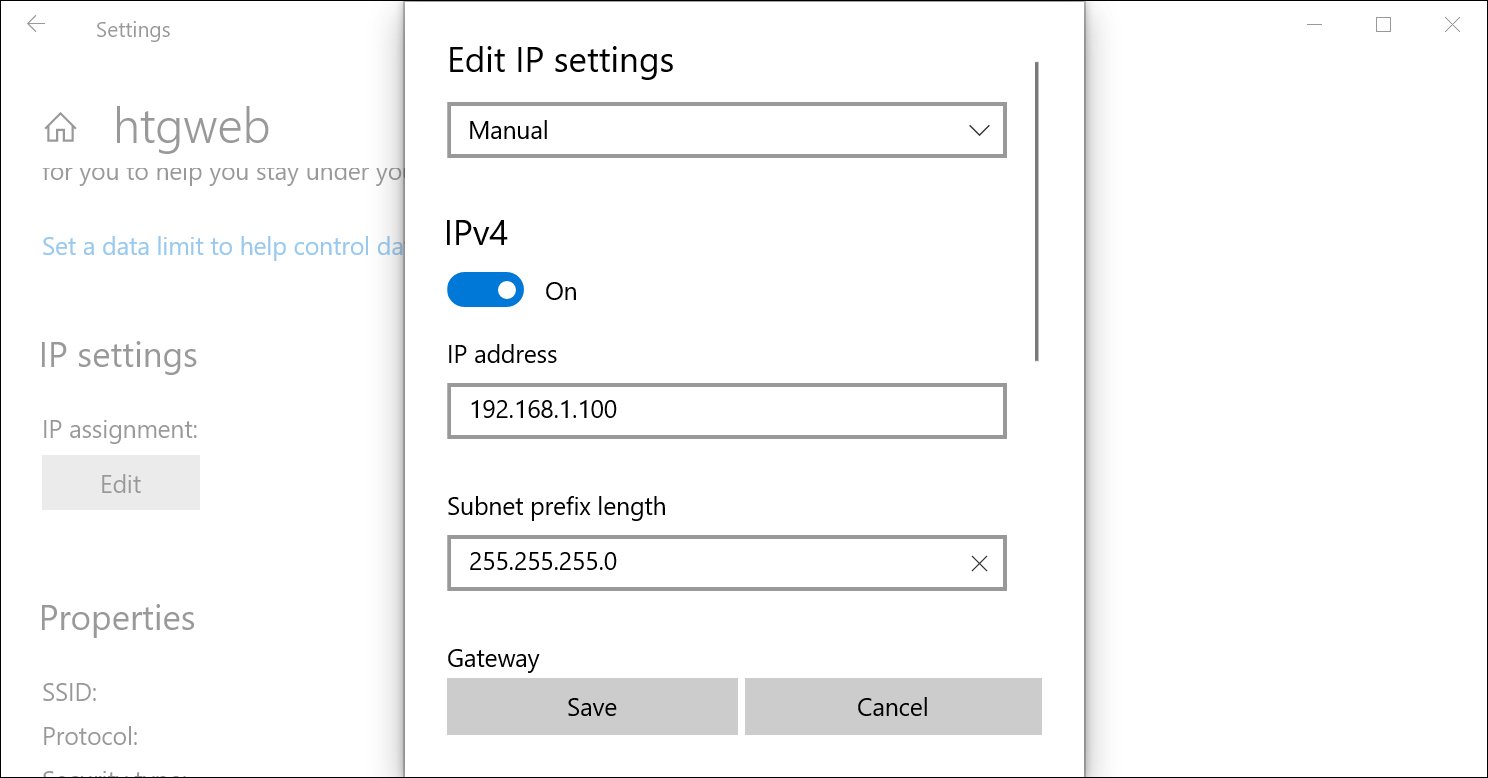
Once there, you’ll flip the drop-down to “Manual” and switch the IPv4 switch to “On”. At this point you can fill out your network details and click Save to finish.

How to Set a Static IP Address in Windows 10
To set a static IP address in Windows 10, you’ll need to open the Settings app and drill down to Network & Internet. From there you’ll select Properties for your network, and then the Edit button next to IP Assignment where you can input a manual IP address. First, open the Settings app and locate the Network & Internet button.

On the next screen you’ll see your network status, which should show you your active network. Here you’ll want to click the Properties button. If you have multiple different networks, you could select them from the left-hand menu—in our case you’ll notice we have both Wi-Fi and Ethernet networks, so you’ll want to pick the one that you are trying to set a manual IP address for. You’ll notice this is the same method we use when we’re trying to find an IP address on Windows 10.

On the network properties screen, scroll down until you see “IP settings” and click the Edit button under “IP assignment”.

In the resulting popup window, change the Edit IP settings dropdown to Manual and then flip the IPv4 switch to “On”. Fill out the details, click Save, and you should be good to go.
Leave A Comment?