Situatie
Even though Windows automatically assigns a drive letter to any external storage device you connect to it, there are unique occasions where it tries to give an already-assigned letter to a new drive. That’s just one credible reason you might see a need to change a drive letter; the rest is up to you, but more important is for you to know how to do it.
Solutie
1. Press on the “Windows” + “R” key. When the “Run” window pops up, type this command in its search field: diskmgmt.msc.
2. Hit the “Enter” key and “Disk Management” will be launched.
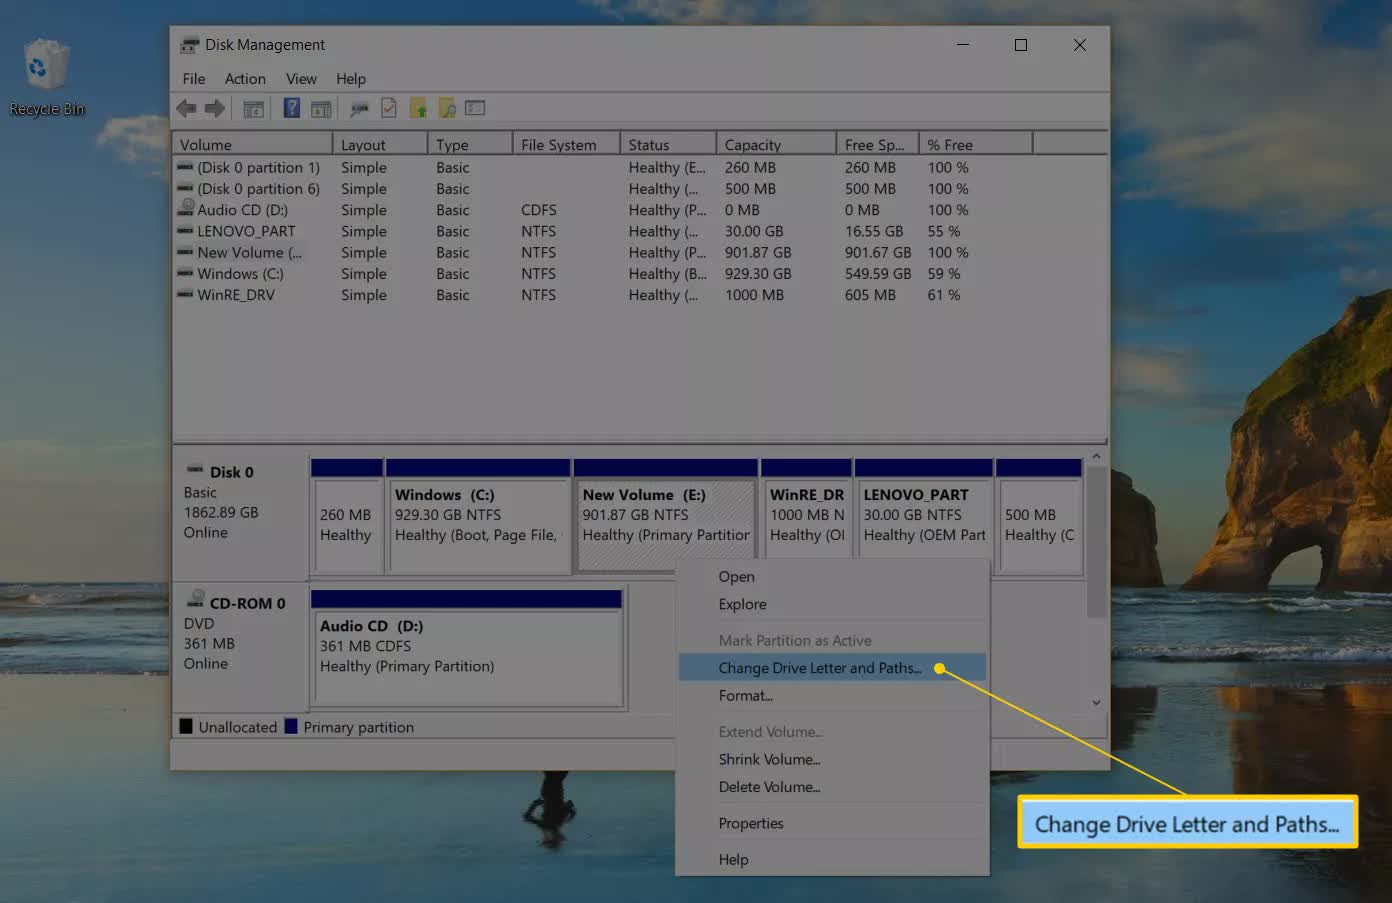
3. You will see a list of drives in the “Disk Management” window. Pick out the one you want to change the letter of, then right-click on it and select “Change Drive Letter and Paths.”

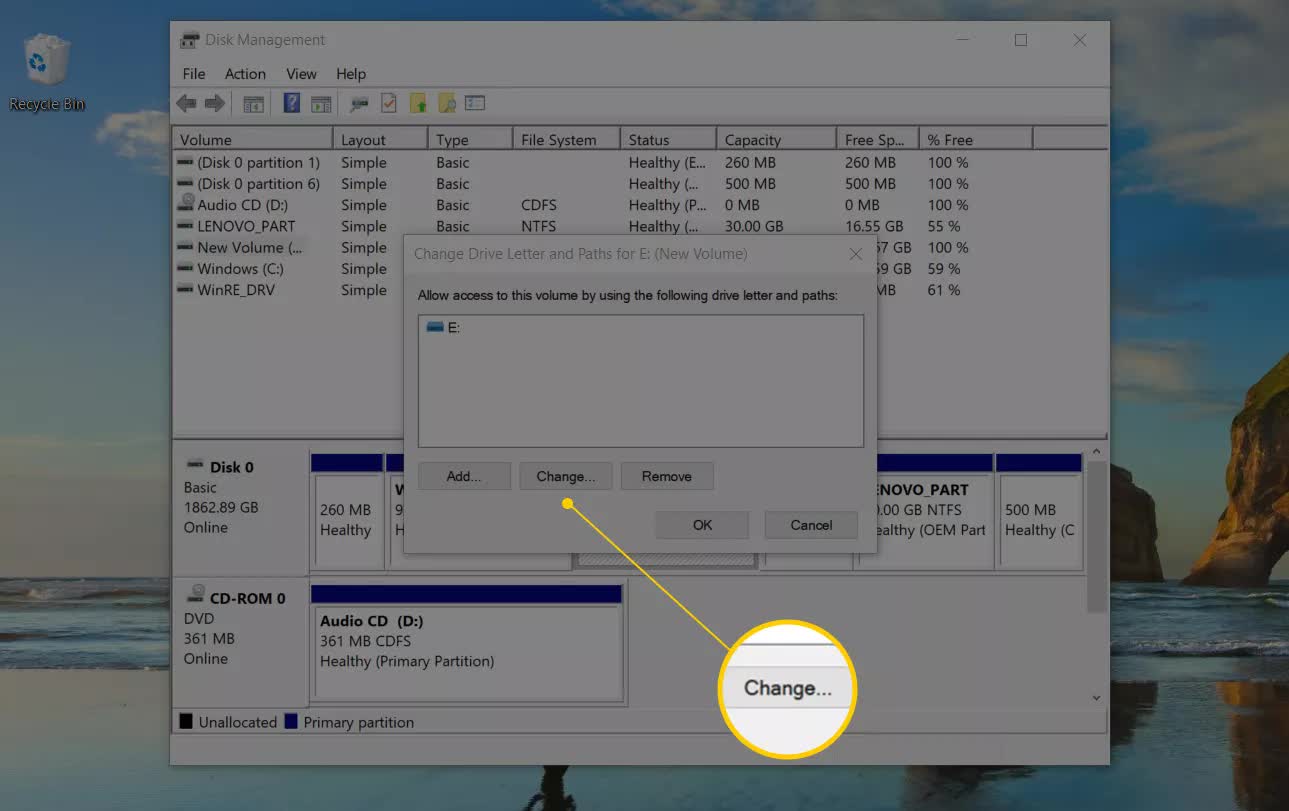
4. Click on “Change” and another window will open up.

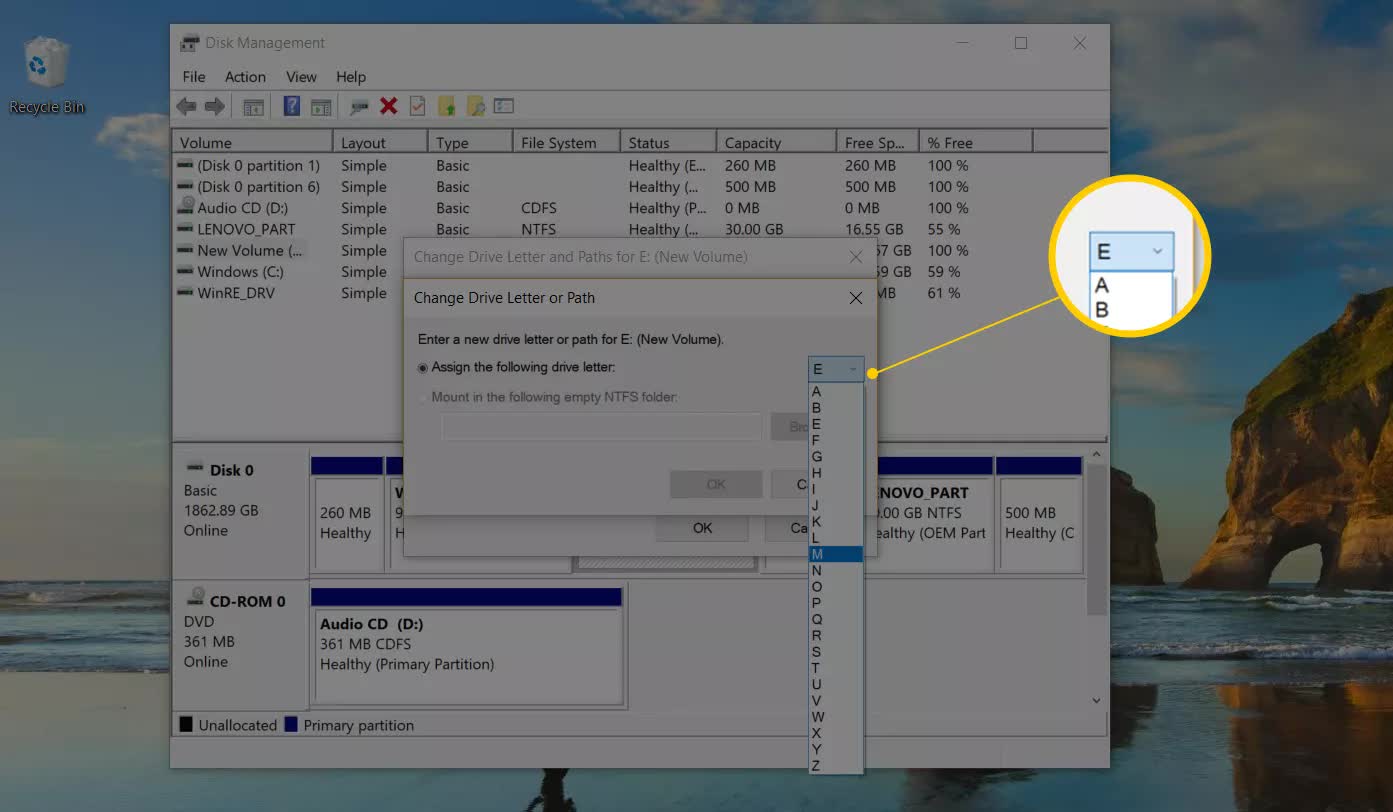
5. Right beside the “Assign the following drive letter” option, you will see a drop-down menu. Select the drive letter you want Windows to give the storage device from this menu.

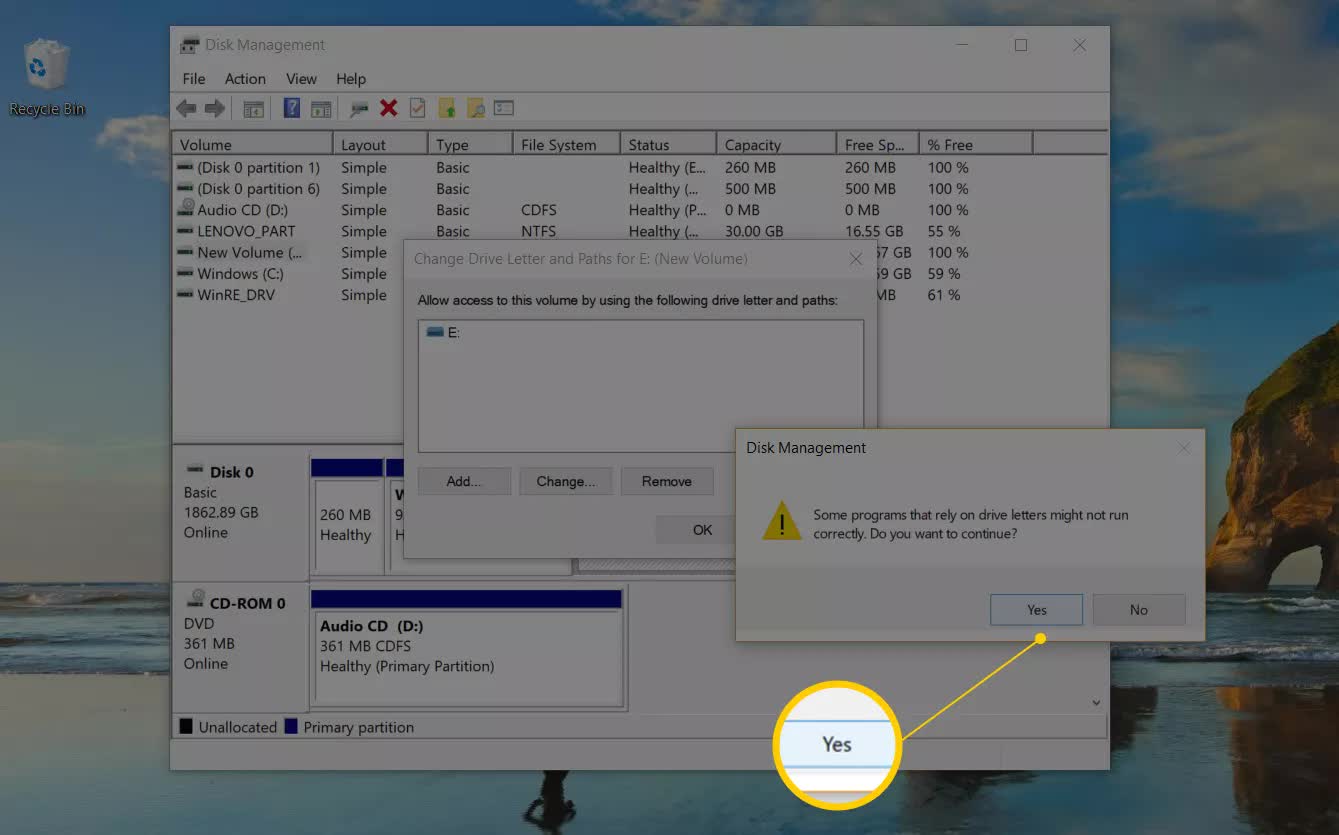
6. Click on “OK” and select “Yes”. Close “Disk Management” and your drive will now be bearing a brand-new letter.


Leave A Comment?