Situatie
Solutie
Pasi de urmat
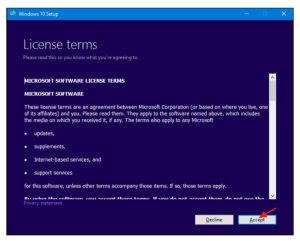
Start by downloading either the Windows 10 Media Creation Tool or the Windows 8.1 Media Creation Tool. Once the file has downloaded, just double-click it to start the tool and then click “Yes” to give it permission to make changes to your PC. When the tool starts, click “Accept” to accept the license terms. Note that the Windows 8.1 version of the tool does not ask you to accept license terms.
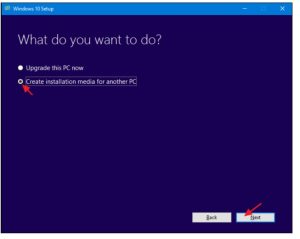
When the tool asks what you want to do, select “Create installation media for another PC” and then click “Next.” The Windows 8.1 version of the tool also does not provide this option; it just defaults to creating installation media for another PC (which is what we want).
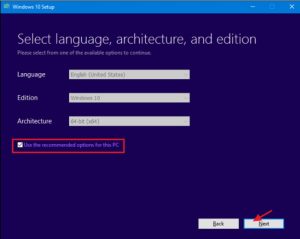
The tool will suggest a language, edition, and architecture for Windows based on information about the PC on which the tool is running. If you’re going to use the installation media on that PC, go ahead and just click “Next.”
If you’re planning to install it on a different PC, clear the “Use recommended options for this PC” check box, select options that are more appropriate for the license you have, and then click “Next.” Note that if you’re using the 8.1 version of the tool, you actually start with this screen. The tool also won’t recommend options; you have to select them yourself.
Remember, your license will only work with the correct version of Windows–if your license is for 64-bit Windows 10 Pro, you can’t install 32-bit Windows 10 Home with it, so ensure your selections here match what’s listed on your product key.
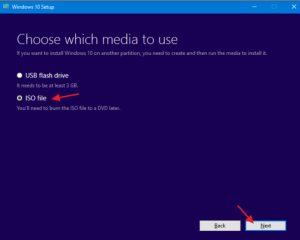
Next, select whether you want the tool to create a bootable USB flash drive with the installation media, or just create an ISO file that you can use or burn to a DVD later. We’re going with the ISO file in this example, but the process is much the same either way. If you go with the USB option, you’ll need to provide a USB drive with at least 3 GB of space.
Also, the USB drive will be formatted during the process, so make sure there’s nothing on it you need. Select the option you want and then click “Next.”
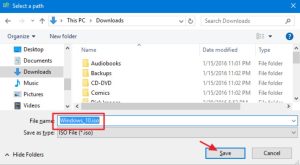
Choose a place to save the finished ISO file (or point the tool toward the right USB drive if that’s the option you chose).
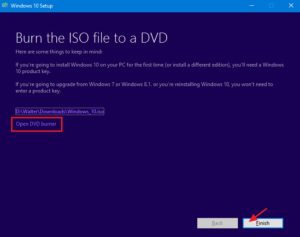
At this point, the Media Creation Tool will begin downloading the files and assembling your ISO, which can take a fair bit of time depending on your internet connection. When it’s finished, you can click “Open DVD Burner” if you want to go ahead and create a disc or just click Finish if you don’t want to make a disc right now.

Leave A Comment?