Situatie
Using Windows 11’s memory compression feature, you can get your PC’s RAM to store more data than its original capacity. This allows your PC to read data faster, improving your overall experience. We’ll show you how to enable and disable memory compression on your computer.
What Is Memory Compression in Windows 11?
Memory compression, as the name suggests, is a feature that compresses the memory to be loaded on your RAM, allowing your RAM to store more data than it normally would. For example, if your PC has 8 GB of RAM available, and there’s 9 GB of data to be stored on it, memory compression will try to compress that extra data so it fits within the 8 GB capacity of your RAM. If you don’t use memory compression, your PC will store the extra data in a file on your hard drive storage.
This reduces your PC’s performance as your PC takes more time to read data from a file on the hard drive than from RAM. Unless you have a specific reason, it’s a good idea to keep memory compression enabled on your system.
Solutie
How to Check If Memory Compression Is Enabled in Windows 11
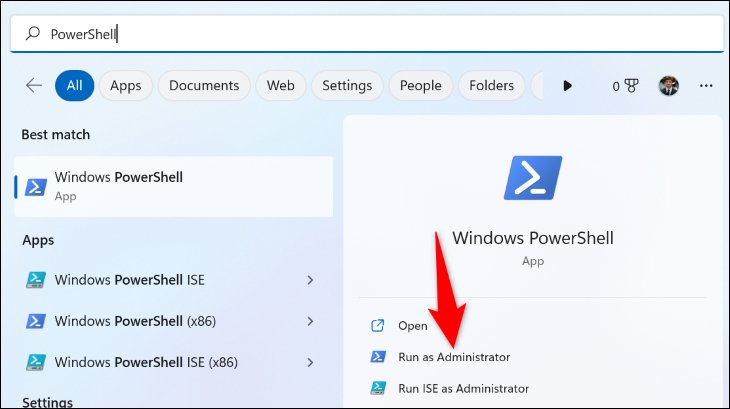
Before you begin to enable or disable memory compression, check and see the feature’s current status. If it’s already enabled, you won’t have to do anything. First, open the “Start” menu and search for “PowerShell”. Then, on the right, click “Run as Administrator.”

In the “User Account Control” prompt, choose “Yes.” Then, type the following command in PowerShell and press Enter: Get-MMAgent
In the result text, read the value next to “MemoryCompression.” If it says “True,” the feature is enabled. If it says “False,” the feature is disabled.

How to Turn On or Off Memory Compression in Windows 11
If you’d like to change memory compression’s current status (to enable or disable it), issue a command from PowerShell as follows.
Enable Memory Compression
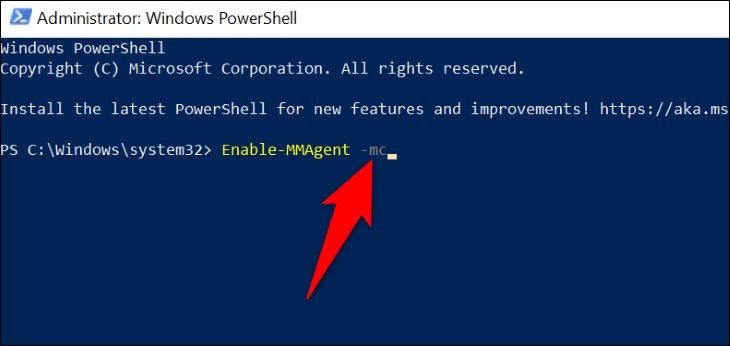
Open the “Start” menu, find “PowerShell”, and select “Run as Administrator” on the right. Make sure to choose “Yes” in the “User Account Control” prompt.
In PowerShell, type the following command and press Enter: Enable-MMAgent -mc
When the command is executed, you won’t get a confirmation, you’ll simply be returned to the command line. Close the PowerShell window. Then, restart your PC by opening the “Start” menu, selecting the Power icon, and choosing “Restart.” And you’ve successfully enabled memory compression on your computer.
Leave A Comment?