Situatie
It could be frustrating when you try opening the Group Policy Editor and the “Cannot Find Gpedit.msc” message keeps popping up. The Group Policy Editor is a Microsoft Management Console that performs advanced system configurations without messing with the Registries.
Solutie
What Causes the “Cannot Find Gpedit.msc” Error on Windows?
Usually, the “Cannot Find Gpedit.msc” message appears if the Group Policy Editor is unavailable or cannot be located. However, it can also occur if administrative privileges are not offered or if it’s being interrupted by a third-party application. The error is common in the Home Edition of Windows as the feature isn’t included by default. Some other reasons this error might occur are:
- Corrupted or missing Windows files
- Misconfigured UAC settings
- Outdated or corrupted Windows version
The complete error message reads, “Windows cannot find ‘gpedit.msc’. Make sure you typed the name correctly, and then try again,” accompanied by an OK button at the bottom.
7 Ways to Fix the Gpedit.msc Not Found Error
Now that you know why the error occurs, let’s start with the troubleshooting methods to fix it:
1. Check if the Group Policy Editor is Installed on Your PC
Start by checking if the Group Policy Editor is installed on your PC or not. Remember that Group Policy Editor isn’t included in Windows Home Edition but is available by default on Windows Pro and similar editions. So, if you are using Windows Home Edition, these instructions may not apply to your device.
Open the “Command Prompt” as an administrator, type these commands individually, and hit “Enter”.
FOR %F IN (“%SystemRoot%\servicing\Packages\Microsoft-Windows-GroupPolicy-ClientTools-Package~*.mum”) DO (DISM /Online /NoRestart /Add-Package:”%F”)
FOR %F IN (“%SystemRoot%\servicing\Packages\Microsoft-Windows-GroupPolicy-ClientExtensions-Package~*.mum”) DO (DISM /Online /NoRestart /Add-Package:”%F”)
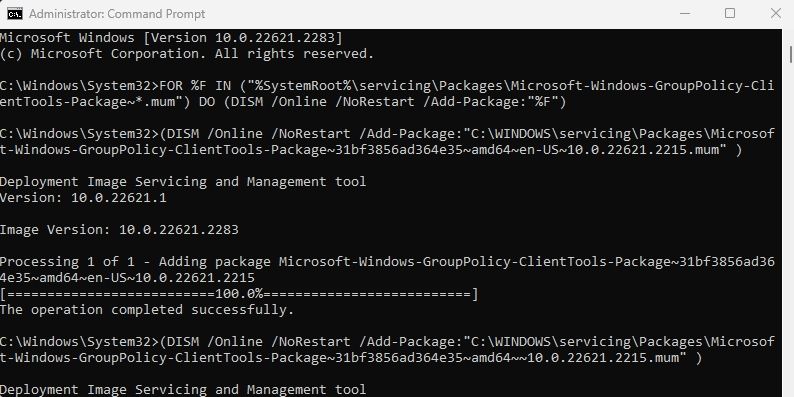
Once the command is done running, restart your device and see if you can open Group Policy Editor.
2. Open Group Policy Editor Using Command Prompt
Using the Command Prompt to access the Group Policy Editor is another way to configure Windows Settings. To do so, open “Command Prompt” with administrator privileges, type “gpedit.msc”, and hit “Enter.”
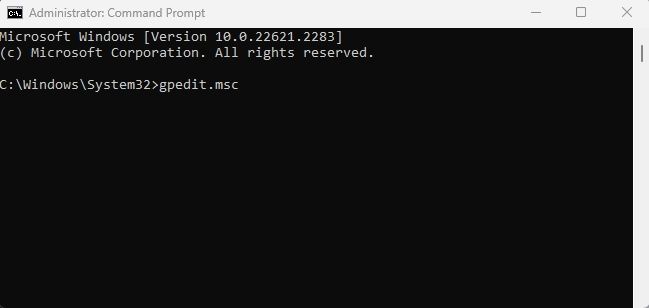
Doing so should open the Group Policy Editor.
3. Create a Shortcut for the Group Policy Editor
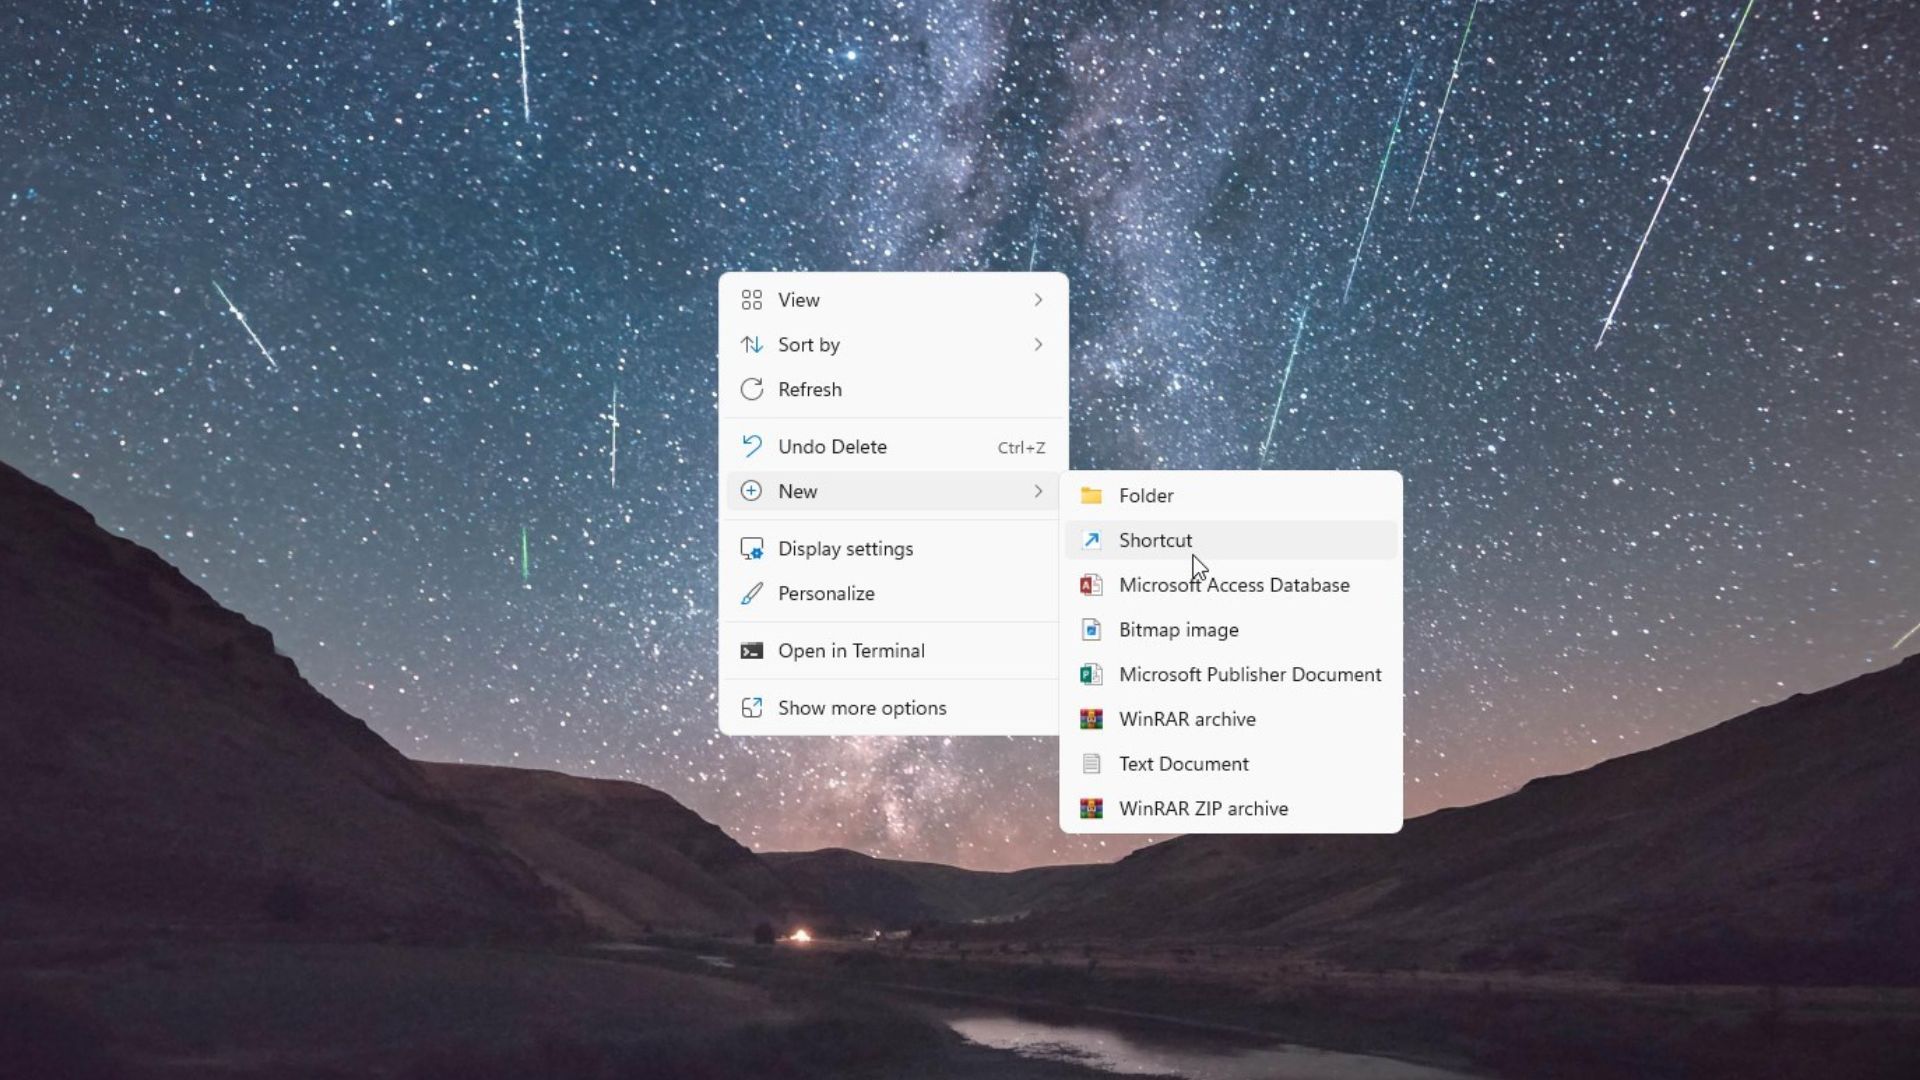
Next, you can create a shortcut on the desktop to open the Group Policy Editor. This will allow you to quickly access Group Policy Editor and fix the cannot find gpedit.msc error. Right-click on any space on your desktop to open the Context menu and select “New” followed by “Shortcut.”
The Create Shortcut window will now open; here, type the location of the item whose shortcut you want to create and click on “Next.”
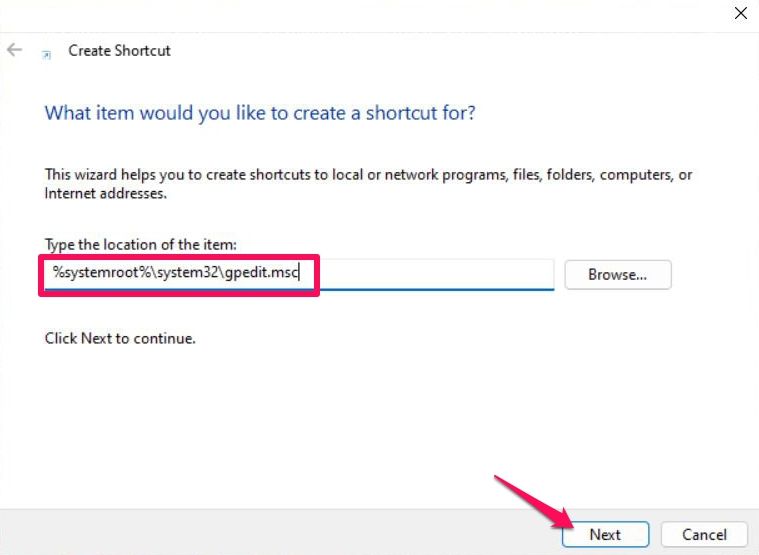
The location of the Group Policy Editor is:
%systemroot%\system32\gpedit.msc
Now, give the shortcut a name that’s easily recognizable, and click “Finish.”
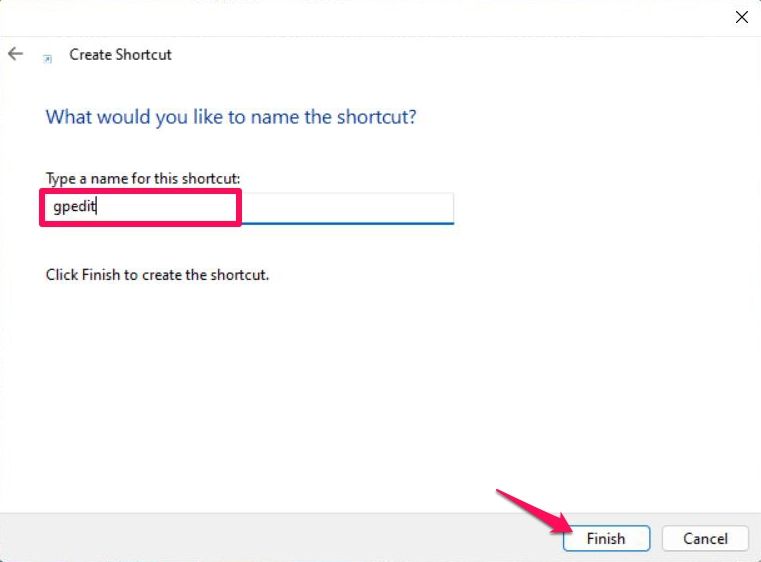
A shortcut icon for Group Policy Editor will now appear on your desktop. Double-click on the icon to access the Group Policy Editor.
4. Run SFC and DISM Scans
Windows files can get corrupted occasionally due to a bug or a recent update. This can cause various issues, including the cannot find gpedit.msc error. Fortunately, you can scan and fix these corruptions by running the SFC and DISM scans.
SFC and DISM are built-in utilities that diagnose and repair issues related to system files, image integrity, and other system components. The System File Checker (SFC) scans and repairs corrupted, missing, and damaged system files. It can be accessed using the Command Prompt.
Click the start menu, search for “Command Prompt”, and click on “Run as Administrator.”
Once the elevated Command Prompt opens, type and run the following command.
sfc/scannow
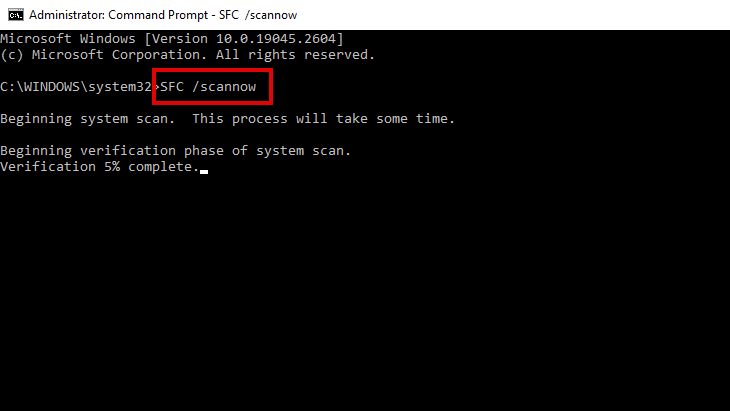
The command might take a few seconds to run and scan for any image corruptions. However, if it doesn’t find any errors, try running the DISM scan.
- To do so, search “Command Prompt” in the Start menu and click on “Run as Administrator.”
- When the elevated Command Prompt opens, type and run these commands one by one.
DISM /Online /Cleanup-Image /CheckHealth
DISM /Online /Cleanup-Image /ScanHealth
DISM /Online /Cleanup-Image /RestoreHealth

Once the scan is complete, try opening the Group Policy Editor and see if the errors fixed.
5. Perform a Clean Boot
If the Cannot Find Gpedit.msc message still keeps troubling you, it may occur due to interruptions from a third-party application. If that’s the case, try performing a clean boot.
- Open the “Start” menu, search “System Configuration”, and hit “Enter.”
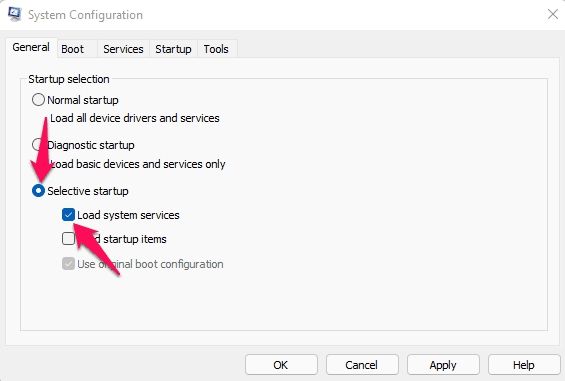
- The System Configuration tab will now open; navigate to the “General” tab and check “Selective Startup” and the “Load System Services” under it.
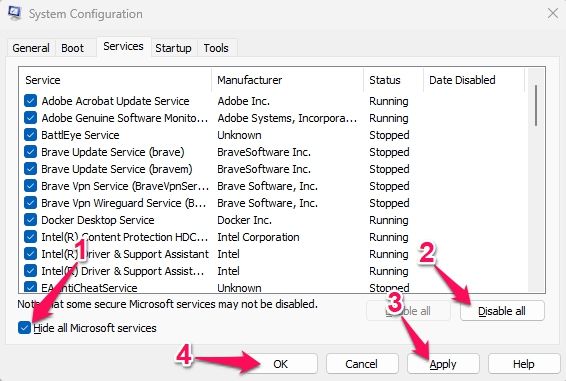
- Next, navigate to the “Services” tab, check the “Hide all Microsoft services” option, and click on “Disable all” at the bottom.
- Click on “Apply” and then on “OK” to save changes.
Now, see if the error appears in the Clean Boot State. If it doesn’t appear in the clean boot mode, enable all Windows processes one by one and search for the culprit. Once it’s been identified, disable or uninstall it.
6. Update Windows to the Latest Version
Windows applications and services may malfunction if Windows isn’t updated. Updating Windows to the latest version can help fix minor bugs and errors.
To update Windows, open Settings > Windows Updates and click “Check for updates.”
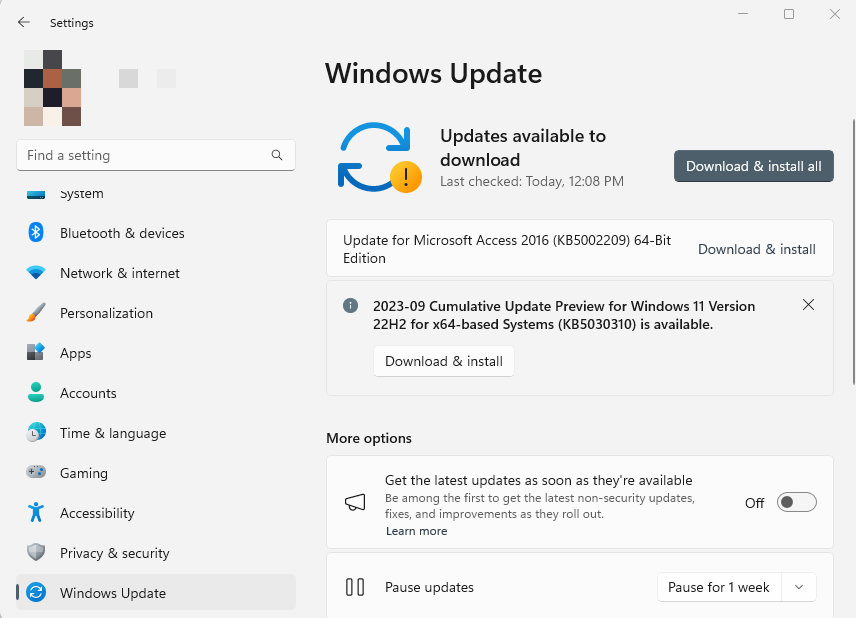
Windows will now automatically start searching for any available updates on the Microsoft servers. If any updates are found, click on “Download & install all” to install them.
However, if the Cannot Find Gpedit.msc error occurs after updating Windows, consider uninstalling the recently installed Windows update.
7. Use Installation Media to Repair Windows
If the Cannot find gpedit.msc error still isn’t fixed, try using the installation media to repair Windows. It’s possible something went wrong when installing Windows. Using the installation media to install Windows can help if that’s the case.
- To create an installation media, download the Windows ISO file and the Media Creation tool from Microsoft’s website.
- Now open “Downloads”; double-click on the downloaded tool, click on “Accept”, and follow the instructions on the screen.
- Once the installation media is created, plug it into your PC, open the BIOS, and select it as the primary boot device.
- Your device will now boot using the installation media; click on “Repair your computer” on the first installation page. Doing so will boot your device into the “Advanced Recovery mode.”
- Here, navigate to Advanced Options > “Troubleshoot” and click on Startup Repair.
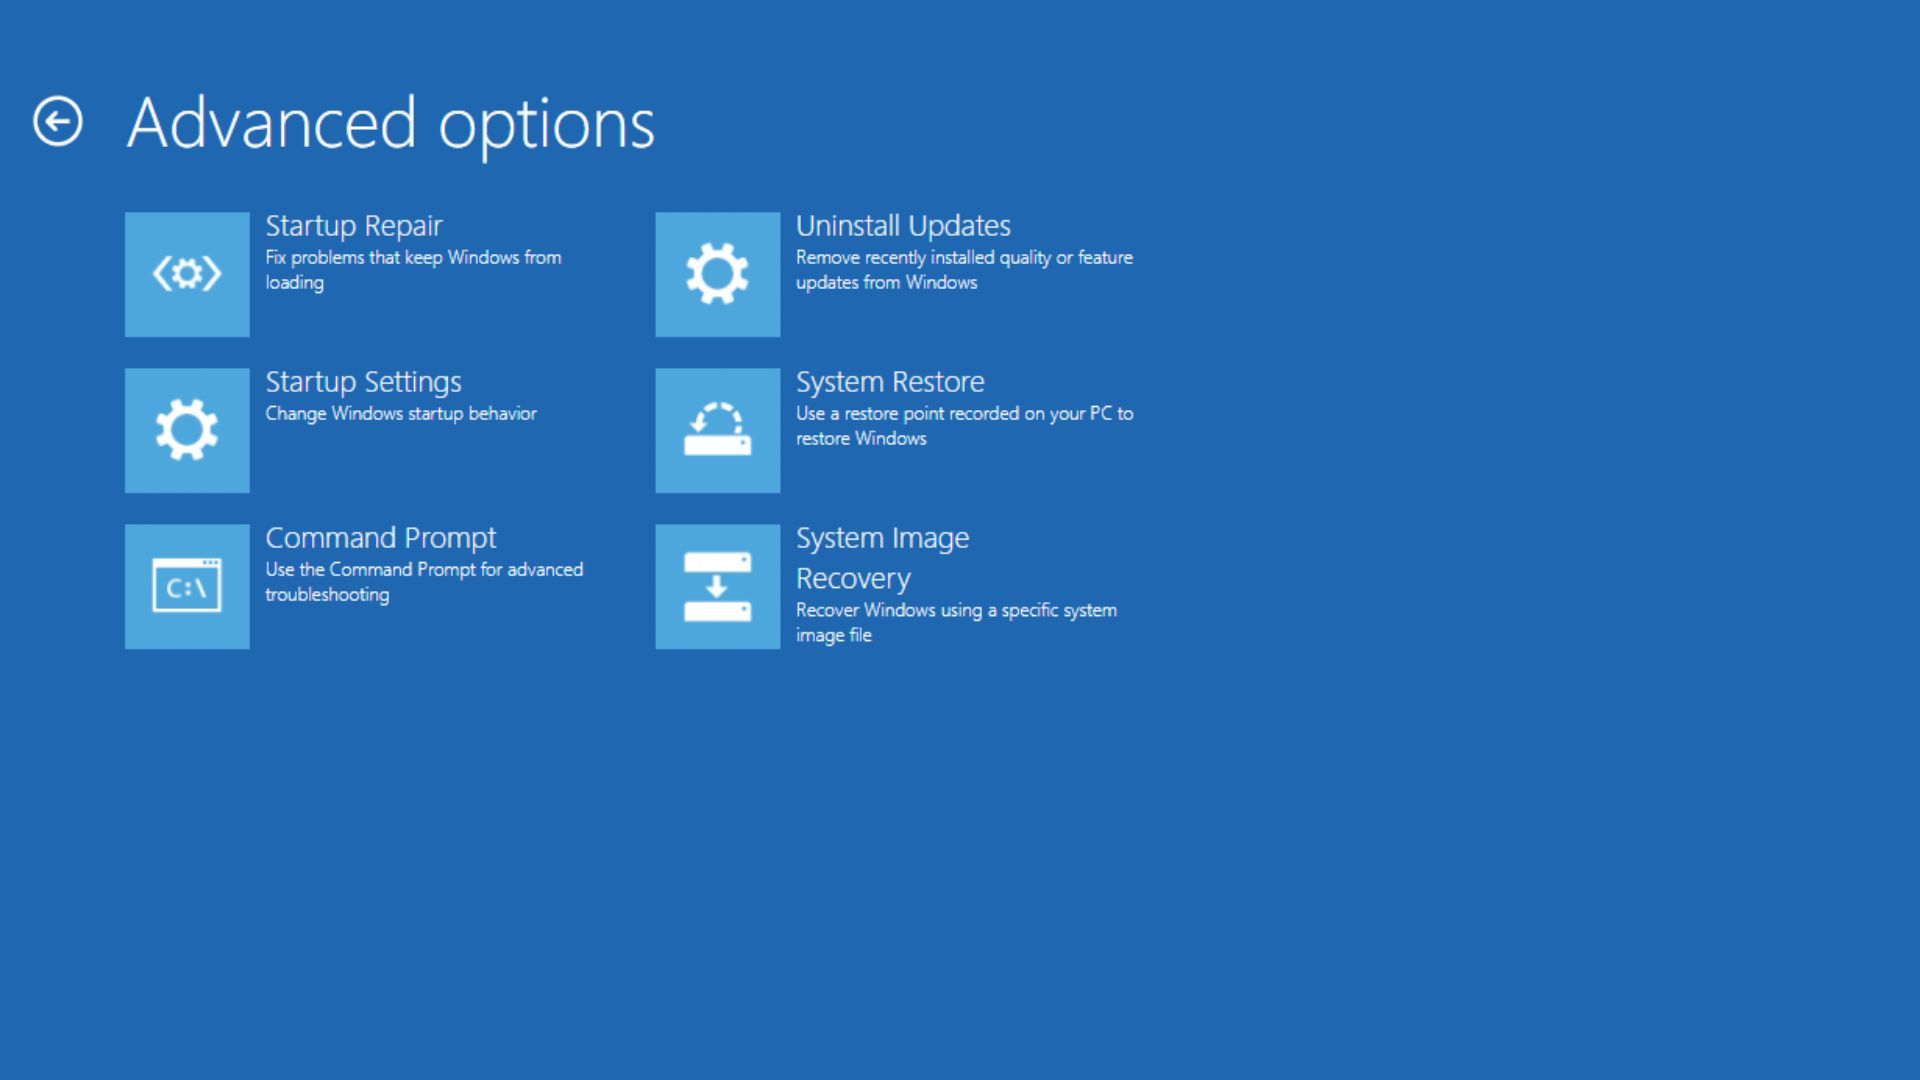
Next, you’ll see the Admin account with its username, select the account, and verify it by entering its password. Windows will now start diagnosing and resolving any issues with your device automatically.

Leave A Comment?