Situatie
Solutie
Pasi de urmat
With the printer powered on, press and hold the  button until Processing… appears. Release the button.

Download and run the setup file.*
Get the Setup File
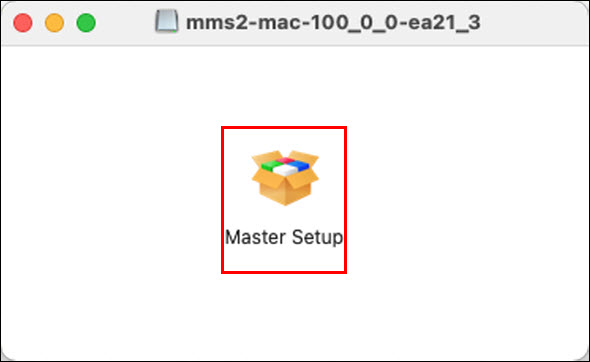
Double-click the Master Setup icon after you have downloaded and opened the setup file.
If you are prompted to open the file, select Open or the appropriate affirmative option.
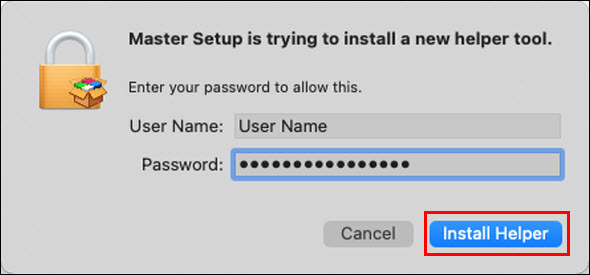
Enter your computer User Name and Password then select Install Helper.
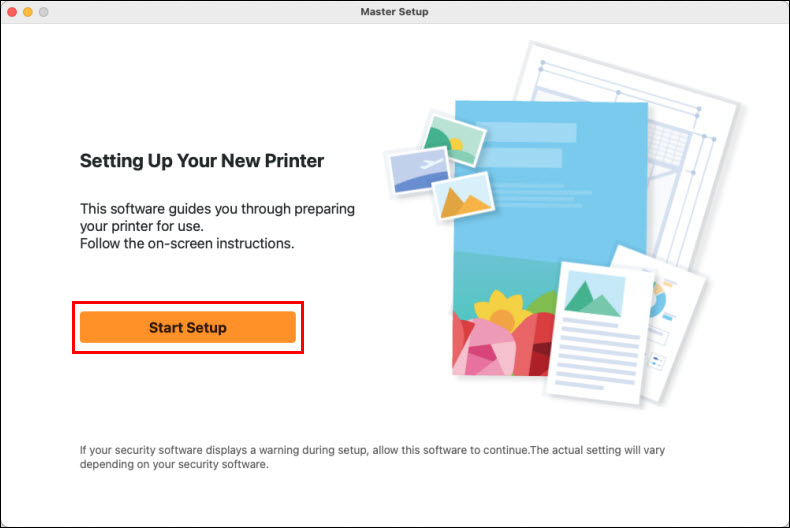
Select Start Setup
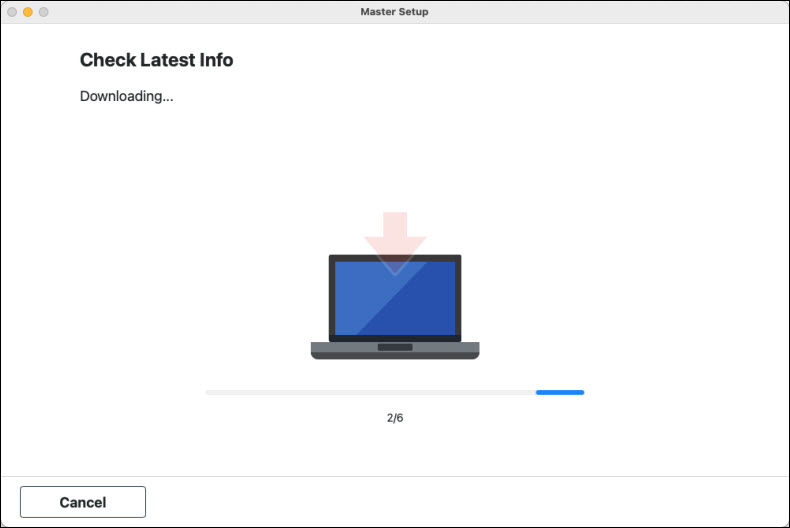
The installer will acquire information on the latest software for the printer. This may take several minutes.
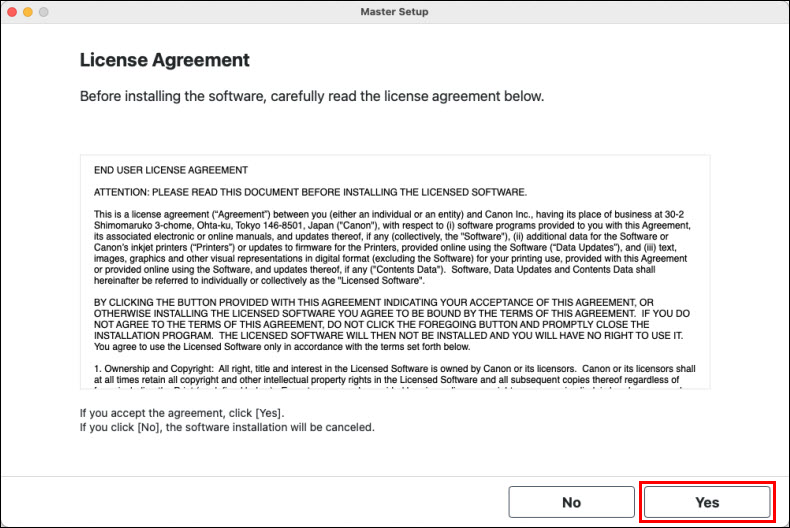
Select Yes on the License Agreement.
Select Agree or Do not agree.
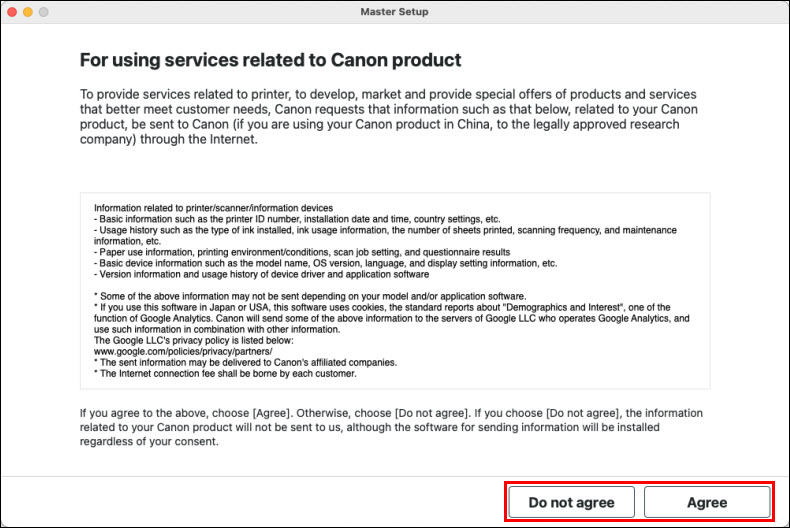
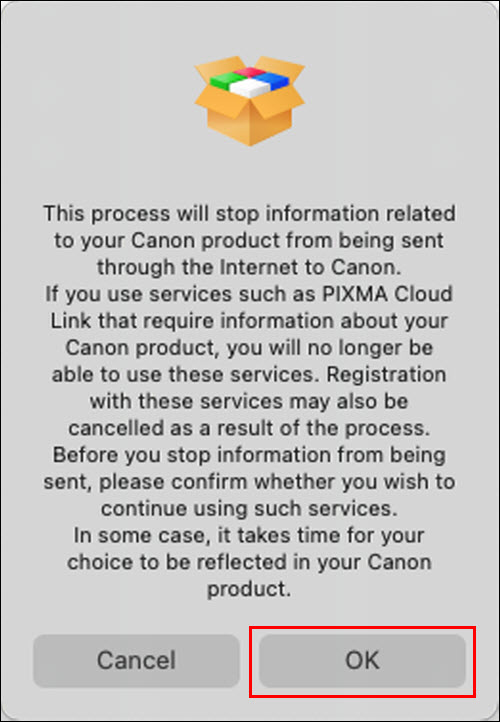
If you select Do not agree, the following message will appear. Select OK to proceed.
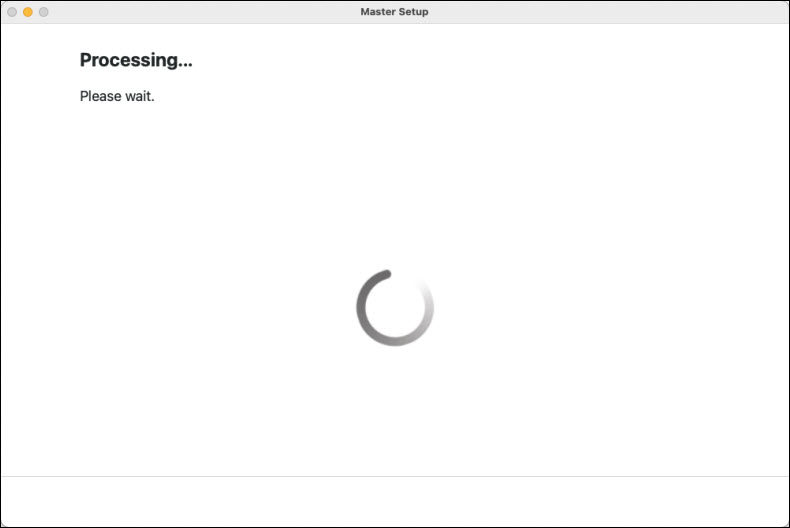
The installer will process for a few moments.
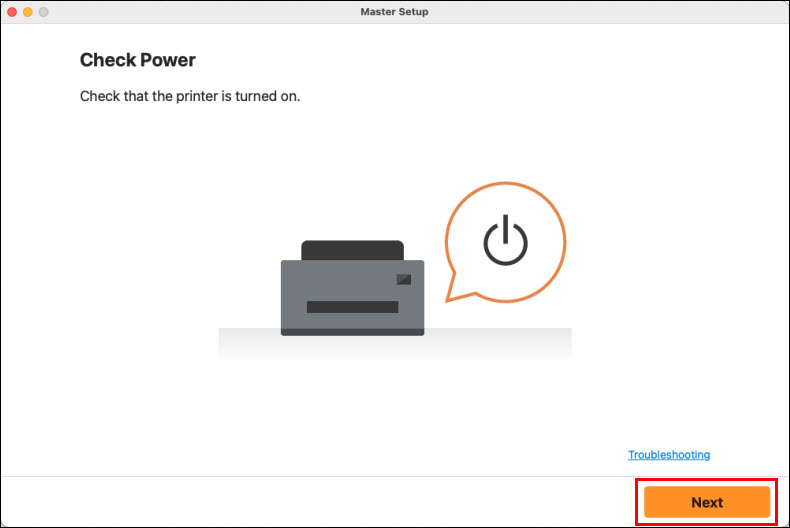
Click Next.
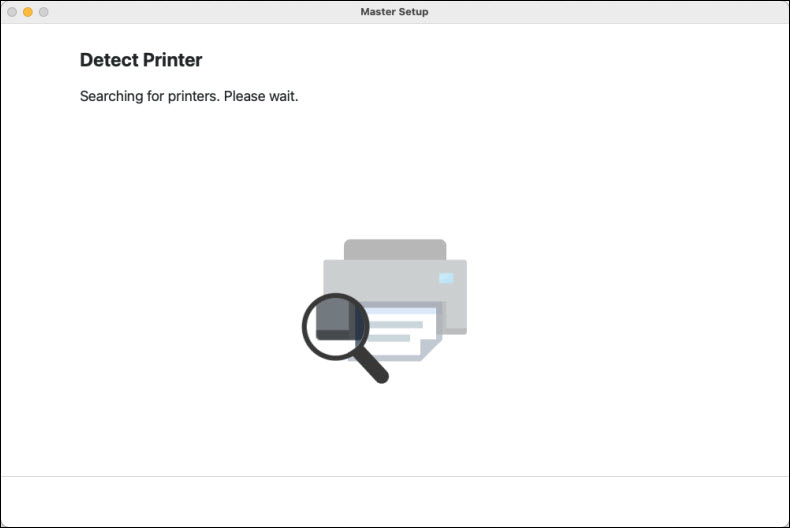
The installer will search for the printer. This may take a few moments.
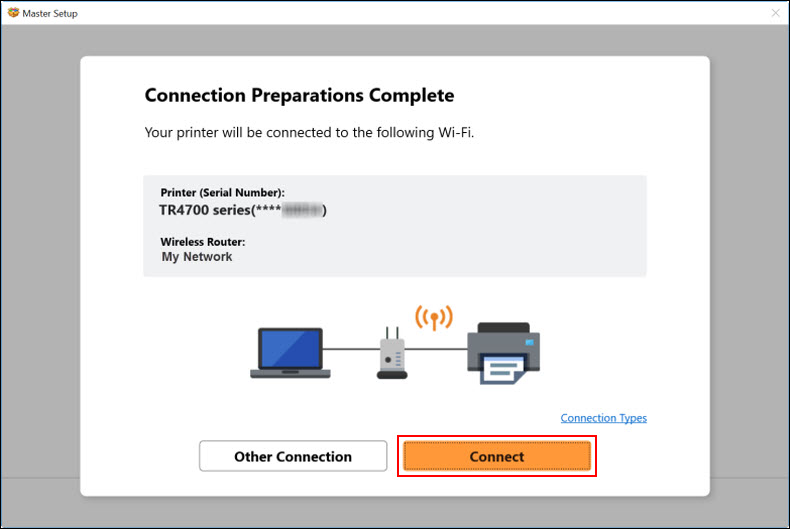
Make sure that the name of your network is shown in the following window. Click Connect to proceed.
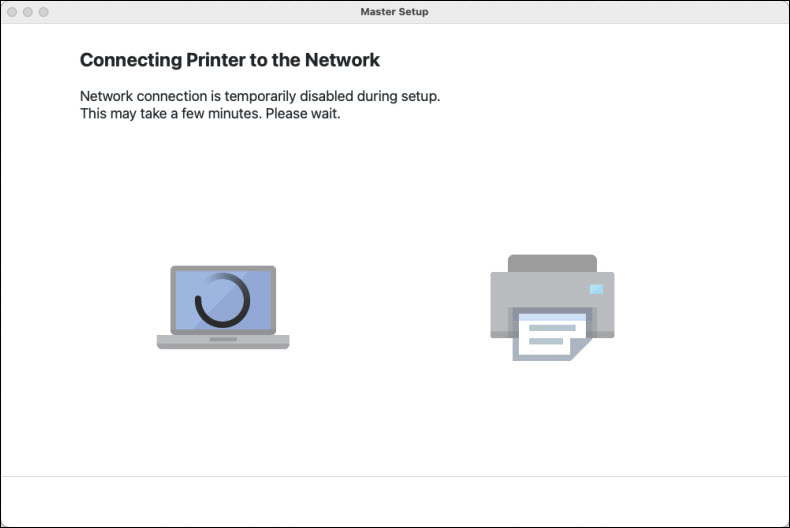
The computer’s wireless network connection will be temporarily disabled. Please wait.
If you see this prompt, click OK.
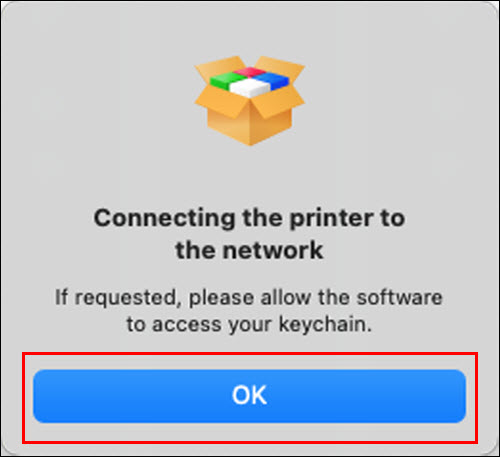
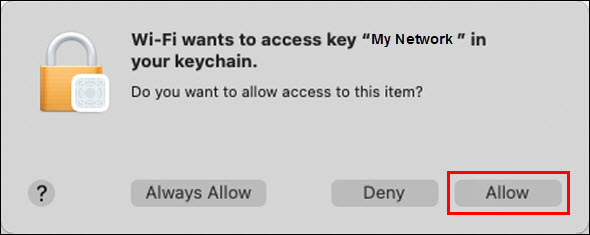
If prompted to allow access to the keychain, select Allow.
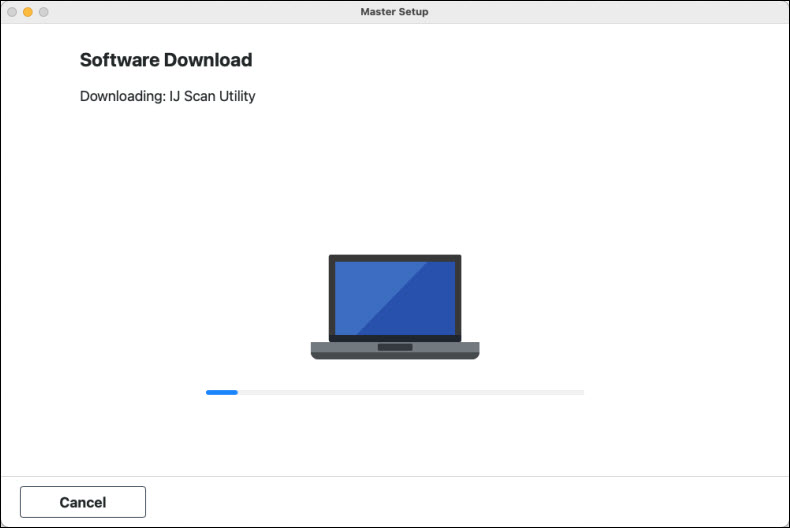
After the connection has been completed, the installer will download and install the IJ Scan Utility. This may take several minutes.
 If your printer is not detected, make sure that the computer has reconnected to the correct network. Also, you may need to temporarily disable any firewall software, or you may need to open blocked ports in the firewall. If your PC is connected to a VPN (Virtual Private Network), temporarily disconnect from the VPN and try the setup again.
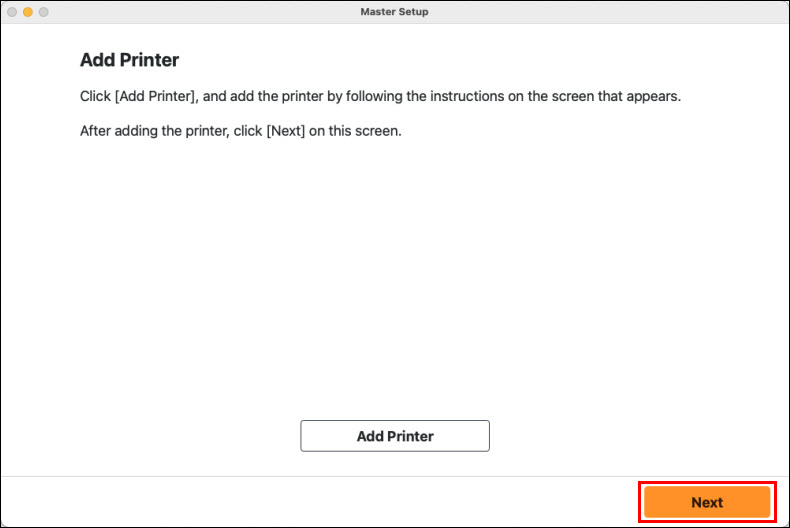
When the Add Printer screen appears, select Add Printer.

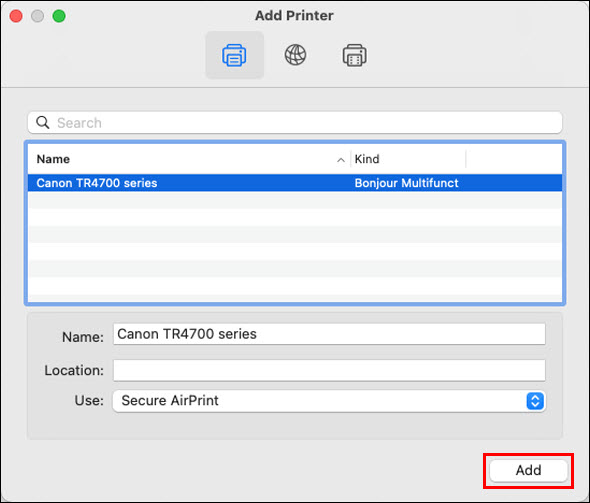
The Add Printer dialog will open. Select the printer, make sure that AirPrint or Secure AirPrint is selected for Use:, then click Add.
The Add Printer window will reappear. Click Next.
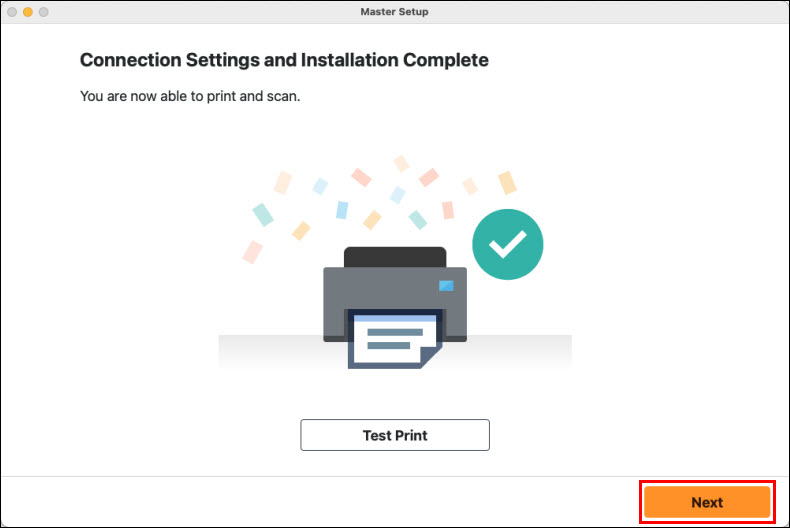
After processing for a few moments, the installation will be complete. Click Next to proceed. If desired, you can click Test Print to print a test page.
Leave A Comment?