Situatie
Windows 10 Home users don’t have much control over what updates are pushed to their PCs by Microsoft. However, users can choose when to reboot their computers or devices in order to install the pending operating system updates automatically. In Windows 10 Creators Update there are two small yet quite helpful features – active hours and custom restart times – that control when Windows 10 reboots and updates itself. Read on to see where you’ll find these settings and how to configure them:
NOTE: The features shared in this article apply to Windows 10 with Creators Update or newer. Windows 10 Creators Update is available for free, for all Windows 10 users, as of April 2017.
Solutie
Pasi de urmat
How to set Active Hours so that Windows 10 doesn’t restart while you’re working
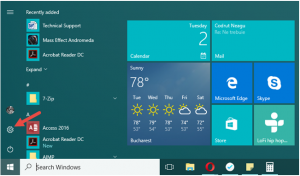
The first thing you must do is open the Settings app. A quick way to do that is to click or tap on the Settings icon from the Start Menu. There are also other ways, and we covered all of them here: 9 ways to open the Settings app in Windows 10.
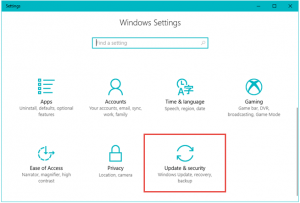
2. In the Settings app, click or tap on the Update & security category.
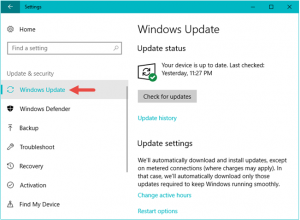
If it’s not already selected, click or tap Windows Update in the column on the left.
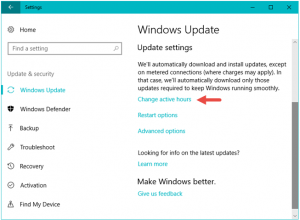
3. On the right side of the window, you’ll find all the settings that govern the way Windows 10 updates itself. Amongst them, you’ll also find an option called “Change active hours.” Click or tap on it.
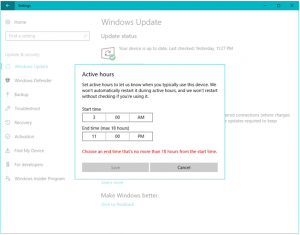
4. The Settings app will display a dialog in which you’re told that you can “set active hours to let us [Microsoft] know when you typically use this device. We [Microsoft] won’t automatically restart it during active hours, and we won’t restart without checking if you’re using it”.
The meaning of this is obvious: you can set a time frame in which you usually work on your Windows 10 computer or device, and the operating system will make sure that it won’t interrupt you during that time by doing an unexpected system reboot.
Enter the Start time and the End time of your usual working hours and then click or tap on Save to apply them.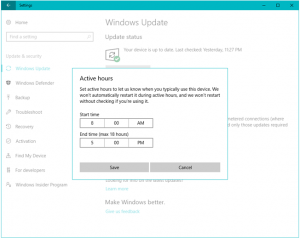
5. Note that Windows 10 doesn’t let you configure an Active hours timeframe that’s longer than 18 hours. If you do try that, you’ll get a message telling you that you must “Choose an end time that’s no more than 18 hours from the start time”.
How to set a custom restart time for updating Windows 10 only after you’ve done all your work
Although configuring Active hours is quite useful for daily activities, there may be times when you’ve got a tight deadline to meet, and you must work after hours. In such situations, restarting your computer to update Windows 10 would be even more unproductive than on other days. That’s why Windows 10 also gives you the option to override Active hours and schedule a custom restart time for installing updates. To configure the custom restart time, in the Settings app, go to “Update & security -> Windows Update.”
On the right side of the window, right under the “Change active hours” link, you’ll find an option called “Restart options.” Click or tap on it.
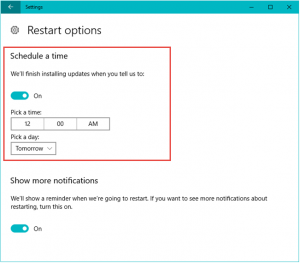
7. The Settings app shows a screen with Restart options, where you can configure Windows 10 to “Schedule a time” and say when it can reboot and install updates. By default, this time is not set and the option is set Off. However, when there are some updates already downloaded on your Windows computer or device, the operating system waits for the Active hours to end so that it can automatically restart and install the updates. If you don’t want that, you can come here and enable the custom restart time to a day and a time of your choosing but which must be during the next seven days. This scheduled restart time will override the active hours.
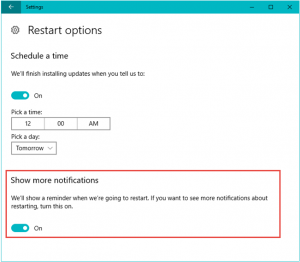
8. Additionally, you can also ask Windows 10 to give you a reminder when the time you’ve scheduled for rebooting and installing the updates is getting near. To receive this notification, turn on the last switch on the page. It’s the one that says “We’ll show a reminder when we’re going to restart. If you want to see more notifications about restarting, turn this on.”.
That’s it!

Leave A Comment?