Situatie
If you just got a Chromebook, you’ve probably noticed that it’s a bit different from most laptops. One of these differences is the absence of the Print Screen (PrtSc) key that’s mostly found on Windows laptops, whose function is to capture screenshots.
Chromebooks don’t have a dedicated screenshot key. Instead, the function is built into the Chrome operating system. However, the process is still fairly simple and in some ways similar to taking screenshots on a Windows PC or Mac, except for a few keyboard shortcut differences, and other steps.

Whether you want to grab the entire screen or a specific portion of the window, we’ll walk you through the various ways to take a screenshot on Chromebook, to produce the images you need.
Solutie
Pasi de urmat
Using The Show Windows Key
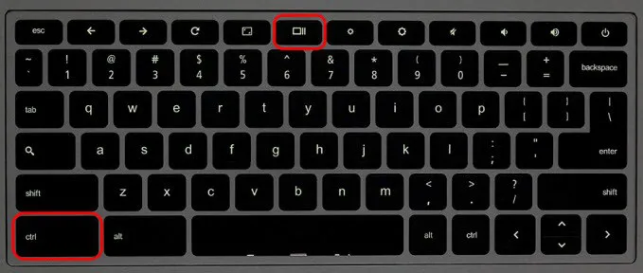
Before you go on your Chromebook and take screenshots using any of these methods, you need to familiarize yourself with a specific key on the keyboard called the Show Windows key. In some cases, it’s referred to as the Overview key or Windows Switcher key, but Google describes it as the Show all windows in Overview mode key.
For this guide, we’ll use Show Windows. This key is located just above the number row, between the full screen and brightness down buttons on your keyboard. It looks like a little rectangle followed by two vertical lines on its right side.

There are different key combinations used with the Show Windows key to capture a full or partial screenshot. The keys referenced in the steps below may appear differently on your Chromebook’s keyboard depending on the model and manufacturer.
For a full screengrab, press and hold down the CTRL+Show Windows key. You’ll see a notification window at the bottom right corner of the screen, indicating that the screenshot was successfully taken and has been saved.
To capture a partial screenshot or specific region on your screen, press and hold down the CTRL+SHIFT+Show Windows key at the same time.
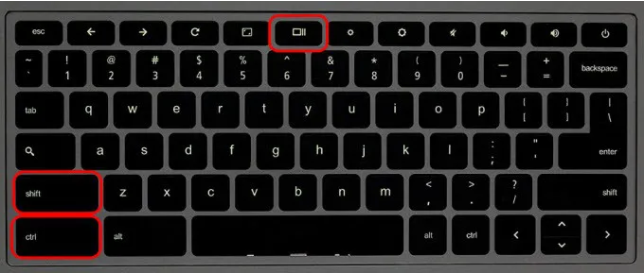
The mouse cursor will change to a crosshair icon temporarily so click and drag to highlight the area you’d like to capture. Once you’ve selected it, release the trackpad to capture the screenshot.
Once again, a notification window will appear at the lower right corner of your screen indicating the process was successful and the screenshot has been saved.
Using The Power & Volume Down Buttons
If your Chromebook is a two-in-one with a 360-degree hinge, you can take screenshots in tablet mode using the power and volume down buttons, as you would on an Android smartphone or tablet.
The keyboard is usually inactive in tablet mode, so the Show Windows and CTRL key method won’t work.
To take a screenshot in tablet mode, press and hold down the power and volume down buttons simultaneously, and it’ll capture an image of the entire screen.
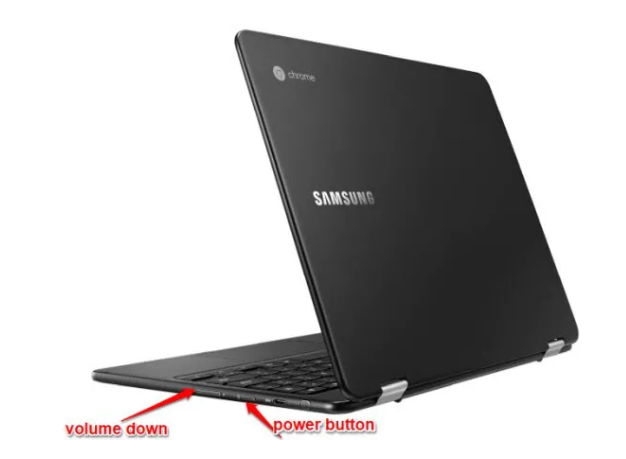
If you want a partial screenshot, you’ll have to crop the full screenshot you just captured, and save it. There’s no option for capturing specific regions of your screen in tablet mode.
Using a Stylus Pen
Some Chromebooks like Pixelbook or Samsung Chromebook Plus come with a stylus, which you can use to capture a full or partial screenshot while in tablet mode, and annotate it if you want.
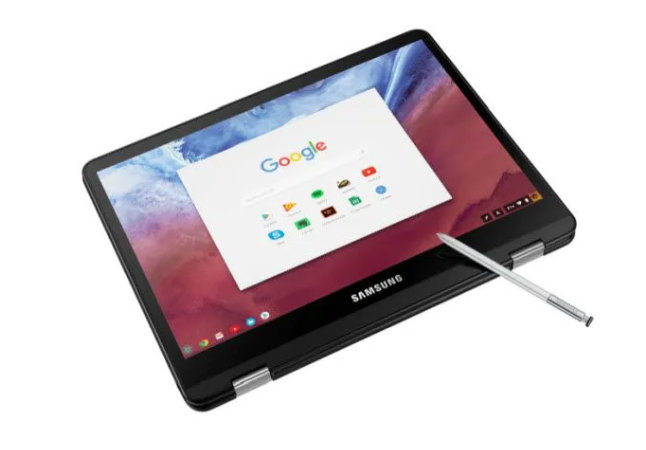
A menu of tools will appear in the bottom right side of the screen. From here, you can capture the part of the screen you want using the pen to draw or select the region.
Using An External Keyboard

You can plug in an external keyboard into your Chromebook, or use a Chrome-powered desktop (Chromebox) and use it to take screenshots.
External keyboards don’t necessarily use Chrome’s dedicated button row, but their function keys do the same job. For example, the F5 button works as the Show Windows key on standard function keyboards, in which case you’ll use the CTRL+F5 command to take a full screenshot and CTRL+SHIFT+F5 for partial screenshots.
Leave A Comment?