Situatie
The Check Disk utility, also known as chkdsk (since that’s the command you use to run it) scans through your entire hard drive to find and fix problems. It’s not a terribly exciting tool — and running it can take some time — but it can really help prevent bigger problems and loss of data in the long run. Chkdsk performs a couple of functions, depending on how it’s run:
- Chkdsk’s basic function is to scan the integrity of the file system and file system metadata on a disk volume and fix any logical file system errors that it finds. Such errors might include corrupt entries in a volume’s master file table (MFT), bad security descriptors associated with files, or even misaligned time stamp or file size information about individual files.
Chkdsk can also optionally scan every sector on a disk volume looking for bad sectors. Bad sectors come in two forms: soft bad sectors, which can occur when data is written badly, and hard bad sectors, which can occur because of physical damage to the disk. Chkdsk attempts to fix these problems by repairing soft bad sectors and marking hard bad sectors so they won’t be used again.
That may all sound very technical, but don’t worry: you don’t need to understand the ins and outs of how it works to know when you should run it.
If chkdsk does encounter problems — especially hard bad sectors — that it can’t repair, data can become unusable. It’s not very likely, but it can happen. For that reason, you should always make sure you have a good backup routine in place and back up your PC before running chkdsk.
The chkdsk tool works pretty much the same in all versions of Windows. We’ll be working with Windows 10 in this article, so the screenshots may look slightly different if you’re using Windows11, but chkdsk performs the same, and we’ll point out where any procedures differ. We’ll also talk about running it from the Command Prompt, in cases where you can’t even boot into Windows.
Solutie
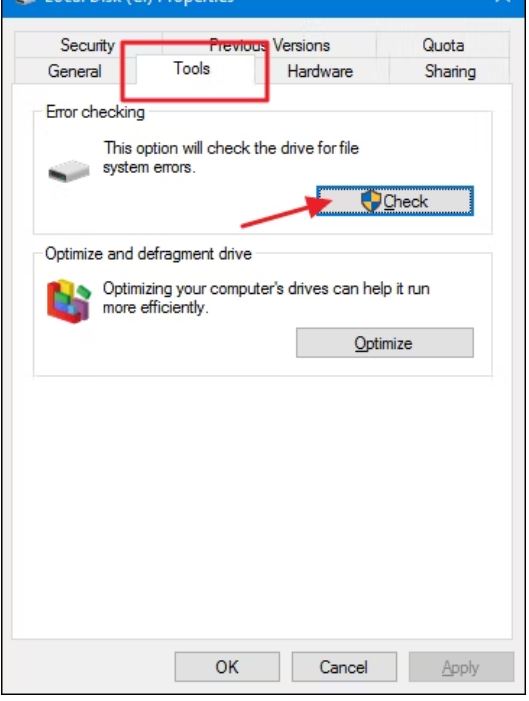
Running the Check Disk tool from the Windows desktop is easy. In File Explorer, right-click the drive you want to check, and then choose “Properties.”

In the properties window, switch to the “Tools” tab and then click the “Check” button. In Windows 7, the button is named “Check Now.”
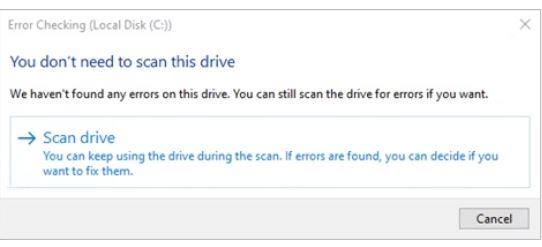
In Windows 10 and Windows 11, Windows may inform you that it hasn’t found any errors on the drive. You can still perform a manual scan by clicking “Scan drive.” This will first perform a scan without attempting any repairs, so it will not restart your PC at this point. If the quick disk scan reveals any problems, Windows will present that option to you. If you want to force it, though, you’ll have to use the command prompt to run chkdsk — something we’ll be covering a bit later in the article.
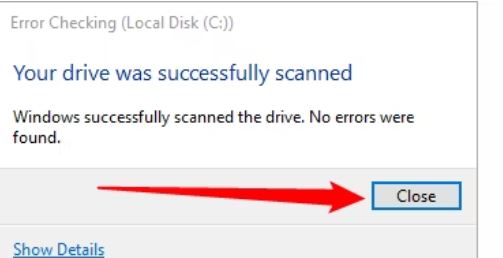
After Windows scans your drive, if no errors were found, you can just click “Close.”
How to Check Up On or Cancel a Scheduled Disk Check
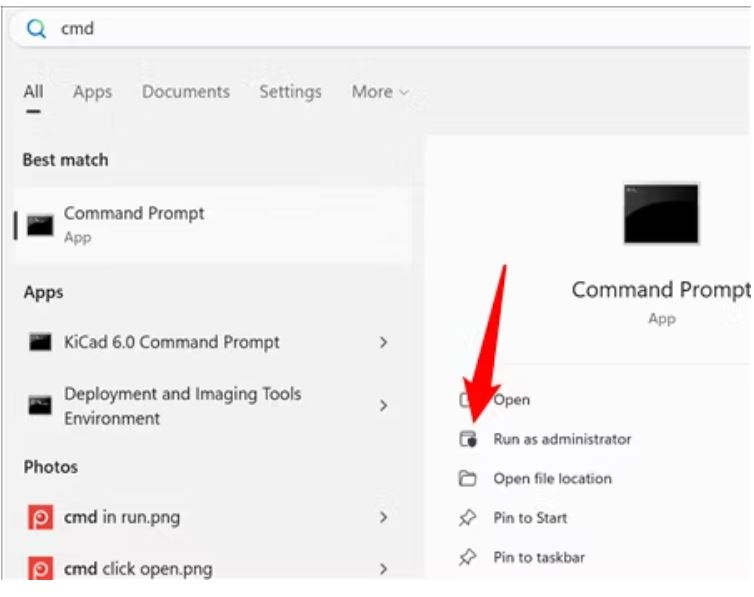
If you’re not sure whether a disk check is scheduled for your next restart, it’s easy enough to check at the Command Prompt. You’ll need to run Command Prompt with administrative privileges. Open the Start Menu and then type “cmd.” Right-click the result and then choose “Run as administrator.”
Note:
This works identically in Command Prompt, PowerShell, or Windows Terminal as long as it is launched as administrator.
At the prompt, type the following command — substituting the drive letter if necessary.
chkntfs c:
If you have scheduled a manual check of the drive, you’ll see a message to that effect.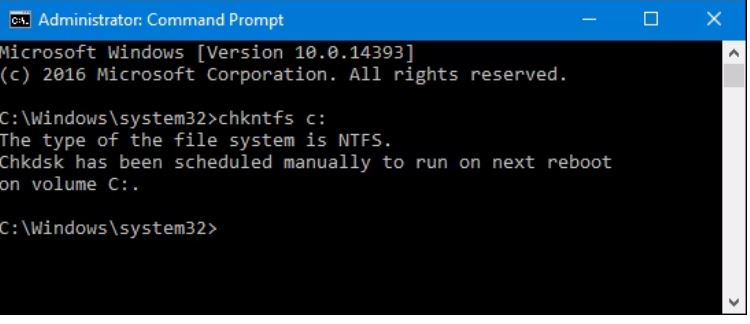
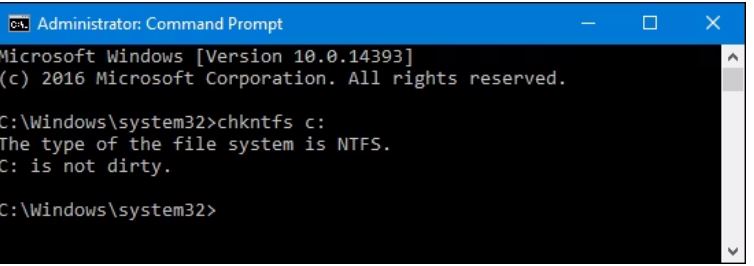
If Windows has scheduled an automatic check of the drive, you’ll see a message letting you know that the volume is dirty, which just means it’s been flagged with potential errors. This serves as indication that Windows will run a check the next time it starts. If no automatic scan is scheduled, you’ll just see a message letting you know that the volume is not dirty.
If a disk check is scheduled for the next time you start Windows, but have decided you don’t want the check to happen, you can cancel the check by typing the following command:
chkntfs /x c:
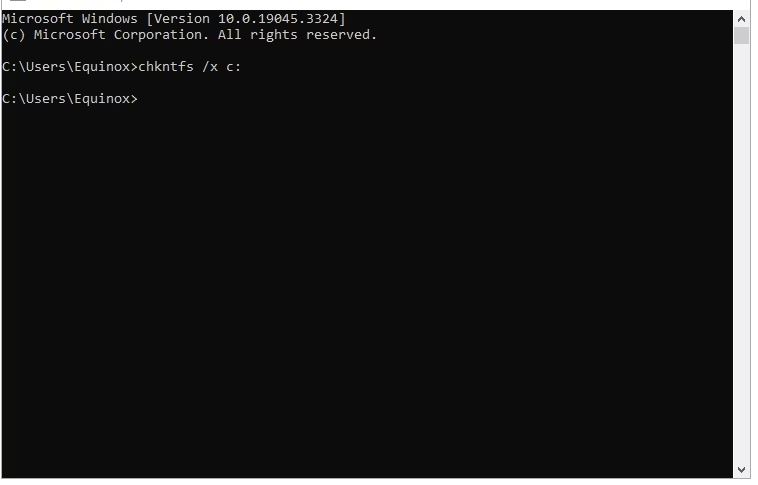
You won’t get any kind of feedback that the scan has been canceled, but it will have been. This command actually excludes the drive from the chkdsk command for the next start. If you do restart to find that a scan has been scheduled, Windows is also kind enough to provide you with about ten seconds to skip the scan if you want to.

Important Chkdsk Commands
There are, of course, other parameters you can use with chkdsk . So, for the sake of completeness — and your geeky enjoyment — here they are:
- C:\>chkdsk /? Checks a disk and displays a status report.
- CHKDSK [volume[[path]filename]]] [/F] [/V] [/R] [/X] [/I] [/C] [/L[:size]] [/B]
- volume Specifies the drive letter (followed by a colon), mount point, or volume name.
- filename FAT/FAT32 only: Specifies the files to check for fragmentation.
- /F Fixes errors on the disk.
- /V On FAT/FAT32: Displays the full path and name of every file on the disk. On NTFS: Displays cleanup messages if any.
- /R Locates bad sectors and recovers readable information (implies /F).
- /L:size NTFS only: Changes the log file size to the specified number of kilobytes. If size is not specified, displays current size.
- /X Forces the volume to dismount first if necessary. All opened handles to the volume would then be invalid (implies /F).
- /I NTFS only: Performs a less vigorous check of index entries. /C NTFS only: Skips checking of cycles within the folder structure.
- /B NTFS only: Re-evaluates bad clusters on the volume (implies /R) /scan NTFS only: Runs an online scan on the volume
- /forceofflinefix NTFS only: (Must be used with “/scan”) Bypass all online repair; all defects found are queued for offline repair (i.e. “chkdsk /spotfix”).
- /perf NTFS only: (Must be used with “/scan”) Uses more system resources to complete a scan as fast as possible. This may have a negative performance impact on other tasks running on the system.
- /spotfix NTFS only: Runs spot fixing on the volume /sdcleanup NTFS only: Garbage collect unneeded security descriptor data (implies /F).
- /offlinescanandfix Runs an offline scan and fix on the volume.
- /freeorphanedchains FAT/FAT32/exFAT only: Frees any orphaned cluster chains instead of recovering their contents.
- /markclean FAT/FAT32/exFAT only: Marks the volume clean if no corruption was detected, even if /F was not specified.
Leave A Comment?