Situatie
Mac computers have a built-in application for managing disks, helpfully called Disk Utility. It can rename, format, and wipe any connected drives, as well as create and restore backup images. It’s a great option for wiping drives, no matter if it’s external storage or your Mac’s internal drive.
Solutie
How to Wipe an External Drive
First, open Disk Utility on your Mac. You can search for it with Spotlight (click the search button in the menu bar or use the Command+Spacebar keyboard shortcut) or the search bar in Launchpad. Disk Utility can be opened in the Finder from Applications > Utilities > Disk Utility.
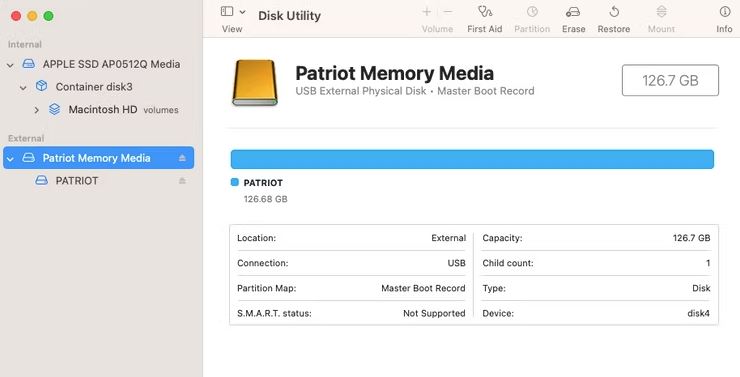
Next, connect the drive you want to erase, if you haven’t already. You also need the sidebar visible to see all your connected drives. If the sidebar is hidden, click the View button and select “Show sidebar.”
You need to select the drive in Disk Utility, not one of the partitions on the drive. The drive is listed in the sidebar above any partitions as the top-level item. For example, in the below screenshot, “Patriot Memory Media” the drive (and is selected) and “PATRIOT” is a FAT32 partition on the drive. If you perform a wipe on a partition instead of the drive, you may not erase all the data.
With the drive selected, click the Erase button at the top of the window. Disk Utility will open a popup menu allowing you to set the new drive name, file system/format, and the partition scheme. The available options will vary depending on the drive type and size.
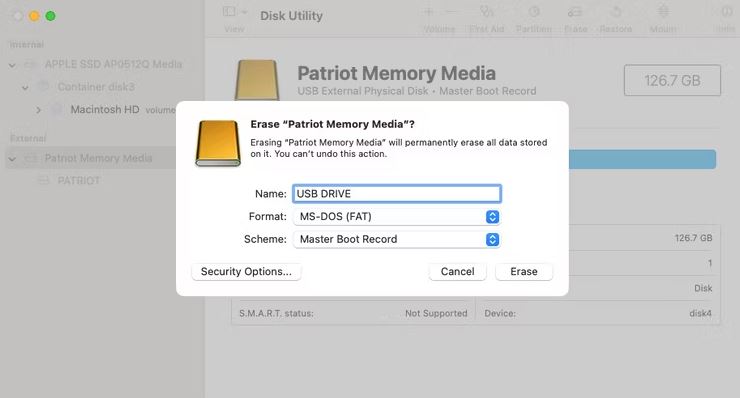
If this is a USB drive, SD card, or other storage that needs to be accessible on non-Apple platforms, set the scheme to Master Boot Record (or GUID if that is unavailable) and the format to MS-DOS FAT (or exFAT if that one is not available). You may need to use exFAT if the drive is too large or if you want to use files larger than 4GB, but some devices can’t read exFAT drives. Mac OS Extended format is only readable/writable by Mac computers.
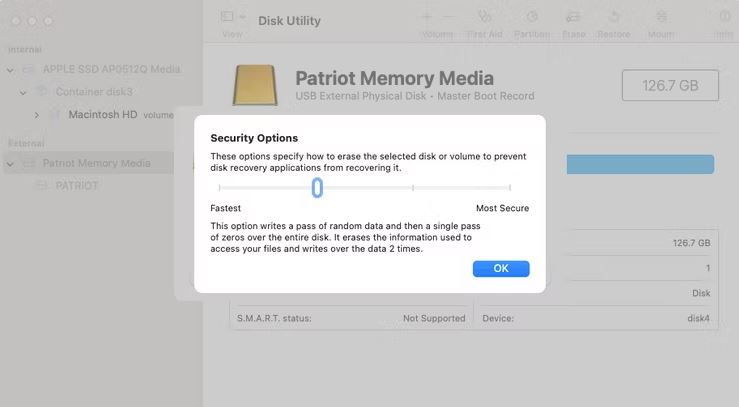
f you want to securely wipe the drive so the files can’t be recovered, click the “Security Options” button in the popup. This will show all available wipe options, from not zeroing out the drive at all (potentially allowing recovery tools to read the erased data) to writing over the entire drive seven times for maximum security. Every wipe adds more time to the process, especially for spinning mechanical disks and flash drives. In most cases, the second option (2x write over) is enough.
When you’re ready, click the Erase button to start the process.
Leave A Comment?