Situatie
Locate Azure AD Connect server
Before you start, you must know on which server the Azure AD Connect software is installed. That’s because you must sign in on the server to proceed further with disabling synchronization and uninstalling the software. Read the article How to find Azure AD Connect server.
Solutie
Pasi de urmat
Turn off directory synchronization
Disable directory synchronization in two places:
- On-premises AD
- Azure AD
Important: If you did migrate Azure AD Connect to a new server and now want to uninstall Azure AD Connect, you should skip the steps to turn off directory synchronization because you need that. Only follow the steps at the end to uninstall Azure AD Connect.
Turn off directory synchronization on-premises AD
- Sign in to the Windows Server, where you have Azure AD Connect installed and configured.
- Start PowerShell as administrator and run Import-Module ADSync. Follow with the Set-ADSyncScheduler cmdlet to stop the synchronization.
Check that on-premises directory synchronization is disabled and shows the value False.
Turn off directory synchronization Azure AD
In the same Windows PowerShell window, install and connect to Azure AD.
Turn off directory synchronization and convert your synchronized users to cloud-only. Run the Set-MsolDirSyncEnabled cmdlet to stop the synchronization.
Check that Azure AD directory synchronization is disabled and shows the value False.
Uninstall Azure AD Connect from server
To uninstall Azure AD Connect from server, follow the below steps:
- Click on Start > Control Panel > Programs and Features.
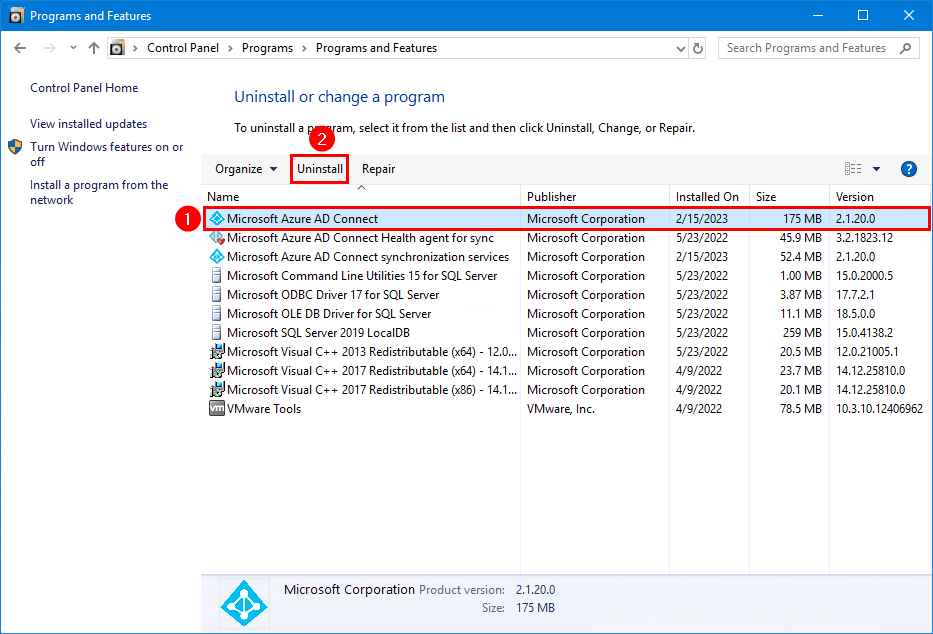
- Click on Microsoft Azure AD Connect and press on Uninstall.
Note: The wizard will uninstall the supporting components: Microsoft Azure AD Connect Health agent for sync, Microsoft Azure AD Connect synchronization services, and Microsoft SQL Server.
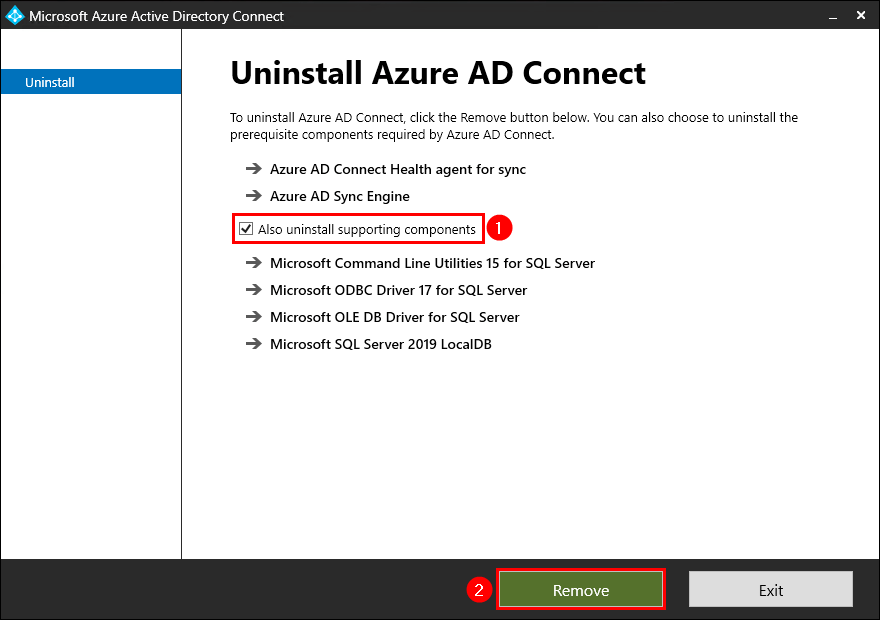
- The Uninstall Azure AD Connect wizard shows up. Check the checkbox Also uninstall supporting components. Click Remove.
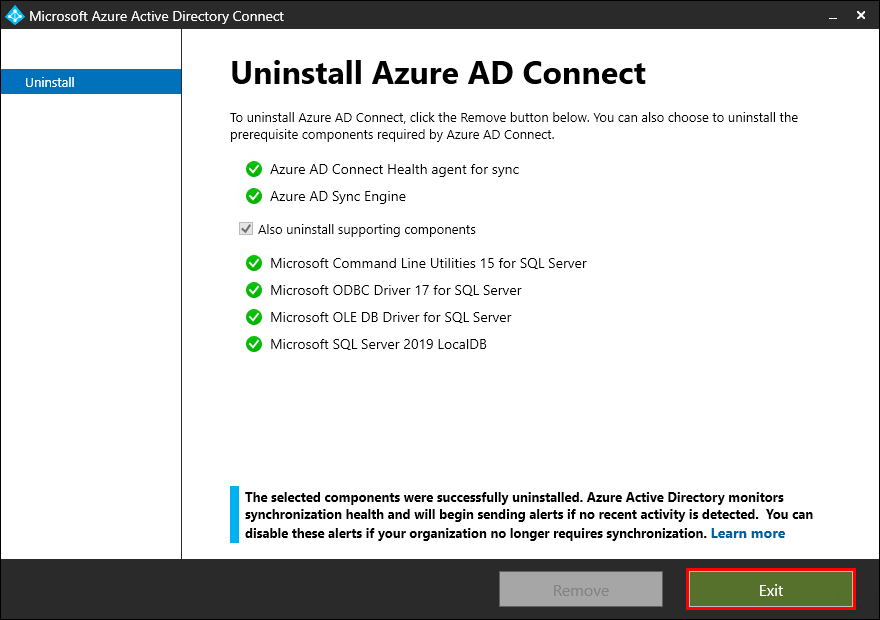
- Give it a couple of minutes, and you will see the green checkmarks. Azure AD Connect is successfully uninstalled. Click Exit.
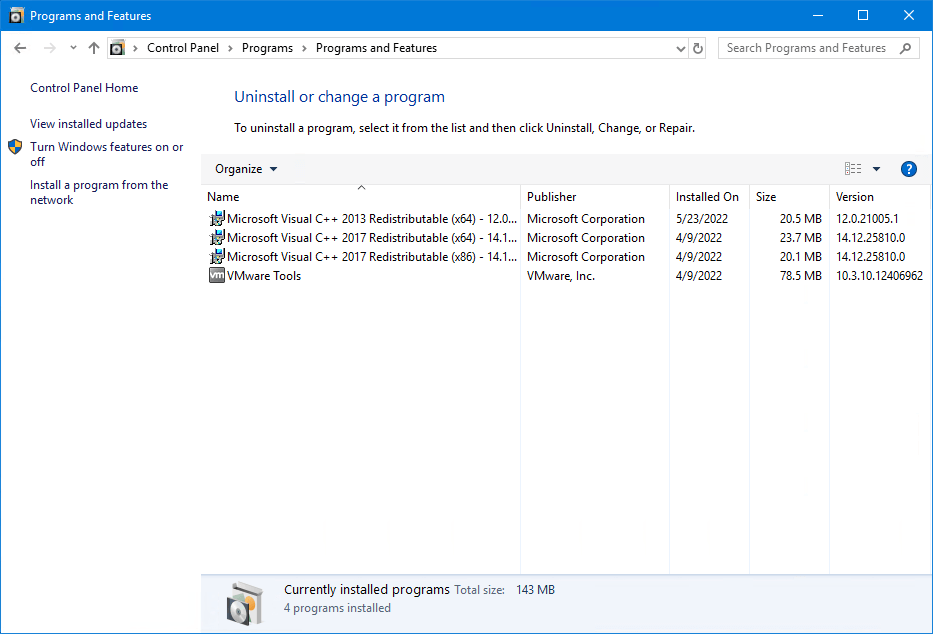
- Verify that Azure AD Connect is removed from the Programs and Features list.
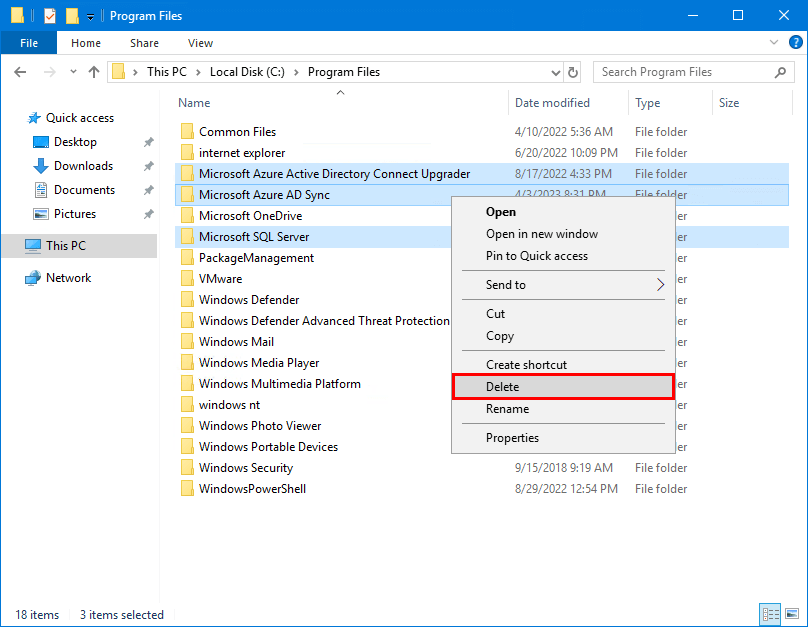
- Start File Explorer. Go to C:\Program Files. Right-click Microsoft Azure AD Sync folder and click on Delete to remove Microsoft Azure AD Sync folder.
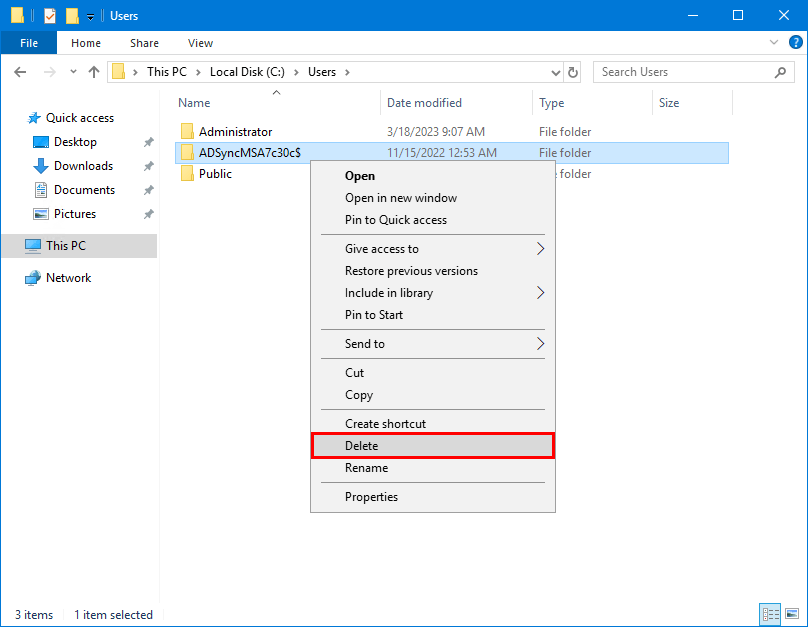
- In File Explorer, navigate to the C:\Users folder. Remove the ADSyncMSA_ folders. You may see folders with the prefix AAD_. If so, remove these — more information about the ADSync service account.
You learned how to uninstall Azure AD Connect. First, disable directory synchronization in Active Directory on-premises and Azure AD. After that, go through the Azure AD Connect uninstall wizard. As of last, delete Azure AD Connect folders in File Explorer. You can always reinstall Azure AD Connect on the same server.

Leave A Comment?