Probleme in aplicatia Cisco WebeX meeting cu microfonul
Uneori Windowsul (din motive de Securitate) opreste microfonul pentru WebeX.
[mai mult...]Soluții pentru problemele tale IT
Uneori Windowsul (din motive de Securitate) opreste microfonul pentru WebeX.
[mai mult...]
Daca vrem sa retragem un mail deja trimis, Outlook2016 ofera functia de recall message care opreste trimiterea mesajului.(Functioneaza doar pe mail-urile trimise intern ce nu au fost citite inca)
[mai mult...]Cum se ruleaza un program cu drepturi de administrator permanent pe un user standard
(local si in domeniu)
[mai mult...]
În actualizarea Windows 10 octombrie 2018, Edge a primit un impuls de performanță care îi permite să pre-lanseze procesele și să preîncărcați fișierele Start și New în timpul pornirii Windows. Dacă nu utilizați Edge, aceste optimizări sunt o pierdere a resursei și o încetinire a lansării. Cu o setare rapidă de regiștri sau setări pentru politica de grup, o puteți dezactiva.
[mai mult...]The Windows 10 October 2018 Update brought a lot of new features, including some to Microsoft Edge. One of those is a built-in dictionary available when you’re in Reading View, an eBook, or a PDF file.
[mai mult...]

Moving your old data to a new computer can be a bit of a headache, especially if you’re going from PC to Mac. Thankfully, there are several ways to go about it, so you can get your new Mac set up and ready to go.
There are various ways to transfer data from your old PC to your new Mac. You could drag your files to an external hard drive and manually transfer them over, set up a networking share between the two systems, or sync them up using a cloud storage account. There’s also the Windows Migration Assistant, a special tool Apple created expressly for this purpose. Both computers will need to be on the same network to use this tool, but past that there aren’t any other hard requirements.
Here’s how to use the Windows Migration Assistant to transfer your files.
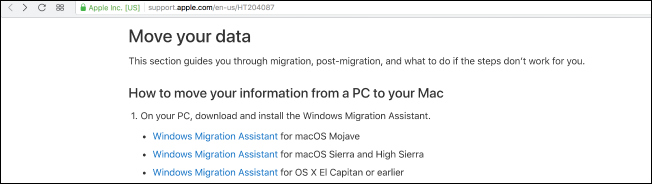
To start this process, begin on your Windows PC. Open up a browser of your choice. There’s an Apple page located on Apple’s official help database with links to the Windows Migration Assistant program for each of the various versions of macOS on your new Mac. You’ll install this application on your Windows machine.
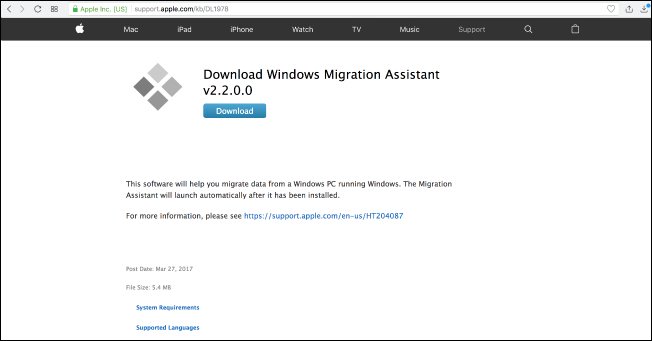
Choose the right download for the version of macOS on your new machine and click on the link to get to the download page. Once there, click the blue “Download” button.
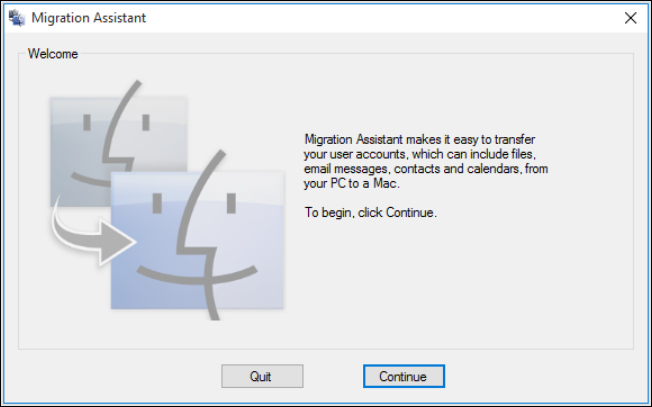
Once you have the Migration Assistant downloaded, make sure you’ve closed any open Windows apps, and then open Windows Migration Assistant by double-clicking it. In the Migration Assistant window, click “Continue” to get the process underway.
Leave your PC available on the next screen, where a code will appear shortly. We’ll come back to this, don’t worry.
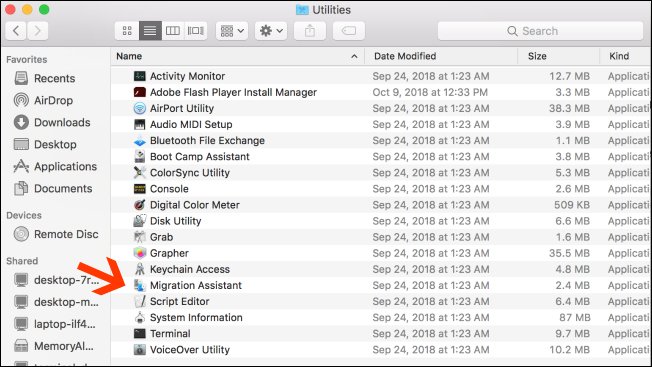
You’re done with your Windows machine for the moment, so turn on your Mac. Open the Mac Migration Assistant, found in the Utilities folder. It’s already pre-installed.
When you open up Migration Assistant on your Mac and click “Continue,” all apps on the Mac will close, so make sure you’re ready to proceed before doing so.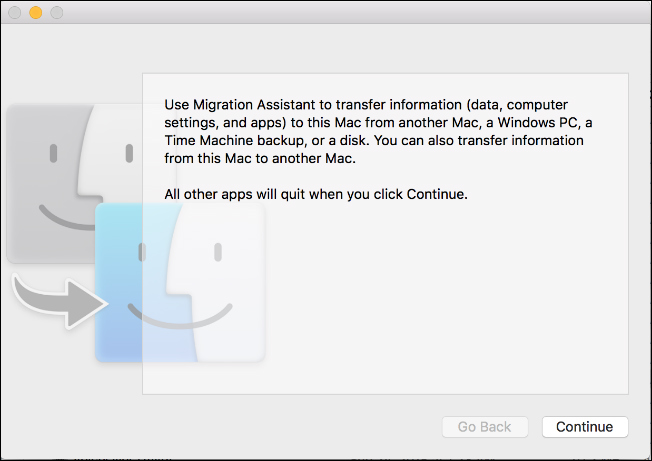
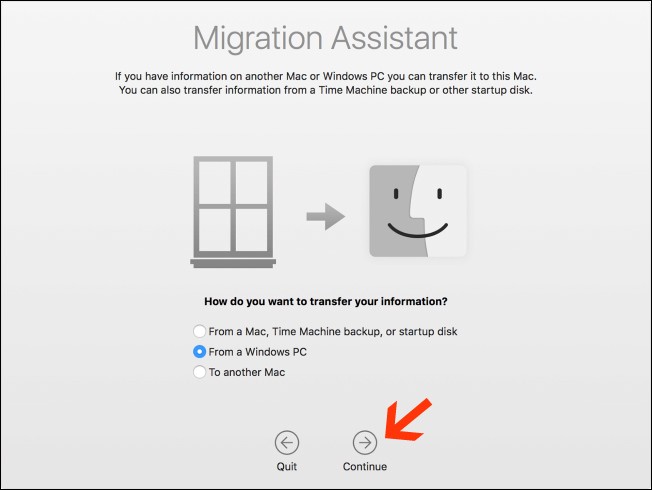
On the next screen, choose the option to transfer data “From a Windows PC.” Then click “Continue” via the arrow at the bottom of the screen.
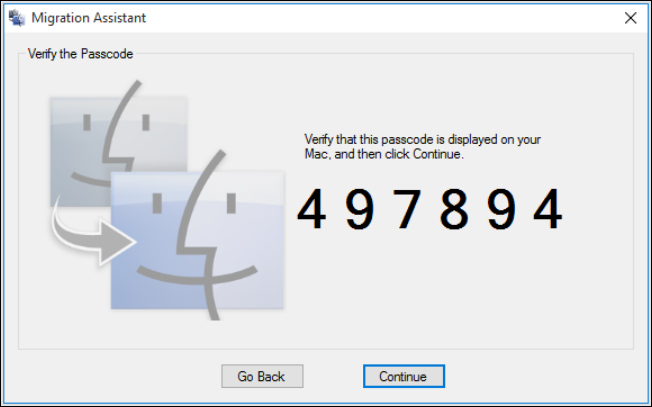
The next screen will show a passcode for the Mac where you’re migrating data. You will see your PC also showing the same code on its instance of the Migration Assistant. The screens will look identical while you have both machines running.
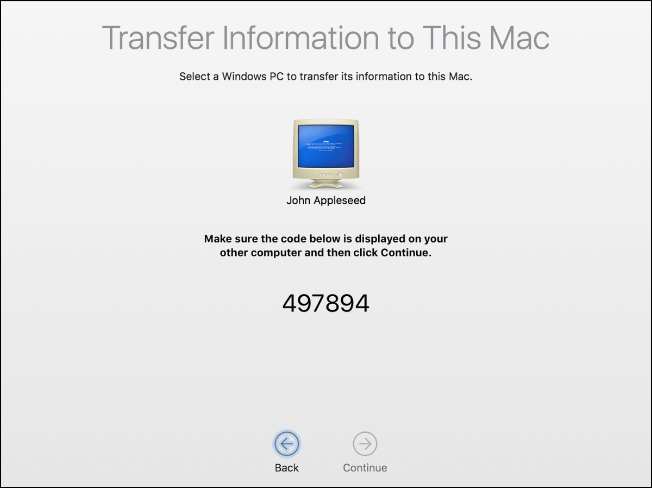
Make sure the two computers display the same code. Next, click “Continue” on your PC first and then do the same on your Mac.
You’ll be focusing on your Mac for the rest of the process.
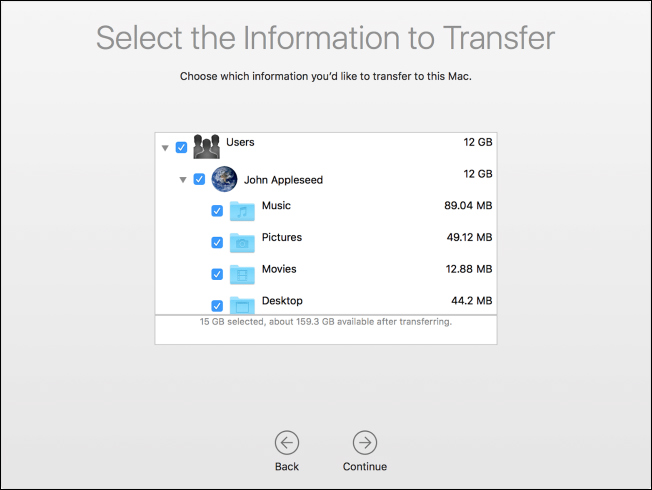
When you press “Continue,” the Migration Assistant on your Mac will scan for a list of files that you can migrate to your new computer. Once it finishes, it will show you all the files it found, separated by user. Select the data you want to move over and then click “Continue.”
After you do this, the process will begin, and you’ll be shown an ETA until it’s finished. The transfer can take a while to complete, depending on how much data you’re transferring, and the Assistant will notify you when it’s finished.
Congratulations! You’re now able to start using your fresh new Mac
[mai mult...]